The Best Fluffy Pancakes recipe you will fall in love with. Full of tips and tricks to help you make the best pancakes.


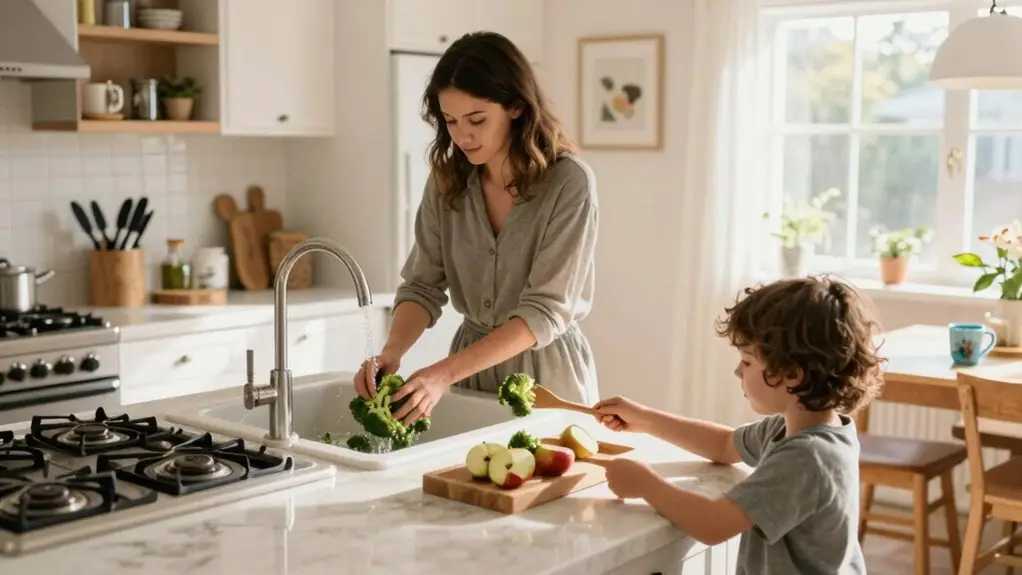
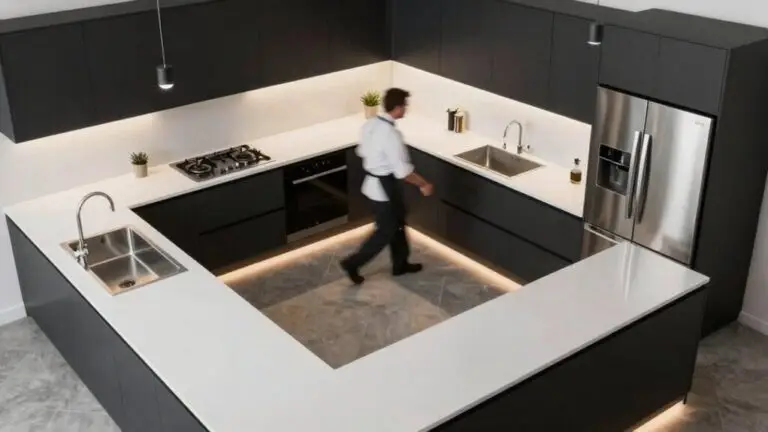
You’ll stop kitchen chaos by zoning your space into dedicated prep, cook, and clean areas. Keep traffic lanes 42–48 inches wide so no one squeezes behind a hot stovetop. Place your cooktop away from main paths. Let your island double as homework central and a safe supervision spot.
Choose quartz counters and induction burners for durability and safety. Organize kid-friendly snack drawers near the fridge for easy access. That’s the foundation—stick around for how to fine-tune every zone.
Why Zone-Based Layouts Stop Kitchen Chaos
If you’ve ever tried making dinner while your kid hunts for a snack and your partner loads the dishwasher, you know the kitchen can feel more like a demolition derby than a family workspace. The fix? Rethink your kitchen layout with smart work zones.
If you’ve ever made dinner while your kid hunts for a snack, you know the kitchen can feel like a demolition derby.
Don’t rely on that old single-cook triangle; instead, create zones that separate storage, prep, and cooking. For a busy family, this stops bottlenecking.
You’ll want at least 42-inch-wide traffic lanes so no one’s squeezing behind a cook.
Assign a home for everything—snack drawer near the fridge, knives in their safe spot. Suddenly, your crew moves in harmony instead of gridlock.
You’re not just cooking; you’re orchestrating a streamlined, sane workflow. A simple way to sustain that workflow is a daily 5-minute reset, returning every item to its designated zone before the next day begins.
How to Map Out Safe Cooking, Prep, and Cleaning Zones
Once you’ve accepted the idea of zones, it’s time to map them out for safety and seamless flow.
Forget the classic work triangle; you’ll want distinct areas with easy access between them.
Place your prep zone near the fridge, stocked with knives and boards so chopping feels effortless.
Your cooking zone should hug the cooktop, with pots and pans within arm’s reach.
The cleaning zone pairs the sink with the dishwasher and glassware storage.
Keep traffic lanes 42–48 inches wide, and never let circulation cut through the cooking zone.
Use a two-cook strategy: one person owns the range, and another handles washing.
Simplify burn risks by choosing induction; cooler surfaces mean fewer ouch moments.
Raise ovens to eye level, and make sure your dishwasher’s door doesn’t trap anyone.
Position your sink and stove in direct proximity so that heavy pot movement between the two stays minimal and safe.
With a little planning, your kitchen flows safely.
Design Kid-Safe Layouts That Keep Traffic Away From the Cooktop
You’ll want to position your cooktop away from the main traffic lane so little ones aren’t tempted to race past a hot stove.
By planning a wide, clear path at least 42 inches wide, you’re giving everyone room to move without squeezing behind you.
If you add an island with seating on the far end, you can keep an eye on them from a safe distance.
Leaving 3 to 4 feet of clearance around the island also means you can safely carry hot pans without worrying about bumping into family members passing through.
Safe Cooktop Placement
Since kids naturally gravitate toward the busiest part of the kitchen, you’ll want to position your cooktop off the main traffic lane, tucking it beside a dedicated primary cooking zone rather than right where everyone walks. For your family, safe cooktop placement starts with thoughtful planning.
Use an island or peninsula layout with seating on the far end, and stagger the sink position to avoid funneling little ones toward burners. Choose induction cooktops, which stay cool to the touch and eliminate open flames, a huge win for safety.
Also, maintain wide aisles of at least 42 inches, so appliance swings don’t force movement through your cooking zone. Test dishwasher clearances too; you don’t want kids trapped near hot surfaces during busy meal prep.
When planning your overall layout, keep the refrigerator, sink, and stove within a 13–26 foot perimeter to reduce unnecessary movement and prevent traffic paths from cutting through your primary cooking zone.
These smart adjustments keep the heart of your home both efficient and kid-friendly.
Traffic Flow Zones
Because kids naturally take the shortest route from point A to B, you’ll want to design clear traffic lanes that keep their little feet far from the cooktop.
Aim for main walkways at least 42 inches wide, so families can move between the living area and fridge without squeezing behind someone cooking.
Route your main traffic flow away from the stove, directing children’s traffic lanes toward seating or the pantry instead.
Place island seating at the far end, keeping kids away from the main prep area but still in sight.
This creates a family-friendly kitchen where you can cook without dodging little ones.
Test every door swing too: dishwasher, fridge, and cabinet doors shouldn’t block the path.
You’ll reduce collisions and make supervision easier, all while keeping your cooking zone clear and safe.
When planning an island, allow at least 36 inches of clearance on every side as a bare minimum, stretching to 48 inches on high-traffic sides when multiple family members are moving through the space simultaneously.
Island Supervision Strategies
Want to whip up dinner without playing bumper cars with your kids? Your island is your command center, but it shouldn’t be a race track. Use these strategies to design a kid-safe layout that keeps traffic away from the cooktop:
- Seat kids on the far end of the island, not near the cooktop side. This lets you supervise children while keeping them physically separated from the hot cooking zone. You can chat and cook without anyone reaching over flames.
- Stagger your sink placement away from behind the cooktop. This forces little ones to clear the prep-and-wash area before you need cooking attention. This improves safety and workflow checks.
- Go for an induction cooktop on the island when possible. The surface stays cooler to the touch than gas, so kids can safely “watch the chef” from their stools.
Route main family traffic lanes away from the cooktop with 42–48 inch pathways. This creates a truly functional kitchen where you cook safely while everyone feels included. When positioning your island, maintain at least 3.5 feet clearance around it to prevent forced detours that push kids closer to the cooking zone.
Use Your Island for Supervision, Homework, and Meals
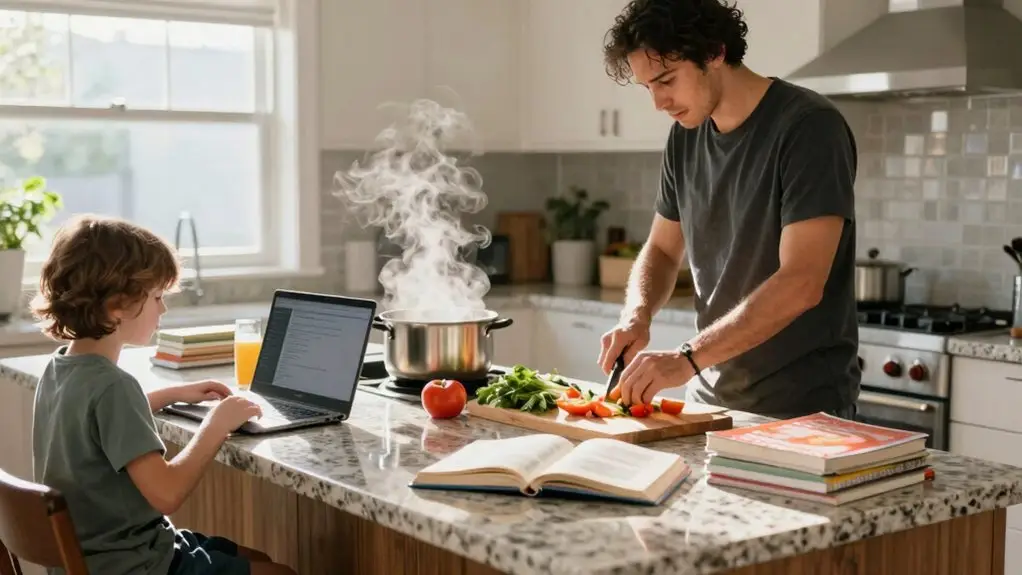
Your island can become the command center for family life, not merely a spot for chopping veggies. By putting the cooktop on one side and homework-friendly seating on the other, you’ll keep little eyes safe while they watch you cook or finish their math sheets.
That way, you’re in control of the heat hazards, yet everyone stays connected for meals, projects, or a quick after-school snack. Keeping the sink, stove, and refrigerator tight around the island perimeter ensures smooth circulation so family members can move freely without constant collisions.
Island Supervision Zone
Turning your island into a supervision zone is a smart way to keep an eye on the kids while you cook. Place seating at the far end so multiple people can watch safely from a distance. If you include a cooktop, choose an induction model: it stays cool to the touch, so kids can reach their snacks without getting burned.
Stagger the sink away from the cooktop so you can quickly check the prep area is clear before turning.
Add a breakfast bar on one side for quick meals, while the other side holds school supplies for homework. Build storage into the seating side for charging cables and kids’ dishes, keeping sharp tasks on the cooktop side. When positioning your cooktop and sink within the island, keep the island cut to the work triangle under twelve inches to avoid blocking efficient movement between cooking zones.
This design keeps everyone in view without crowding the cooking zone.
Homework-Ready Island
A homework-ready island does more than just look good, it transforms your kitchen into the busiest hub in the house. Busy families love how one surface handles meals, homework, and cooking without bottlenecks.
Seat kids at the far end of the island, away from the main prep zone, so you’ve got clear sightlines for supervision. Add a counter-height eating bar plus a lower drawer stocked with pencils, chargers, and supplies—everything’s within arm’s reach.
Position the island sink in a staggered layout, not behind the cooktop, so you can wash and monitor safely. The induction cooktop stays cool to the touch, letting kids watch cooking without risk.
Keeping each task in its own dedicated area—prep, cook, and clean—means fewer collisions and less chaos when the whole family is in the kitchen at once, which is exactly why dedicated kitchen work zones are worth planning around your island from the start.
Grab a free design consultation to optimize your island layout, it’s the smartest way to keep your kitchen running effectively from breakfast to bedtime.
Cooktop Watching Safety
- Place comfortable stools beyond the cooktop’s reach, creating a clear buffer zone so they can watch without crowding.
- Stagger the island sink behind you, not directly behind the cooktop, giving you an easy pivot to check clearance before turning back.
- Avoid sharp corners on island edges. Rounded ones mean fewer bumped heads mid-recipe.
A dedicated traffic lane of 42–48 inches lets you move without squeezing past little ones. It’s safe, smart, and keeps everyone together. For seating areas, plan for 44 inches of clearance so stools can slide out fully without blocking the path between the cooktop and the rest of the kitchen.
Organize Storage for Snack Time, Lunch Packing, and Kid Access
Since kids can’t read schematics or locate a maze of cabinets before breakfast, your first move is to carve out a snack zone they can actually reach: think a low pull-out drawer near the fridge where granola bars and fruit pouches live.
Since kids can’t read schematics before breakfast, create a low snack drawer they can actually reach.
You’ll stash lunch containers and supplies in the lower cabinets below your packing counter, so everything’s within arm’s reach for a quick pack-and-go routine.
Keep a single dedicated drawer or cabinet for kid-access dishes.
Cups, plates, and bowls at their height build independence and cut counter clutter.
Organize by category: snacks separate from cereals, using pull-out systems and vertical dividers to prevent duplicates.
This creates a seamless path from fridge to snack grab to lunch staging.
Need help setting up a kitchen that works for your family? Contact us for personalized solutions.
Choose Durable Materials for Handprints, Spills, and Daily Wear
- Go for quartz or non-porous stone countertops; they resist stains from spilled juice, handle hot pans, and wipe clean in seconds after sticky hands.
- PICK MATTE OR SATIN FINISHES FOR CABINETS AND SURFACES; THEY HIDE FINGERPRINTS BETTER THAN HIGH-GLOSS, SO YOUR KITCHEN STAYS LOOKING TIDY LONGER.
- Use fuss-free, wipeable backsplashes like glass or ceramic tile. Splatters from family cooking zones come off easily, keeping your well-designed family kitchen fresh.
These choices make your space easy to maintain.
You can focus on messing it up—and cleaning it up—without stress.
Select Safer, Faster Appliances for Family Meal Prep
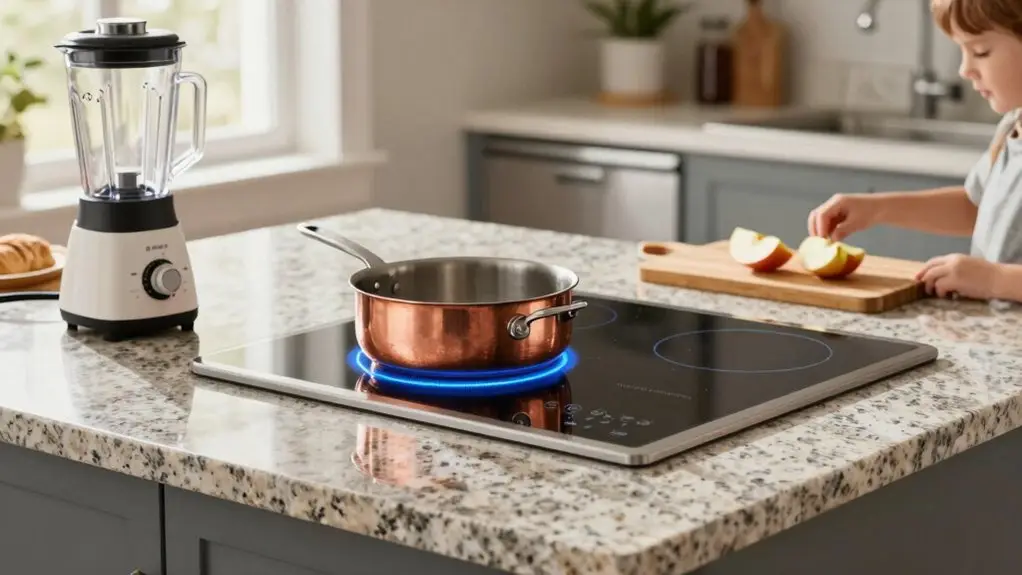
When you’ve got hungry kids, a tight schedule, and meal prep chaos, the right appliances can turn your kitchen into a real ally. Start with an induction cooktop—no open flame and a cooler surface mean fewer burn risks when little hands reach in.
Speed up dinner with rapid oven modes that cut cooking time, so you’re not waiting forever.
For cleanup, a quiet dishwasher lets you run it mid-evening without drowning out conversation, and its sanitizing cycle handles post-meal hygiene.
An instant hot system is a lifesaver for tea, pasta water, or rinsing sticky spoons fast.
These choices make meal prep safer, quicker, and way less chaotic. You’ll thank yourself at 6 PM.
Add Recycling and Compost Drawers That Make Sorting Easy for Kids
A smart recycling and compost drawer system near your sink makes sorting a no-brainer for the whole family. You’re transforming clean-up into a quick, kid-friendly game, not a chore.
These design choices truly make life easier by putting everything at small hands’ level.
These design choices make life easier by putting everything right at small hands’ level.
Color-coded, labeled bins with a strict “one lid = one item” rule ensure your child drops food scraps into the green compost bin without second-guessing.
Wide-opening drawers on effortless glides pop open easily, letting tiny fingers access recycling and compost without needing to dig into deep cabinets.
Built-in liners and easy-wipe surfaces**** handle drips from apple cores or yogurt containers, keeping spills quick to clean when compost gets added daily.
Pair these with a simple prompt card, like “food scraps, paper, cans,” and you’ll build sorting habits that stick.
Future-Proof Your Kitchen for Growing Kids and Guests
As kids grow and you start hosting more guests, your kitchen needs to work just as hard as it does today, without requiring a full remodel. Choose a layout with multiple work zones so everyone can prep, cook, and clean without colliding.
To future-proof, go with neutral, durable finishes like matte cabinets and quartz counters; they hide fingerprints and stains for years. Build guest-friendly capacity with enough seating at the island and a table that handles after-school friends, not only everyday meals.
For safety, place an induction cooktop, which is cooler to touch, and raise the oven to eye level. Teen-friendly zones let them ACTUALLY USE the fridge and microwave without help.
Add pull-out storage and easy-access bins near the cleaning zone so you make the most of EVERY BIT. These choices WORK BEAUTIFULLY as your household expands.
Final Thoughts
So, you’ve got the blueprint for a kitchen that won’t drive you crazy. Start with those zones, pick tough materials, and keep the snacks where little hands can grab them.
You’re not building a showroom; you’re building a room where life actually happens, spills and all. It’ll take some tweaking, but pretty soon, your kitchen will be the calmest spot in the house. Promise.