The Best Fluffy Pancakes recipe you will fall in love with. Full of tips and tricks to help you make the best pancakes.


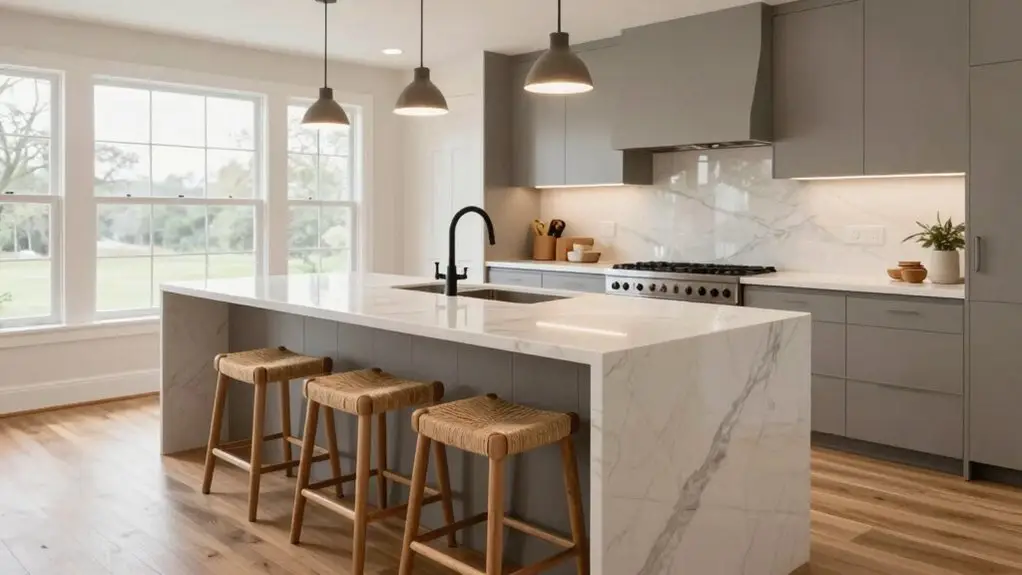
The “right” island size depends on your kitchen’s actual circulation, not a chart. You’ll need 36–42 inches of walking space around it, or 48 inches if two cooks share the space.
Plan for 18–24 inches of counter beside a sink. Remember that a 7-foot island fits a sink alone, while adding a cooktop stretches you toward 9 feet.
Check your slab stock early; those 10×5 foot limits can derail dreams fast. Sometimes two islands beat one cramped monster. Stick around, and you’ll dodge the expensive mistakes hiding in your layout.
Why the “Right” Island Size Depends on Your Room, Not a Rulebook
If you’ve ever found yourself squinting at a tiny island wedged into a sprawling kitchen—or worse, bumping hips with your partner every time you reach for the coffee maker—you already know that cookie-cutter sizing rules don’t cut it.
Your kitchen island dimensions shouldn’t come from a percentage of square footage or some designer’s “golden ratio.” Nope, you’ve got to look at your actual room.
You’ll need enough space around the island—think 36 to 42 inches minimum for comfortable walking, or 48 inches if you’re both juggling hot pans. Without this breathing room, even a “correctly” sized island becomes a traffic nightmare.
Before you commit, check your countertop material limits and major architectural lines too. An island that ignores your windows or fireplace just looks wrong, no matter what the math says. The same organizational thinking applies below the surface—under sink cabinet storage solutions can help you maximize every inch of space your island’s base cabinets have to offer.
How to Size Your Island Without Breaking the Work Triangle
You’ve got your breathing room figured out, but now comes the part where your island either makes cooking feel like a dance or a traffic jam.
Your Kitchen Island Size must respect the work triangle: that trusty connection between your sink, stove, and fridge. Here’s how you keep it intact:
- Center your island on the primary work triangle so it supports your prep-to-cook-to-chill flow.
- Keep space around the island at 36–42 inches minimum so nobody’s dodging doors.
- Allow 18–24 inches beside any island sink for workable counter space without stretching the triangle too far.
- Build a cardboard mockup at counter height to confirm your path feels natural before you commit.
If your floor beneath the island feels soft or uneven underfoot, check for soft spots near plumbing as these can signal subfloor damage that should be addressed before installation.
Get this right, and your kitchen works with you, not against you.
Clearance Widths That Keep Work Aisles Functional
You’ll want to get your aisle widths right, or you’ll be doing that awkward sideways shuffle every time you try to open the dishwasher while someone’s chopping vegetables.
There’s a sweet spot between “tight squeeze” and “room to breathe,” and it depends on how many people you’ve got crowding your kitchen.
Let’s break down the minimums that’ll keep you from bumping elbows, the ideal spacing for seamless traffic flow, and how to avoid turning your island into a bottleneck. If your island position feels off, it may help to shift the island center point based on how foot traffic and fixtures interact with the surrounding workspace.
Minimum Clearance Requirements
Because nothing ruins a kitchen flow like squeezing past a half-open dishwasher or doing the “excuse me, pardon me” dance with your partner during dinner prep, you’ll want to lock in your aisle widths before you even think about island size.
Minimum clearance requirements aren’t just building code boxes to check: they’re what keep your kitchen triangle from becoming a traffic nightmare.
Here’s what you need to nail down:
- Start with 36–42 inches of clearance on all sides so appliances and doors swing freely without bumping hips.
- Bump that to 48 inches if you’re a two-cook household dodging each other constantly.
- Make clearance your “controlling dimension,” not island size, or you’ll end up with a beautiful boat you can’t *make your way through*.
- Add 44 inches where stools live so legs and chairs don’t become human speed bumps.
Remember one outlet: cramped aisles kill function fast. If you’re lighting the island overhead or underneath, aim for 300–700 lumens per linear foot to keep task areas bright without introducing glare that makes tight spaces feel even more claustrophobic.
Ideal Spacing Standards
Thirty-six inches keeps things tight but usable, though you’ll really feel it when you’re juggling hot pans.
If you’ve got multiple cooks, stretch that space around island sizes to about 48 inches.
Nobody wants an elbow in their ribs mid-recipe.
Measure every side, too.
One cramped edge throws off the whole vibe.
If you’re adding seating, bump clearance toward 44 inches so stools slide out without kicking anyone behind them.
Good overhead lighting helps too, and 5000K daylight bulbs are especially effective above islands where food prep and detail work demand clear, accurate color.
Traffic Flow Considerations
Picture yourself trying to squeeze past a half-open oven door while someone’s chopping vegetables at the island. Yeah, that’s the chaos we’re trying to avoid. Smart traffic flow considerations keep your kitchen humming, not stumbling.
Here’s your clearance playbook for easy sailing around the island:
- Aim for 42 inches clearance as your sweet spot. Tight 36 inches works minimum, 48 inches wins when you’re cooking together.
- Check appliance swings so dishwasher doors don’t trap you mid-meal prep.
- Add extra inches for seating, bumping to roughly 44 inches so seated guests don’t block walkers.
- Measure every side because corners can ambush you with awkward detours.
Get this right, and you’ll glide between zones instead of doing the kitchen shuffle. Your future self carrying a hot pan will thank you. When finalizing your island design, don’t overlook the hardware — cabinet pulls with a 3-inch center-to-center spacing are among the most common and widely compatible options for island cabinetry.
What Fits on Your Island: Sink, Cooktop, or Both?

You’ll need to figure out what actually fits on your island before you get too attached to that Pinterest-perfect vision of cooking and chatting with friends.
Whether you’re dreaming of a simple prep sink, a sleek cooktop, or trying to squeeze in both, your island’s length and layout will make or break these plans pretty quickly.
Let’s break down exactly how much space you’ll need so you don’t end up with a cramped cooking station that makes you bump elbows every time you dice an onion. If you’re also planning a full bathroom overhaul at the same time, a bathroom renovation tile kit can help streamline the tiling process in that space while you focus your energy on the kitchen.
Sink Size Requirements
Whether you’re dreaming of a simple prep sink or a full-blown cleanup station, the size of your island sink will make or break your daily workflow. During your kitchen remodel, you’ll want to nail these details early.
Here’s what you need to know:
- Aim for 18-24 inches of counter space on at least one side of your island sink, ideally both. This way, you’re not juggling dishes like a circus act.
- Match your sink width to your countertop depth. Most island sinks run 9-18 inches wide, and you’ll need room for scrubbing without the splash zone invading your NEC outlet planning.
- Center or offset your placement depending on whether you want balanced access or a defined prep zone versus social space.
- Consider a bar sink for overflow prep only. This keeps heavy dish duty at the main sink. If you’re tiling around your island sink area, keep in mind that grout joint width for kitchen backsplashes is typically recommended between 1/8″ and 1/4″ for easier cleaning and a modern look.
Cooktop Space Needs
How do you decide between a sink, a cooktop, or both on your island? Start by mapping out your cooktop space needs first, since that will shape everything else.
Most island-ready cooktops fit standard counter layouts, but you’ll want workable prep area nearby. Nobody enjoys juggling hot pans with nowhere to set them down.
Island sizes matter more than you might think. A 7-foot island handles a sink pretty well, but squeeze in both sink and cooktop? You’re looking at roughly 9 feet minimum. Otherwise, you’ll feel like you’re cooking in a phone booth.
Don’t forget ventilation. That island cooktop needs an overhead hood, which affects placement.
Center or offset your cooktop based on traffic flow, so you’re not dodging kids or guests while flipping pancakes. Smart planning now saves headaches later. If you’re also thinking about overhead organization, garage ceiling storage systems can inspire smart vertical space solutions that translate well to kitchen planning.
Combined Layout Options
Once you’ve mapped out your cooktop needs, it’s time to play matchmaker with your island’s other potential jobs. Your kitchen layout really shines when you’ve got the right size island doing double duty.
Here’s how to nail the combo:
- Sink-only islands need about 7 feet of length, giving you 18-24 inches of prep space on one side of the island for easy cleanup flow.
- Cooktop islands demand serious venting and clearance planning, don’t wing it!
- Both together? Stretch to 9 feet, so you’re not bumping elbows mid-recipe.
- Center everything on your sink, cooktop, fridge lines, keeping your work triangle tight and happy.
For the backsplash behind your cooktop or sink, peel-and-stick backsplash tiles offer a grout-free, waterproof solution that installs without special tools and holds up to heat and moisture.
Get these dimensions dialed in. You’ll cook like a pro without the traffic jams.
When One Island Is Too Big: Planning for Two
Sometimes a single island grows so large it starts eating up your floor space, and that’s when you know you’ve crossed into “too much of a good thing” territory. If your clearance drops below 36–42 inches, don’t just squeeze the room further; split that beast into two islands instead.
Try pairing a permanent island with a mobile one, matching their heights so they read as one continuous surface. You’ll double your prep area and keep walkways open. However, stick key work zones on the main island so you’re not running laps between sink and stove.
When you double the size of your kitchen layout, remember: extra seating needs 44 inches of breathing room. And don’t forget NEC rules; GFCI outlets depend on total countertop area, not only your original island’s footprint.
Countertop Slab Sizes That Restrict Island Dimensions
Beyond just picking a pretty stone, you’ve got to wrestle with the slab itself. Most countertops slab sizes max out around 10 feet long by 5 feet wide. That reality can seriously cramp your style when you’re dreaming up your island.
You’ll need to factor in overhangs for seating and edges, which eat into your usable material fast. Here is how slab realities shape your design decisions:
- Measure your island against actual slab stock before you commit.
- Account for 10–12 inch overhangs when calculating coverage.
- Plan cutouts and seams with your fabricator early.
- Confirm exact dimensions and rotation plans before finalizing size.
Skip these steps, and you might watch your seamless vision vanish, along with your budget.
When to Hire a Spatial Designer to Validate Island Fit

While a tape measure and some graph paper can get you pretty far, there comes a point when you’re staring at your kitchen layout and wondering if that island is going to work or just turn your space into an obstacle course.
That’s when you call in a spatial designer.
That’s when you call in a spatial designer to turn measurements into a kitchen that actually works.
You’ll want expert eyes on your kitchen design when standard island sizes feel risky for your footprint, like squeezing something massive into a cozy 10’×13′ space.
They’ll make sure you hit that sweet spot of 36–42 inches circulation around the island and up to 48 inches if you’re a two-cook household.
Bring them in early to align your island with the work triangle, center it on doorways or windows, and nail seating clearances.
They’ll also handle the messy stuff, routing gas, plumbing, and hood vents, so you don’t end up with a beautiful island you can’t actually use.
Final Thoughts
Now you’ve got the tools to size your island like a pro, not a guessing amateur. Trust your room’s dimensions, not some magazine fantasy, and you’ll end up with a space that actually works for real life.
Don’t stress if you’re still unsure. That’s what spatial designers are for. Go ahead, start planning that island you’ve been dreaming about.