The Best Fluffy Pancakes recipe you will fall in love with. Full of tips and tricks to help you make the best pancakes.


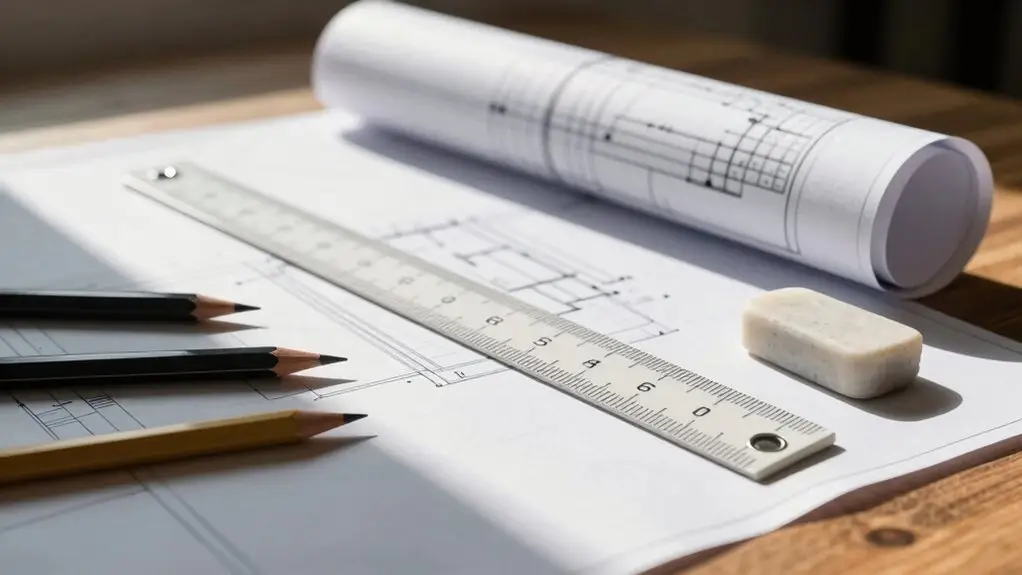
You’ll start by anchoring your sink, stove, and fridge into a practical work triangle that keeps your steps short. Then grab a tape measure and graph paper to capture wall lengths in millimeters, noting doors, windows, and pipe locations.
After mapping your prep, cook, and cleanup zones, you’ll match cabinet sizes to your layout and check appliance clearances. Sign off your plan and hand it to the CAD team. Stick around—there’s a full checklist waiting to lock everything down.
Set Sink, Stove, and Fridge for a Workable Layout
Since you’ll spend the most time bouncing between the sink, stove, and fridge, start by dropping the sink in first: it’s the anchor of your clean-up zone.
Pop your dishwasher within 600–900mm of it; that’s your kitchen layout’s workhorse, saving you from dripping across the floor with dirty plates.
Next, position your stove with a generous 600mm prep run beside the sink.
You’ll dice veggies right there before they hit the pan—no gymnastics required.
Finally, set your fridge within that same working loop, creating a practical triangle with short travel distances between grocery drop-offs, prep, and cooking.
Finally, set your fridge within that same working loop, creating a practical triangle with short travel distances.
In a tighter kitchen layout, just keep those main paths clear, avoiding door swings and appliance openings.
It’s about real-world flow, not theoretical perfection.
Aim to keep the total triangle perimeter between 13–26 feet across all three points, reducing exhausting back-and-forth without making the space feel cramped.
Measure Your Space Like a Pro in 15 Minutes
First, grab your graph paper, pencil, and tape measure because you’re going to capture those wall lengths in millimetres for a super accurate outline. You’ll also need to note the ceiling height and measure across both the front and back of the room, especially in older homes where walls aren’t square.
Then, mark every door and window with their positions, widths, and heights—measuring to the outside of the architrave. This way, your kitchen units won’t clash with the openings later. For even greater precision, consider using a laser measuring tool for tricky corners where a standard tape measure can be difficult to position accurately.
Wall Lengths
Before you pick up a single cabinet or appliance, you’ll need to know exactly how much wall space you’re working with—so grab your tape measure as your best friend here. For accurate kitchen layouts, measure every wall wall-to-wall in millimetres.
Record the full length along the outside of each wall, not only the inside.
If your home feels a bit “off,” measure across both the front and back of each wall to check for squareness.
Don’t forget structural breaks like alcoves, posts, or curved sections—sketch the widest dimensions and “box” that area.
Write each length on your sketch, like “Wall A = 3,240mm,” so you keep context for doors and windows.
Keep ceiling height noted alongside wall lengths too—it’ll help cabinetry fit right from the start.
Also mark the locations of stationary plumbing spots, radiators, and flue positions during this stage so fixed features are accounted for before any layout decisions are made.
Ceiling Height
When you’ve got those wall lengths down on paper, it’s time to look up—literally. Grab your tape and measure the ceiling height from your kitchen floor to the highest point on each wall, noting any dropped sections, beams, or soffits. Record everything in millimetres so your cabinets and tall units fit perfectly.
If the room isn’t uniform, take two extra checks at opposite ends or near the run, then jot down the exact numbers in your plan notes. Include these heights on your draft alongside the kitchen floor layout, as wall-mounted cabinets and vent clearances depend on it.
For a quick 15-minute workflow, measure every ceiling you can see from the layout area. Re-check any tricky spots once and move on. Easy. While you’re planning vertical space, keep in mind that pendant fixture diameter above narrow counters should fall in the 6–9 inch range to maintain proper clearance and proportion.
Door & Windows
While you’re still standing in the middle of your kitchen with tape in hand, don’t forget to scope out the doors and windows. They’re the gatekeepers of your layout.
For your kitchen, door and window positions dictate where cabinets and appliances can go. So measure each opening’s width from the nearest corner’s fixed reference point, recording both to the outside of the architrave for accuracy.
Note door swing clearance in millimetres, where the door edge lands at full open, so it won’t overlap nearby appliances or cabinets in your kitchen door and window plan. Record window sizes including sill height and overall height.
If it projects, like a bay window, capture that too for correct cabinet placement.
Take variation checks in older rooms by measuring the same position across the room’s front and back to confirm walls are square before finalizing your layout.
Door and window placement also affects where your refrigerator, sink, and stove can be positioned, since traffic paths through doorways should not cut through the kitchen work triangle.
Measure twice, and you’ll avoid costly surprises later.
Draw the Room Outline: Walls, Windows, and Doors
Since you’re starting with an empty sheet and a vision, sketching the room outline from a bird’s-eye view gives you total control from the get-go.
First, measure every wall-to-wall length in millimetres and label them clearly—don’t skip this step, trust me.
Then, mark doors and windows with their exact positions and widths/heights, measured to the outside of the architrave for accuracy. Include the frame for accuracy.
You’ll also note the ceiling height on your outline; that way, later you can plan appliance and cabinet clearances without surprises.
Place each opening on the correct wall at the correct distance from a chosen reference point.
Keep notes off the drawing to avoid clutter.
For older or irregular rooms, take measurements across both the front and back of the space to confirm wall-to-wall variations before finalizing.
This keeps your space true to life.
Note the location of any fixed features like columns or beams, as well as where pipes and wires run behind walls, so cabinet placement decisions are informed before delivery day arrives.
Handle Tricky Walls, Doors, and Pipes Early
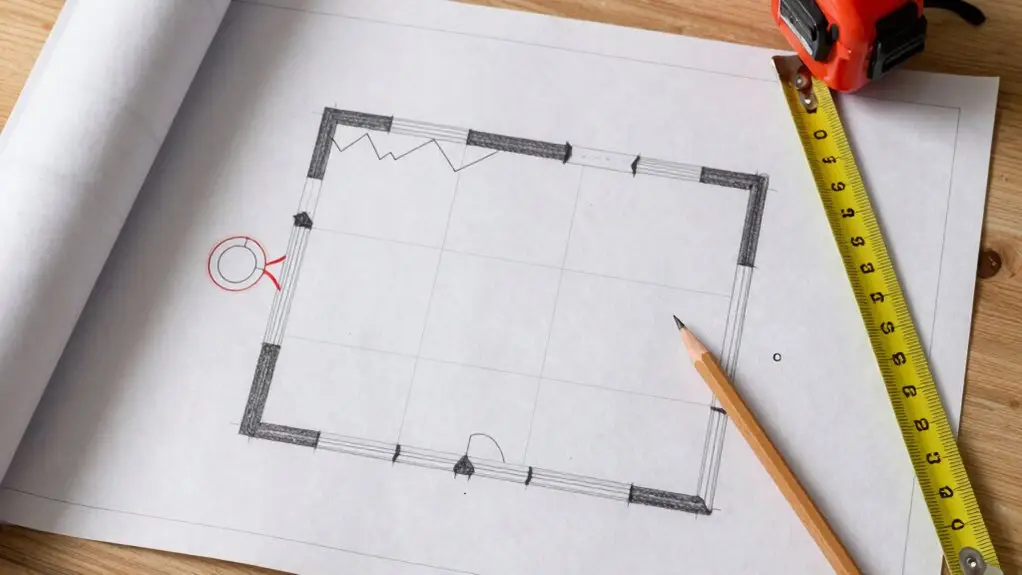
Before you get too comfortable with your nice straight walls and perfect right angles, it’s time to tackle the tricky stuff: those awkward walls, oddly placed doors, and hidden pipes that can throw a wrench in your plans if you ignore them. You’ll want to get these quirks onto your floor plan early, so nothing surprises you later.
Before you get too comfortable, tackle the tricky stuff—awkward walls, odd doors, and hidden pipes—early.
Measure every door and window to the outside of the architrave, not the inside edge. This prevents cabinets from smashing into reveals when your floor plan is laid out.
Sketch curved walls or bump-outs as boxed dimensions, noting widest points. It saves your designer headaches and keeps clearances accurate.
Mark pipe locations—water inlets, waste, boiler/flue positions—directly on your plan before deciding where your sink or dishwasher lives. A hidden pipe can ruin a perfect layout.
Snap photos of each tricky area alongside your measurements. Trust me, your future self will thank you when CAD questions pop up. Rerouting pipes after base cabinets are installed can quickly become a costly nightmare, especially once stone countertops are bonded in place and access is severely limited.
Map Your Prep, Cook, and Cleanup Zones
Now that you’ve squared away the tricky structural stuff, it’s time to map your prep, cook, and cleanup zones: you guessed it—cleanup zones.
Start with your Prep Zone: give yourself at least 36 inches of clear countertop right next to the sink. That’s where you’ll chop, season, and mix.
Keep it close to your Cooking Zone around the rangetop, so you’re not hauling ingredients across the room mid-task. It’s the key to an efficient kitchen.
For cleanup, center your Cleanup Zone on the sink and dishwasher. Place the dishwasher within about 36 inches of the sink to shorten the plate-and-utensil shuffle.
Finally, add a Putting Away path near the fridge for grocery storage, so you never cross back over prep or cook areas while unloading. You’ll feel the flow instantly. Positioning your refrigerator, sink, and stove so the total triangle perimeter falls between 13 and 26 feet keeps every zone within reach without forcing you to trek across the kitchen.
Use the Kitchen Triangle to Check Work Triangle to Check Workflow
You’ll define three key zones—prep, cooking, and cleanup—and then use the kitchen triangle to check if they flow together seamlessly.
Basically, you want your sink, cooktop, and fridge arranged so you’re not zigzagging across the room every time you chop a carrot or wash a dish.
Keep those travel paths short, and you’ll save yourself a ton of wasted steps and frustration.
Aim to keep each leg of the triangle between four and nine feet to hit the sweet spot that balances easy reach without unnecessary walking.
Define the Zones
Once you’ve mapped the basic kitchen triangle, you get to define the zones that make the triangle work for you. Don’t just want the sink, cooktop, and fridge close together; you want them connected by purposeful space. When you design your dream kitchen the right way, you create zones that turn raw movement into a smart workflow.
Consider these three:
- Prep Zone: Place about 36 inches of clear counter near the sink. That’s your staging area for chopping and mixing, so you don’t juggle ingredients across a cluttered space.
- Cooking Zone: Off the immediate leg, carve a Cooking Zone around the range. Keep utensils and spices within arm’s reach, so you aren’t hunting mid-sauce.
- Wrap it up with a Cleanup Zone that parks the dishwasher within 36 inches of the sink. That keeps dirty plates moving fast-tracked away, not wandering through your path.
Now, test your zones with a quick meal run. Move fridge → prep → prep → cooktop → sink, and adjust to keep bottlenecks out of your groove. Once your zones feel right, store rarely used items in the hardest-to-reach spots — high shelves or the back of deep cabinets — so prime areas stay reserved for what you reach for every day.
Movement Efficiency Check
Before you finalize your layout, run a quick movement efficiency check using the classic kitchen triangle.
Define your “working triangle” by placing the sink, dishwasher, and rangetop within close reach.
Cross-check their distances so you move without backtracking in your kitchen space.
Avoid layouts where the triangle forces long walks between the fridge, sink, and cook zone; that’s a recipe for frustration, not dinner.
Keep as much open countertop space inside the triangle as possible.
That gives you a clear prep-to-cook path without bottlenecks near doors or appliance pulls.
For an efficient match, aim for a compact triangle while respecting clearances for oven and dishwasher doors.
You don’t want workflow blocked when they swing open.
Finally, re-check your triangle against your four workflow zones: prepping, cooking, clean-up, and putting away.
Each zone should sit right next to the next step, making movement feel natural, not like a workout.
Match Cabinet Sizing the Kitchen Work Triangle and Zones
Since your sink, dishwasher, range, and fridge form the heart of the kitchen’s workflow, it’s smart to size your cabinets so these key players still create an efficient-working triangle. You’re not just placing boxes; you’re shaping your kitchen design into a smooth, logical flow.
Define work zones by cabinet placement: The prep area needs a clear counter run near the sink (aim for at least 36 inches). Meanwhile, cooking zone cabinets hold pots and spices within arm’s reach of the range—no extra steps.
Put-away zone makes life easier: Position tall pantry cabinets right next to the fridge so leftovers and groceries go straight in, not across the whole triangle.
Balance standard cabinet widths with clearance: Use common 600mm modules, but leave at least 42 inches around an island so your zone movement stays effortless. You’ll thank yourself later.
Position Smart Appliances for WiFi and Exhaust Clearance
You’ll want to put your smart fridge and oven where they can easily chat with your router, so avoid tucking them behind thick cabinets or foil-backed insulation.
Also, don’t forget to measure the gap between your cooktop and hood. Following the manufacturer’s specs keeps your exhaust working right and stops smoke-free from ductwork drama.
Finally, check that your WiFi signal reaches those spots like the microwave or dishwasher before locking in cabinet layouts. A quick router placement check now saves you from frustrating dead zones later.
WiFi Router Placement Zones
- Place the router at a height where it “sees” your smart appliances, not hidden inside a cabinet.
- Keep it at least a meter away from any ducting or hot surfaces, even if that slightly reduces signal strength.
- Add a mesh node if your kitchen has an island or L-shaped corners to prevent signal loss to the stove sensors.
Exhaust Clearance Requirements
Start your kitchen layout by picking where the cooktop or range will go, then map out the exhaust clearance from the cooking surface upward. This way, the flue or ducting has a straight, safe path outside without any tight bends.
Those exhaust clearance requirements aren’t just suggestions; they’re essential for avoiding smoke recirculation and meeting modern ventilation standards.
If your cooktop is integrated or has active ventilation, you must keep the manufacturer’s minimum clearances around the hood or duct collar. Seriously, ignore these, and you’ll end up with a smoky kitchen and inefficient operation.
Also, check where the duct route passes through ceilings and walls. Keep it far from electrical runs and any water or waste pipes on your plan.
Sketching your sink, hob, and hood together with the exhaust pathway helps you nail both WiFi placement and clearance before you finalize cabinets.
Smart Appliance Connectivity Needs
- Place your fridge or dishwasher where Wi-Fi reaches the installation height, with an outlet close by and cables tucked away from drawers or cabinet openings.
- For ducted range hoods, measure the exhaust route from the appliance outlet to the wall or ceiling, avoiding extra bends that choke airflow.
- Mark power points for your smart devices—behind the fridge, near the cook zone—and keep electrical switches a safe distance from heat sources.
This way, you won’t need to redo the whole layout later.
Plan this now, and your kitchen will stay connected and clear-headed.
Access the Full Kitchen Planning Checklist
Before you even think about picking out cabinets or countertops, you’ll want to grab the Kitchen Floor Plan Checklist. It’s your blueprint for accuracy. This tool makes sure you measure your current kitchen’s wall lengths in millimetres, ceiling height, and exact door and window positions. Mark those openings with dimensions to the outside of the architrave, and record widths plus heights so the CAD team nails the placement.
> Grab the Kitchen Floor Plan Checklist before you even choose cabinets or countertops.
Don’t forget water inlet and waste pipe locations, plus the boiler’s width, height, and flue details. Snap photos of each wall, the boiler, under-sink area, and any tricky corners. Those images serve as your supporting evidence.
Before design begins, you’ll review everything with the CAD team. If something looks off, they’ll ask you to double-check.
Trust us, catching hiccups now saves headaches later.
Finalize Your Kitchen Floor Plan Workflow
Once you’ve got your measurements and checklist handy, it’s time to lock down your kitchen floor plan workflow. This step is all about precision and confidence.
You’ll confirm every detail so your vision feels fully open and workable, not cramped or chaotic.
Recheck all wall-to-wall lengths in millimetres, measuring both front and back. Older walls can be slightly out of square, creeping up on you later.
Pinpoint permanent spots for doors and windows (width and height to outside the architrave), water and waste pipes, and your boiler with flue position—no guesswork allowed.
Ensure your sink, dishwasher, cooktop, and fridge form a practical “kitchen triangle.” Retaining at least 36 inches of counter space around the prep zone is essential for smooth flow.
Finally, run your kitchen floor plan checklist, sign off, and hand it to the CAD team. That extra certainty turns your sketch into a solid blueprint without back and forth hassle.
Final Thoughts
So, you’ve got your kitchen floor plan workflow down. By measuring like a pro and handling those tricky pipes and wonky walls early, you’ve sidestepped a world of frustration. Now, your sink, stove, and fridge are singing together in a workable triangle, and your zones actually make sense.
Don’t forget that WiFi and exhaust clearance for your smart appliances. Your future self will thank you when the kitchen runs as efficiently as you planned. You’re ready to create a space that just feels right.