The Best Fluffy Pancakes recipe you will fall in love with. Full of tips and tricks to help you make the best pancakes.



You’ll want an open floor plan so you’re never stuck in the kitchen alone. U-shaped layouts keep you in the conversation, while L-shaped ones let guests drift without dodging the stove. Add a social island for prep and seating.
Galley layouts tighten your work triangle for efficient party prep. Zone your space into prep, cooking, and mingling areas. Layer lighting with dimmers to shift from bright prep to cozy mood.
Upgrade appliances for speed, and tuck a coffee bar near seating. Stick around—there’s plenty more to make hosting effortless.
Start With an Open Floor Plan for Guest-Friendly Entertaining
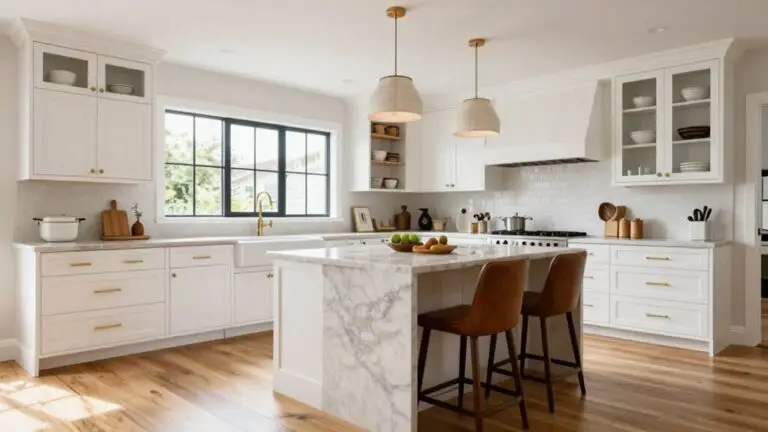
An open-concept kitchen is a party’s best friend. It keeps you in the thick of conversation while you’re chopping veggies or pouring drinks. You’ll love how clear sightlines let you chat with guests in the living area without missing a beat.
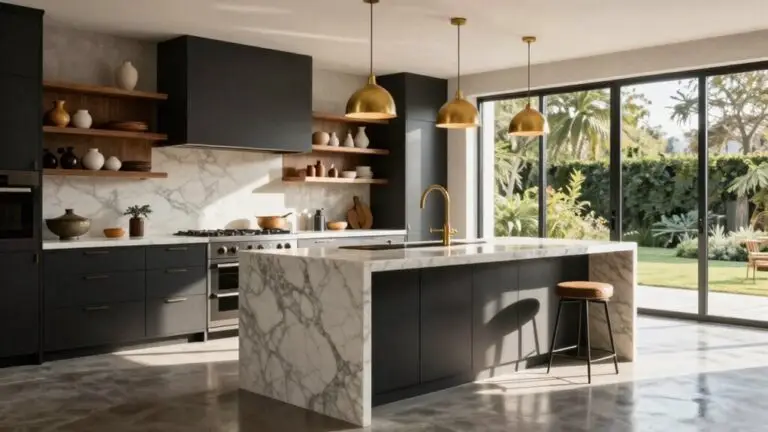
Pair that open concept with a large island, and you’ve got a natural gathering spot. Friends can perch there with a glass of wine, and you can still move around easily. There’s no blocking circulation, which means you’ll avoid those awkward bottlenecks when everyone’s grabbing appetizers.
Thoughtful appliance placement helps too. Keep your blender or coffee station hidden yet handy. Plus, layered lighting balances cooking tasks with a warm, social glow. It’s all about making your kitchen feel welcoming while you work your magic. A well-placed island also keeps guests away from the stove, so hosting and storage benefits like clever pullouts for everything stay within reach without disrupting your cooking path.
The U-Shaped Layout for Entertaining Keeps the Cook in the Conversation
With a U-shaped kitchen, you’re literally wrapped in counter space on three sides, which means you can chop, stir, and season without ever turning your back on the party. This entertaining kitchen keeps you smack in the middle of the action, so you’re never missing a story while you work.
With a U-shaped kitchen, you’re wrapped in counter space and never miss a moment of the party.
An open island? You won’t need one here. The U-shape naturally corrals guests toward the cook, creating a cozy spot for chat without bottlenecks. You’ll stage a “hot landing” near the range for dishes, letting sides pile up without clutter.
Add double ovens or a warming drawer, and you’re multitasking like a pro. Your cooking zones flow right into each other, saving steps and keeping everyone fed. Positioning your sink, fridge, and cooktop across the three walls keeps the kitchen work triangle tight, so you’re never taking unnecessary steps between tasks.
Honestly, it’s the perfect layout for a cook who loves to host without missing a beat.
An L-Shaped Layout Creates Natural Traffic Flow for Entertaining
If the U-shaped kitchen pulls everyone into the action, the L-shaped layout gives you a more relaxed way to keep things moving. You’ll love how this kitchen layout creates an easy flow without trapping guests in a tight work triangle.
By placing cabinets along two perpendicular walls, you naturally separate your prep zone from the main serving lane. Your guests can drift between the kitchen and dining room without dodging your elbow at the stove.
Plan heat-safe counters near the oven as staging landings for hot dishes, and keep that open walkway clear for carrying plates. Even in smaller footprints, deep drawers slide out easily, letting you grab platters without crossing traffic.
This layout keeps you efficient and your guests comfortable—no one’s interrupting your flow. For the best prep and cook flow, position the fridge at one end, the range at the other, and the sink between them to keep your work triangle tight and steps minimal.
Add a Social Island for Prep, Serving, and Party Seating

While a U-shaped or L-shaped layout gets the flow started, adding a social island takes your kitchen from functional to party-ready.
While a U-shaped or L-shaped layout gets the flow started, adding a social island takes your kitchen from functional to party-ready.
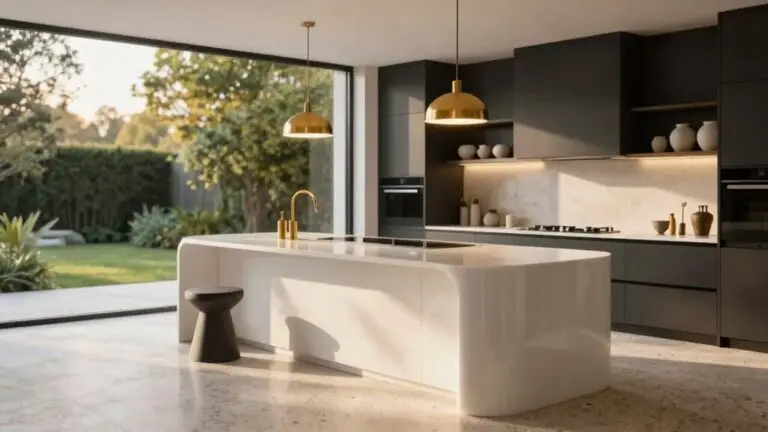
An oversized open island gives you dedicated prep space for party trays while offering seating for guests to linger without blocking your work.
You’ll love the “landing strip” workflow: short counter near the fridge for full hands, plus a heat-safe spot near the range for hot dishes.
Smart kitchen design includes deep drawers for pots and vertical dividers for sheet pans, keeping supplies accessible without crossing guest traffic.
Don’t forget built-in outlets for small appliances, and space your stools so they don’t block the main aisle.
Plan for at least 44 inches of clearance around seating areas so guests can slide stools in and out without blocking the main traffic path.
This island becomes the heart of your party, blending prep, serving, and conversation effortlessly.
Use a Galley Layout for Efficient Party Prep
A social island might steal the spotlight, but a galley layout is your secret weapon for serious party prep. In this galley kitchen, you create a dedicated prep zone between two parallel walls, making your work flow like a well-operated machine. You’ll keep your refrigerator, prep space, and cooktop in a tight work triangle, slashing those back-and-forth trips.
Add vertical dividers and full-extension drawers to your prep zone, so sheet pans stay organized without cluttering the walkway. Place a heat-safe landing strip near the cooktop for hot trays, keeping the path clear.
Tuck your sink and dishwasher close to the cooking area, so cleanup runs smoothly without forcing guests to zigzag through your space. Keep dish storage near the dishwasher so counters don’t become dumping grounds during busy entertaining moments.
It’s efficient, focused, and perfect for serious entertaining.
Maximize Small or Awkward Spaces With a Peninsula Layout
For smaller or awkward kitchens, a peninsula layout is your crucial shortcut to both extra counter space and a welcoming social hub. It extends from a wall, giving you a generous prep and plating area while keeping the room more open than an island. Plus, you can add extra seating with casual bar stools, letting guests hang out without squeezing through tight aisles.
PLACE YOUR PREP ZONE RIGHT ALONG THE PENINSULA. THAT WAY, YOU’VE GOT QUICK ACCESS TO REFRIGERATION AND CABINETS FOR WHIPPING UP SNACKS AND FOR GRABBING PLATES. It reduces those annoying back-and-forth trips as you move dishes to the dining area.
A peninsula typically includes a 12-inch overhang for stools, giving guests a comfortable perch without pulling them into your active cooking zone.
And don’t forget storage: deep drawers for cookware and vertical dividers for sheet pans keep party essentials close but your countertop clutter-free.
Zone Your Kitchen for Prep, Cooking, and Guest Mingling

Think of your kitchen as a busy restaurant, and you’re the head chef orchestrating the show. You’ll want clear prep and cooking zones so you aren’t dodging guests while grabbing ingredients.
Plus, a smart serving station placement keeps the party flowing.
By managing guest traffic flow with an open layout, you can stay focused on the food without blocking the fun.
Your island or counter becomes the perfect mingling hub.
Keeping at least 3.5 feet of clearance around your island ensures guests can gather without forcing you into an awkward detour mid-recipe.
Prep & Cooking Zones
When you’re hosting, your kitchen becomes a stage, so zoning it well keeps the show running seamlessly.
Start with your prep zone, placing it near your fridge and cabinets for fast ingredient access. That way, guests aren’t dodging your chopping board.
Don’t skimp on task lighting here—bright, focused lights make slicing onions feel less like a weepy ordeal and more like a pro move.
Keep your cooking zone right next door, with your cooktop, wall ovens, and warming drawers close by. That means hot dishes travel a short, safe path, staying at perfect temp.
Add a landing spot near the range for hot trays, and stash mitts in a shallow drawer.
To keep your workflow tight, aim for 36 to 48 inches of uninterrupted prep space between your fridge and cooktop so ingredients move cleanly from grab to cook without backtracking.
A well-lit, connected prep-to-cook flow turns your kitchen into a hospitality powerhouse.
Guest Traffic Flow
Smart prep and cooking zones get your kitchen humming, but now cooking on all burners, the real party trick is keeping guests out of your way. Manage guest traffic flow by zoning so they grab drinks and snacks without crossing your prep path. Keep that serving lane open to avoid bottlenecks.
Place a short “hands-free” landing strip by the fridge for them to stage plates while you keep ingredients reachable. Add a second heat-safe area near the range for hot trays, so they don’t interrupt your circulation route.
Separate the sink from prep zones to reduce backtracking. According to NKBA planning guidelines, traffic paths should never cut through the refrigerator, sink, and stove triangle, so positioning guest flow around rather than through this zone protects both safety and efficiency. This clever layout won’t just improve guest traffic flow; it’ll make a kitchen feel spacious and social, turning chaos into easy conversation.
Serving Station Placement
Because you’ve already got a great traffic flow plan, it’s time to zone your kitchen for actual serving.
For serving station placement in casual gatherings, set up a “cold storage + drinks” landing near the fridge. Just make it away from the sink and prep aisle so guests don’t block your ingredient path during peak cooking.
Next, guarantee a clear serving lane from the cook zone to the dining area. This lets hot dishes move without bottlenecks when traffic picks up.
Add a second heat-safe landing beside the range or wall ovens for mitts and trivets, so you’re not carrying hot trays across the kitchen.
Define three zones—prep, cooking, and cleaning—placing them adjacently to minimize movement.
Finally, stock shallow drawers under each landing with guest-ready tools like foil and oven mitts. That way, your serving station stays fast and tidy, keeping the party flow seamless. For pantry items you’re pulling out to serve, organize your landing shelves using category-based pantry zones so condiments, snacks, and dry goods stay grouped and easy to grab mid-party.
Layer Task and Ambient Lighting to Warm Up Your Kitchen
You’ll want to layer your lighting with ambient, task, and accent fixtures to make the kitchen feel warm and functional for both cooking and chatting.
Adding dimmer switches gives you control, so you can brighten things up for chopping ingredients, then soften the mood when it’s time for dessert and drinks.
This mix of layers and controls transforms your kitchen from a workspace into a welcoming social hub.
Layered Lighting Layers
While layered lighting sounds like a fancy design term, it’s really just a smart way to make your kitchen both functional for cooking and cozy for chatting. By layering task and ambient light, you’ll create a welcoming space that works for everything from chopping veggies to hosting cocktails.
- Start with ambient light – recessed or flush-mount ceiling fixtures give your kitchen a bright, even glow so nobody trips over a stool while grabbing a snack.
- Add task light directly under cabinets. This banishes shadows on your countertops, so guests can watch you plate appetizers or mix drinks without squinting.
- Include accent lights. A spotlight on your backsplash or a low-glare toe-kick strip adds warmth and highlights your kitchen’s best features without blinding anyone.
With layered lighting, your kitchen feels open for action, yet intimate enough for late-night conversations.
Dimmer Switch Control
With a simple flick of a dimmer switch, you can turn your kitchen from a bright prep zone into a cozy hangout spot. That’s the magic of dimmer switch control: you’re not stuck with one level of light.
Dim your ambient ceiling fixtures to soften the room during casual gatherings, while keeping your under-cabinet task lights bright for plating snacks.
No more harsh shadows, just a warm glow that makes everyone feel at home.
Set up separate control zones so you can cook with full task lighting while ambient lights stay low for conversation.
It’s like having a dimmer for your mood, without moving a single cabinet.
Just remember to grab dimmable bulbs and compatible fixtures, and you’ll nail that laid-back entertaining vibe every time.
Upgrade Your Appliances to Support Effortless Entertaining
Because your kitchen is the heart of every gathering, upgrading your appliances can turn chaos into calm. You’ll breeze through prep with smart, high-capacity tools that take care of the heavy lifting.
- Boost cooling and drink storage. A built-in side-by-side fridge offers flexible bins and an Under-Shelf Prep Zone for chilling desserts. Add a wine fridge nearby; your guests can grab bottles without crowding the main fridge.
- Expand cooking capacity. Double wall ovens or a 48″ Smart Commercial-Style Gas Range with griddle let you roast, bake, and sear simultaneously. Even-Heat True Convection ensures everything cooks evenly, so you’re not juggling hotspots.
- Streamline cleanup and serving. A 44 dBA dishwasher with a third rack and LED lighting hides dirty dishes fast. A warming drawer keeps sides ready—no last-minute reheating.
Trust the KitchenAid App to preheat or proof with one tap.
Add a Coffee Bar and Comfort Features for a Cozy Hosting
Start by carving out a coffee bar nook near your seating. Guests can grab their own espresso without stepping into your prep zone.
Then, add cushioned stools or a window seat to invite them to linger over conversation rather than sipping and standing.
Soften the space with a rug and a plant or two. This will turn hard kitchen surfaces into a warm, welcoming hangout spot.
Coffee Bar Placement
When you place your coffee bar, think about workflow: you don’t want guests bumping into you while you’re pulling shots or steaming milk.
Position it near the cooktop but on a separate counter, so it’s easy to refill water without crossing the main prep path.
Avoid blocking the fridge or sink, and keep it close to seating where guests naturally gather.
- KEEP IT NEAR THE COOKTOP for quick access to hot water for tea or instant coffee, but don’t cram it next to sizzling pans. Give it its own zone.
- MOUNT TASK LIGHTING like under-cabinet strips to eliminate shadows while you batch drinks. Then layer dimmable ambient lighting for that cozy evening vibe.
- USE APPLIANCE GARAGES WITH POWER to hide bulky tools like your grinder or espresso machine. This keeps the surface clutter-free and ready for action.
This setup keeps you in the conversation while you brew.
Comfort Seating Additions
After you’ve carved out a spot for your coffee station, it’s time to bring in the comfort: think cushioned stools, a window-seat nook, or a pair of cozy chairs that invite guests to settle in.
You’ll want comfort seating around the island so friends can sip lattes while you finish plating dinner.
Those plush stools encourage longer stays, turning your kitchen into the heart of the party.
Position them just right, and you’ve created a natural gathering spot for lingering conversations.
Drape a soft throw over a nearby chair, and you’re set.
THIS ISN’T ABOUT SEATING; IT’S ABOUT MAKING PEOPLE FEEL THEY BELONG, NOT MERELY WAITING.
Now your coffee bar feels complete, with each stool a small invitation to relax and stay awhile.
Warm Atmosphere Essentials
While you’re setting up that coffee bar, think of it as more than just a spot for caffeine; it’s your secret weapon for keeping guests happy without crowding your cooking zone. Stock it with a burr grinder, espresso machine, milk frother, and kettle so folks can whip up café-style drinks themselves.
Now, layer in the warmth where PEOPLE GATHER naturally. Here’s how:
- Install a warming drawer under your counter to keep side dishes, bread, or plates perfectly heated. No more last-minute microwave dashes or cold food drama.
- Soften surfaces with a plush rug, an indoor plant, and a few pillows on stools or a window seat. This turns a sterile kitchen into a cozy, lived-in hangout.
- Dimmable lighting for flexibility: bright task lights under cabinets for cooking prep, then switch to a softer glow when dinner winds down and conversation lingers.
These touches make guests feel at home while you stay stress-free.
Final Thoughts
So, you’re ready to throw the best parties, and your kitchen’s finally on board. Remember, an open layout isn’t just about space, it’s about connection. A social island or comfy coffee nook turns cooking into a shared event, not a solo chore.
Don’t forget good lighting, either. It’s the secret sauce that makes everyone feel at ease. With these tricks, you’ll host with confidence and have way more fun yourself. Now, go make some memories.