
The Best Fluffy Pancakes recipe you will fall in love with. Full of tips and tricks to help you make the best pancakes.



You’ll start your kitchen remodel by planning and ordering long-lead materials like cabinets. Next, secure permits before demolition, which takes one to six weeks depending on scope.
After framing, trades tackle rough-ins for plumbing, electrical, and HVAC. Flooring or cabinets come next based on material, then countertops: the longest stage.
Finally, install appliances and lighting before wrapping up with cleaning, caulking, and a final walkthrough. There’s a clear order to follow, and sticking to it saves you from costly mistakes.
If you keep reading, you’ll see exactly how each step plays out in real time.
How Long Should Your Kitchen Remodel Actually Take?
So how long should your kitchen remodel actually take? The planning alone eats up about 8.3 months on average, while construction runs closer to 4.5 months. The culprit isn’t usually the build itself; it’s decision-making and scheduling that drag out your timeline. Your scope matters most here.
A cosmetic refresh might wrap demolition in 1–2 weeks, but moving walls or gas lines can stretch that to 6 weeks. Those structural changes add logistics that slow everything down. Countertops often become the big block because you’re stuck waiting. Fabrication can’t start until cabinets are finished, so lead times play a huge role.
Build in buffer for surprises like mold or backlogged supplies. They’ll test both your schedule and budget. Cabinetry alone can consume 30% to 50% of your total remodel budget, so delays in sourcing or delivery hit harder than most homeowners expect. Stay flexible during the remodeling process, and you’ll weather the delays without losing your cool.
Plan Permits and Material Lead Times First
You shouldn’t even think about swinging a sledgehammer until you’ve secured those building permits.
Municipal reviews can drag on for weeks, so get your paperwork in early to avoid a frustrating delay.
At the same time, place orders for your cabinets and countertops right away.
You don’t want your entire project stalled while you wait for materials to arrive.
Cabinets should be ordered first since countertop fabrication can’t start until cabinets are physically on-site.
Permit Timelines and Approvals
Two big things can make or break your kitchen timeline: permits and materials. Don’t wait until after design and demolition to apply for building permits. Municipal review cycles can stall you for weeks.
A general contractor can handle electrical, plumbing, and building permits end-to-end, but if you’re DIY, call the city permitting office directly.
Plan around those lead times because you’ll need approvals before any major work starts, especially Plumbing: Rough-In.
Treat long-lead items like cabinets, countertops, and appliances as schedule-critical. Countertop fabrication can’t start until cabinets are fully installed, so order early to dodge supply-chain backlogs.
Countertop crews will only template after cabinets are fully leveled and secured, since installed cabinets create the accurate reference point needed for custom slab measurements.
Build in contingency time for surprises like missing documentation or unavailable materials. Nobody wants mold remediation to halt a project right after permits are secured. Stay ahead, and you’ll keep momentum.
Order Materials Before Demolition
Once your permit timelines are mapped out and approvals are in motion, the next logical move is to lock in your materials, before you swing a single sledgehammer.
Kitchen remodeling projects demand early ordering to avoid painful delays.
Cabinet chaos: You don’t want demo done, then wait six weeks for cabinets. Order them first.
Flooring fiasco: Tile, wood, or vinyl can have long lead times too. Get it on-site before you start tearing things up.
Appliance agony: Fridges and ranges are often backordered. Confirm ship dates early.
When deliveries arrive, you’re ready to work.
Without them, you’re stuck.
Use supplier quotes to build your schedule backward.
Plan for roughly 8.3 months overall, with 4.5 months of construction.
Treat lead times as your biggest risk—control them now, and you’ll avoid idle crews later.
It’s not glamorous, but it beats staring at bare studs while you wait.
A renovation designer can coordinate plumbing and electrical placement across your material orders to prevent costly clashes before construction begins.
When to Demolish (and What to Save)
Timing your demolition right can save you a headache or two. In a Commercial Kitchen remodel, when to demolish is often early, about one to two weeks for smaller projects or up to six for bigger ones.
You’ll tear down walls to expose utilities and then decide what to save.
Keep it selective if you’re keeping cabinets or appliances. Delay demo until your replacements are ordered and ready to arrive. That cuts rework and timeline chaos.
Save plumbing or appliances only after a pre-demolition inspection confirms they won’t be blocked by moving gas lines or rewiring.
Also, plan for debris safety, especially if lead paint or asbestos might be lurking. Mess that up, and you’re halted.
Keep floors in mind too—wood goes before cabinets, and vinyl can wait. Protect what functions, but don’t force it. Once demolition wraps and rebuilding begins, positioning your refrigerator, sink, and stove within easy reach of one another keeps your workflow efficient from day one.
Timeline for Electrical, Plumbing, and Drywall Rough-In
You’ll want licensed pros to start with plumbing and electrical rough-ins first, since drywall can’t be closed until those pass inspection.
Expect this phase to take about one to three weeks, depending on how complex your kitchen is and how well your trades coordinate.
To avoid surprise repairs that mean reopening fresh walls, make sure your electrician and plumber talk about shared paths up front.
No one wants to patch a hole you just finished.
Request extra outlets during rough-in to avoid having to use adapters later when positioning them near blending, mixing, and boiling surfaces.
Order of Trades
Because electrical, plumbing, and HVAC all need to run behind your walls before anything gets sealed up, the rough-in phase kicks off right after demolition and framing. You’ll schedule the trades in a specific chain: mechanicals go first, then electrical, then plumbing work, so inspectors can check each step before drywall hides everything. This order prevents costly clashes later.
Electrical rough-in involves pulling wires and installing boxes for your outlets, switches, and lights. Don’t forget to plan for under-cabinet lighting or specialty circuits for commercial kitchens.
Plumbing work comes after electrical, with your team running water supply lines and drainpipes to the sink, dishwasher, and any prep sinks. Rough-in includes pressure testing to avoid leaks.
HVAC gets installed early, too, managing ductwork for your range hood and heating vents. Coordinate these behind-the-wall runs so they don’t conflict with your layout. Once rough-ins pass inspection, drywall can be hung.
During this phase, it’s also worth confirming where your sink, stove, and refrigerator will land, since work triangle logic requires each of those three points to sit roughly 4–9 feet apart for efficient daily movement.
Duration Estimates
Once demolition is done and the walls are open, you’re looking at a rough-in timeline that typically falls between one and three weeks, but that’s only if everything goes seamlessly. Your licensed pros handle plumbing and electrical first, running new lines for sinks, dishwashers, and task lights.
Even in a modest kitchen project, those dedicated circuits for your range hood and fridge take careful placement. Inspections can throw a wrench in the works, adding days to a week just for sign-off.
A commercial kitchen project often demands extra coordination, like gas line reroutes or venting updates, which stretches that three-week window. Remember, drywall can’t close up until those systems pass.
Build in some contingency, as utility surprises in old walls love to show up unannounced. During this phase, it’s also the ideal moment to confirm that your sink, stove, and refrigerator are positioned to support a work triangle perimeter of 12 to 26 feet for balanced circulation once the kitchen is fully operational.
Avoiding Surprise Repairs
To dodge those wallet-draining surprise repairs, schedule your electrical, plumbing, mechanical, and HVAC duct rough-ins right after framing and before any walls or ceilings get closed up. This sequence—demolition, rough-ins, inspection, then drywall—keeps your kitchen design on track and avoids costly tear-outs.
Plan for potential utility coordination delays, like ventilation conflicts or gas line reroutes; these are common surprises that can turn a simple job into a headache.
Verify appliance, sink, and lighting locations before rough-ins begin—even small plan-to-field differences force rework later. Before finalizing those locations, mark stationary plumbing spots and radiator and flue positions on your layout drawing to ensure trades work from accurate, field-verified references. Add buffer time after rough-ins for testing plumbing and electrical issues, so you catch problems before drywall locks everything in.
Schedule inspections when trades are at peak service, making sure inspectors sign off before walls close up. This way, you avoid panic later and keep your kitchen renovation moving easily.
Flooring and Cabinet Installation: Which Goes First?
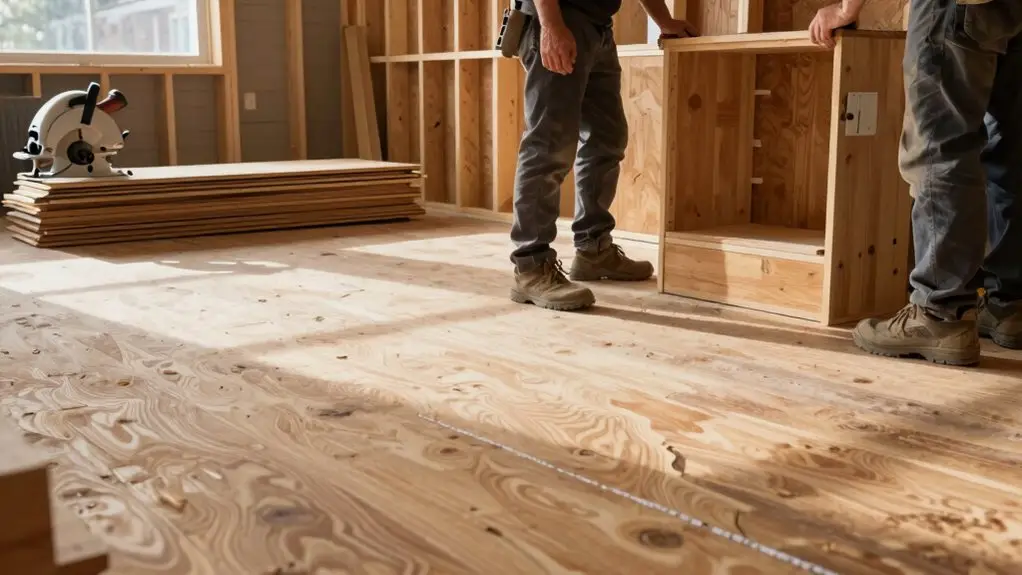
If you’re tackling a kitchen remodel, you’ve probably hit the big question: should you install flooring or cabinets first? For hardwood or other wood, always lay the flooring before the cabinets. You need a properly finished, level surface for precise cabinet placement. Plus, you won’t risk damaging the floor during installation.
But with vinyl, you can often install cabinets first; it’s more forgiving. Still, you must protect new surfaces and check leveling. Cabinets need precise anchoring; even small errors can cause misalignment later.
Flooring takes about 2–3 days—don’t rush it. Hurried work can damage drywall or cabinets.
Delaying demolition until supplies arrive will ensure consistent service. Keep your kitchen’s materials on-site to avoid rework. Make the right call, and you’ll save headaches down the line. Once cabinets are in place, consider running upper cabinets to the ceiling to eliminate dead zones and capture every inch of vertical storage in a small kitchen.
Countertop Fabrication: The Longest Stage in Your Schedule
With your cabinets finally squared away, it’s time to tackle the stage that’ll eat up the most calendar space: countertop fabrication. This phase often dominates your timeline because it involves templating, cutting, and finishing before anything can be installed.
Countertop fabrication eats the most calendar space—templating, cutting, and finishing before installation.
Your design plans now become reality, but only if your cabinets are perfectly level and anchored. Otherwise, you’re looking at delays and rework around sink cutouts and appliance fits.
Fabricators need precise cabinet measurements before they start, no shortcuts here. Material selection and shop scheduling can add weeks to your schedule.
Even after fabrication, installation requires fine-tuning to align everything cleanly.
Don’t rush this stage. Patience now saves you from headaches later.
Appliance and Lighting Hookup: Testing Before Finishing
Once your cabinets and countertops are finally in place, it’s tempting to rush ahead and flip every switch, but don’t.
The appliance and lighting hookup is your last chance to test everything before you seal the deal.
You’ll save money by catching electrical load issues or water pressure problems now, not after paint and trim are done.
Your electrician will install fixtures and verify switches work.
The plumber might need a return trip to connect the dishwasher and fridge.
Rushing this stage risks damaging your new flooring or drywall during rework.
So let the trades run their ignition checks and flow tests.
It’s a boring step, but a smart one—trust us, you’ll thank yourself later.
Final Cleaning, Caulking, and Inspection Walkthrough

After your electrician and plumber have signed off on their tests, it’s time for the finishing touches that make your kitchen truly shine. Your contractor will do a thorough final cleaning, wiping down every surface and checking that grout, caulk lines, and hardware are spotless.
Next, they’ll apply caulk at junctions like countertops against walls and around sink cutouts. No gaps means no grime or water trouble down the road.
- Priming and touch-up paint hide any scuffs from installation.
- Trim work and sealing help make certain that transitions around backsplashes look uniform.
- They’ll test that every fixture fits perfectly and nothing’s damaged.
Finally, walk through with your contractor during an inspection walkthrough. Look for any missed caulk spots or lingering dust around seams. Fixing small issues now beats dealing with them later.
Once everything passes, you’re clear to start cooking.
Final Thoughts
You’ve now got the full picture of your kitchen remodel timeline. Sure, it feels like a lot of steps, but breaking it down keeps you from losing your cool or your deposit.
Remember, patience isn’t just a virtue here; it’s your best tool. Stockpile snacks for the wait, celebrate small wins like a working outlet, and trust the process.
Before you know it, you’ll be making coffee in that shiny new space. You’ve got this.







