
The Best Fluffy Pancakes recipe you will fall in love with. Full of tips and tricks to help you make the best pancakes.



You’ll move through eight kitchen stages without the chaos. Start by deciding your workflow type: residential or commercial. Then map your clean, prep, and cook zones. Unload groceries near the entrance, position prep and wash for speed, and connect cooking straight to the stove.
Design serving to cut extra steps, and give cleanup its own path to avoid cross-traffic. Fix any trouble spots before demo day. Stick around—there’s more to making your kitchen actually work for you.
Decide Between Residential and Commercial Kitchen Workflows
When you’re planning a kitchen, the very first fork in the road is choosing between residential and commercial workflows. For a home kitchen, you’re focused on your personal meal-prep and cleanup flow. Every step prioritizes convenience over strict separation.
But commercial kitchen layouts demand high volume, following FDA rules like “raw to ready-to-eat” to avoid cross-contamination. You can’t ignore plumbing and electrical here; they’re vital for preventing backtracking.
Residential designs, on the other hand, allow you to mix cooking and entertaining without guilt. Every structural change, like widening aisles to 48 inches, transforms your space into an efficient machine for your home improvement project.
In a home kitchen, the kitchen work triangle links the refrigerator, sink, and stove as the three primary work zones, reducing the distance traveled between your most-used appliances and cutting down on fatigue during meal prep.
A kitchen transformation starts with this choice. It’s a fork that determines how your daily cooking feels.
The 3 Zones That Define Every Kitchen Workflow
You’ll find your kitchen workflow runs more smoothly when you focus on clean zone design from the start. In the Prep zone, you keep raw ingredients and storage separate from cooking, so you’re never hunting for a knife while a pan’s smoking.
That Prep-to-Cook flow means you move ingredients forward in a straight line, avoiding the chaos of backtracking that slows down service. Keeping your mise en place containers within arm’s reach between the sink and stove ensures every ingredient stage — from washing to chopping to saucing — stays anchored to one focused zone.
Clean Zone Design
You’ll need separate sinks for raw and clean prep.
Your kitchen lighting should spotlight each zone, making it easy to spot a stray splash. When planning a kitchen remodel, experienced professionals can help you map one-way workflow from raw to ready-to-eat to plateware, so dirty tools never backtrack.
This isn’t just about food safety; it’s about sanity.
Storing dish soap, sponges, and cleaning sprays in a dedicated cleaning zone around the sink keeps contamination tools centralized and your workflow moving in one direction.
With thoughtful kitchen design, your clean zones stay truly clean, and your dinner party stays epic—not epic disaster.
Prep-to-Cook Flow
Your kitchen’s prep-to-cook flow boils down to three zones: prep, transfer, and cook. No backtracking allowed.
In the prep zone, you stage raw items separate from ready-to-use ones, so nothing gets mixed up before it’s time.
Then the transfer zone holds your pre-portioned ingredients and tools, giving you rapid access.
You’ll save precious seconds between grabbing and cooking.
Now, the cook zone is where the action happens.
You stand at the heat sources, turning and plating in order, with no retracing paths.
To nail this flow, imagine drawing arrows from prep to transfer to cook; they should stay unidirectional.
Grouping ingredients by recipe step and storing them in airtight containers for chopped veggies keeps your transfer zone stocked and ready without last-minute pantry sprints derailing your momentum.
During kitchen remodeling, don’t skip this logic.
Even before demolition begins, plan for new flooring, cabinets and countertops that support this path.
Clear communication with your contractor ensures the zones flow smoothly, not against each other.
Stage 1: Unload and Store Near Your Kitchen Entrance
First, designate a “kitchen work zone” right near your kitchen entrance so crews can unload materials fast, without tracking debris through the whole house. You’ll protect floors and doorways with coverings to prevent scratches, keeping that new kitchen flawless from day one.
In remodeling projects, this zone becomes your staging area for heavy cabinets and appliances, cutting down trips. You’ll store frequently used items like fasteners and sealant in labeled bins here, saving you time.
Coordinate with your contractor on staging capacity, especially when construction begins; you don’t want to block access while dust barriers are up. Getting gas lines and plumbing sorted later starts with this organized hub, so everything flows seamlessly into prep. To further avoid costly disruptions, hold off on teardown until cabinets and flooring sit on-site so finished work isn’t damaged before installation even begins.
Stage 2: Position Prep and Wash for Speed
Once you’ve got that staging zone humming near the entrance, it’s time to focus on position prep and wash, the real heartbeat of kitchen speed.
Set up your dish and ingredient staging so everything flows one way: clean to prep, dirty back to warewashing. That reduces backtracking and cross-traffic, so your work stays seamless.
Wash in measured steps: scrape, rinse, then wash with properly mixed detergent at the right temperature.
Place sanitizer, towels, and utensil racks within arm’s reach; it cuts walking time during peak service.
An expert kitchen knows easy to maintain stations rely on clear barriers between clean and dirty zones.
Make sure your electrical work supports dedicated zones for wash sinks and dish machines.
Keep a steady clean-dish supply moving toward plating, so you never run out mid-service.
Positioning your sink inside the cooking triangle supports rinsing, draining, and deglazing without missing a beat, keeping flavor timing intact during active cooking.
Stage 3: Connect Cooking and Assembly to the Stove
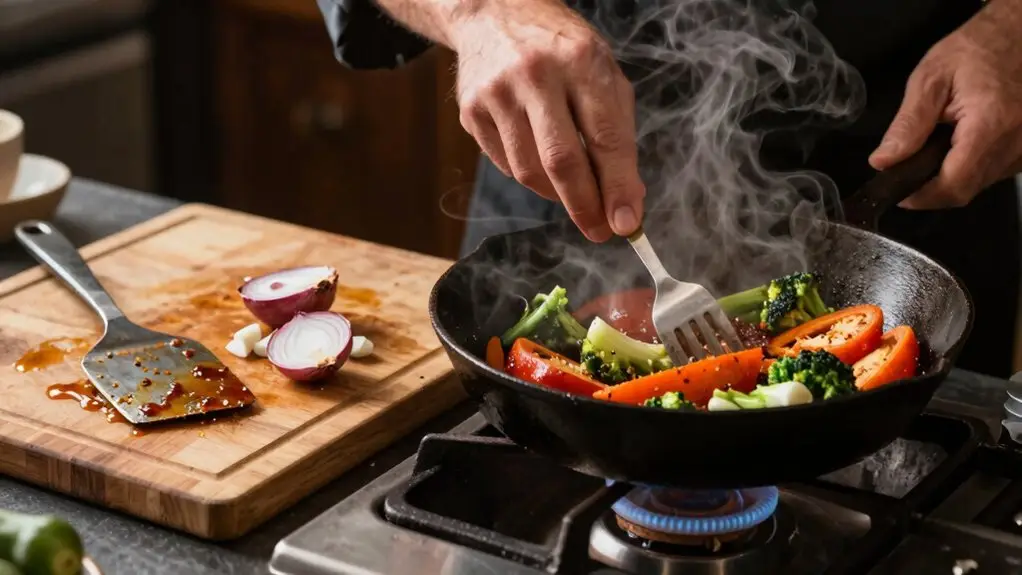
Now you’re ready to link cooking and assembly directly to the stove, using the heat zone hierarchy to keep your busiest stations flowing consistently.
Your stove-to-plate flow should be a straight shot: cooked items move straight to plating without crossing raw prep paths, preventing cross-contamination risks.
Finally, stick to a batch cooking order to avoid bottlenecks.
Keep seasonings and tools within arm’s reach so you can crank out dishes without extra steps.
Position undercounter refrigeration within arm’s reach of prep surfaces so ingredients stay accessible without interrupting the cooking sequence.
Heat Zone Hierarchy
Because the stove is your kitchen’s main power source for cooking, you’ll want to treat it like the center of a heat zone, a dedicated hub where sautéing, simmering, and boiling all happen without extra steps. The Heat Zone hierarchy puts your stove as Step 1 for any layout that works.
When you’re planning a kitchen, floor plans should map a clear path: oils, seasonings, and common sauces sit within arm’s reach, so you’re not reaching awkwardly across your body.
Keep the flow from prep to stove unidirectional—raw ingredients move in, hot dishes move out, and there’s no backtracking.
That “landing” spot for pans and lids? It’s non-negotiable.
It lets you swap, plate, or transfer without queuing up.
During busy shifts, cross-check your layout: if arrows around the stove cross or return, you’ve found a friction point that slows service.
Fix it, and you’ll cut ticket times. Positioning your stove as part of a work triangle formation keeps the total walking distance between the fridge, sink, and cooking zone under 26 feet, which means fewer wasted steps during high-output cooking.
Stove-to-Plate Flow
When you’re in the thick of service, the stove-to-plate flow is your last chance to get food out hot and fast. You’ve got to position plating right next to the burners, no wasted steps.
Clear that movement path, too, so your clean ingredients head toward the stove without crossing dirty dish traffic. This avoids delays and keeps things sanitary.
Staging pans and tools nearby cuts down on frantic mid-course dashes. Your oils, seasonings, and hot-holding containers should be within arm’s reach.
Every kitchen runs easier when you design this handoff intentionally. Keeping 3–4 feet of clearance around your island ensures you can move hot pans safely without squeezing past family members or creating bottlenecks near the burners.
Now, if you’re planning a kitchen renovation, think about these zones early. Your general contractor can help layout cabinets and choose a practical flooring option for grip near the heat.
Batch Cooking Order
Since you’re linking cooking directly to assembly, batch cooking order matters more than most cooks realize. You can’t just wing it: this stage of the kitchen demands precision. Your first step? Place batch-prep ingredients and assembled pans near the stove. That way, you’re not trekking back to base cabinets or flooring your team with wasted steps.
Keep raw items moving before cooking starts, then shift ready-to-plate containers close to the burners to avoid cross-contamination. Think of it like laying new floors: you need a solid foundation. Use staging rules at the cooking station. Hold full sheet pans and labeled containers within reach.
Coordinate assembly-to-stove timing so finished plates don’t sit idle. If you’re passing to plating, schedule stove output in predictable waves, like batch 1 simmering while batch 2 preps. This keeps service hot, consistent, and your crew sane. For tighter workspaces, a rolling kitchen cart can be wheeled directly beside the stove to keep batch-prep containers staged and accessible without crowding your primary cooking zone.
Stage 4: Design Serving and Plating to Reduce Steps
- Keep the plating zone right beside your cooktop, so there’s zero extra travel for hot food.
- Store tools, sauces, and garnishes within arm’s reach—no rushing across the kitchen mid-service.
- Follow the right sequence of cooking, then plating, then serving: no backtracking allowed.
- Set up a one-way flow: raw food never crosses paths with ready-to-eat plates, keeping everyone safe.
You’ll finish plates faster. Your staff won’t trip over each other.
Stage 5: Plan the Cleanup Path to Avoid Cross-Traffic
You’ve got your cooking and plating zones humming along with a smart one-way flow, so now it’s time to tackle what happens after the meal leaves the kitchen.
Every remodeling plan should include a dedicated cleanup path for dirty dishes and trash that runs straight to warewashing, never crossing your food-flow route.
In this last stage, you’ll need to remove bottlenecks by placing bus tubs and scrape stations near the dish area, not at main entrances.
Keep in mind you’ll want aisle widths of at least 48 inches to let staff move full racks without backtracking.
Use simple arrows on your workflow map to spot crossed traffic early.
This simple step helps you avoid costly rework during peak service.
How to Fix Kitchen Workflow Troublespots Before You Demo
Before you swing a single sledgehammer, trace your kitchen’s workflow from receiving all the way to warewashing, drawing arrows for every ingredient and dish.
You’ll spot crossed paths that choke efficiency, especially in an old kitchen with cramped routes.
Fix these now to avoid costly fixes later.
Watch for cross-contamination: Keep raw and ready-to-eat paths separate.
Dirty dishes must never cross clean food zones.
Measure your aisles: Enforce at least 48 inches of clearance.
Tight spaces are a common kitchen bottleneck, slowing everyone down.
Position smartly: Place seasoning near cooking, refrigerators close to prep, and warewashing away from the service route.
Don’t bury it at the back.
Plan structural work carefully: Removing a wall can open flow, but skipping permits wrecks budgets.
Choose durable flooring materials, tile beats cheap vinyl.
Don’t demo until you’ve resolved these troubles.
Your future self will thank you.
Final Thoughts
So, you’ve mapped out your kitchen’s flow. Don’t let a perfect plan get dusty. Test it by walking through each step yourself, pretend you’re making a messy Sunday breakfast. You’ll spot bottlenecks fast. Fixing a tight pinch point now saves you from cursing that corner later.
Remember, a smart layout isn’t just about looking good; it’s about making your time in there feel less like work and more like a dance.







