The Best Fluffy Pancakes recipe you will fall in love with. Full of tips and tricks to help you make the best pancakes.


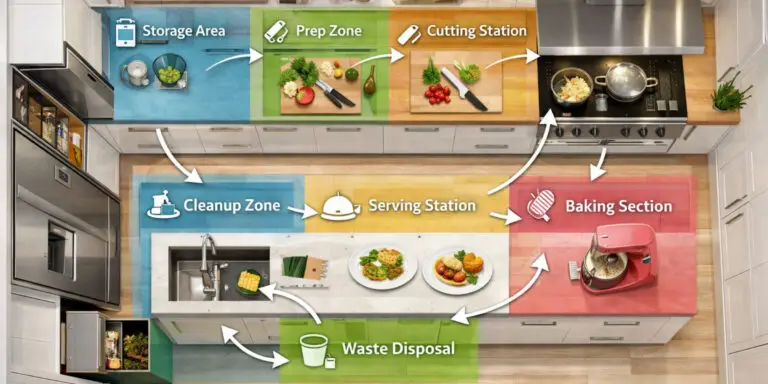
To design an efficient kitchen station layout, start by picking your fridge, rangetop, and dishwasher before planning counters; they drive everything. Map your work triangle (sink, range, fridge) so you’re not zigzagging through traffic.
Set your prep station next to the cooking zone to avoid cross-kitchen trips. Arrange your pots and seasonings within arm’s reach. Place cleanup between prep and cooking to keep dirty dishes flowing one way.
Measure your tallest pantry items before choosing cabinet heights. Lock in your layout before cabinets ship to avoid expensive re-dos. Stick around for the full breakdown of each step.
Right Kitchen Station Layout Starts With Your Appliances, Not Floor Plans
Since your appliances have fixed requirements for clearance, venting, and access, they should drive your station layout, not the other way around. Start by picking your fridge, rangetop, fridge, and dishwasher first.
Their needs define where everything else fits, especially in an open kitchen where walls won’t let you also share with living space.
Use the classic Kitchen Work Triangle: sink, rangetop, fridge to keep your main path short. There’s no point dreaming up counters before you know where the heat source is or where not to put them.
Plan your cooking station around the rangetop, stashing pots and seasoning right next to it.
Then, place prep near cooking, cleanup at the sink, and putting-away beside the fridge. This appliance-first approach makes the Kitchen Work Triangle actually work, not merely look good on paper.
You’re designing movement, not a picture. Each leg of the triangle should measure between 4 and 9 feet to avoid both cramped appliance placement and excessive walking between your three primary work zones.
Map Your Working Triangle to Where You Actually Move in the Kitchen
Start by mapping your refrigerator-to-sink flow. Grab ingredients, then wash or prep them without crossing through a busy traffic lane.
Next, optimize your sink-to-range path so you’re not hauling pots and pans directly from the sink to the cooktop. This saves you from awkward zigzags.
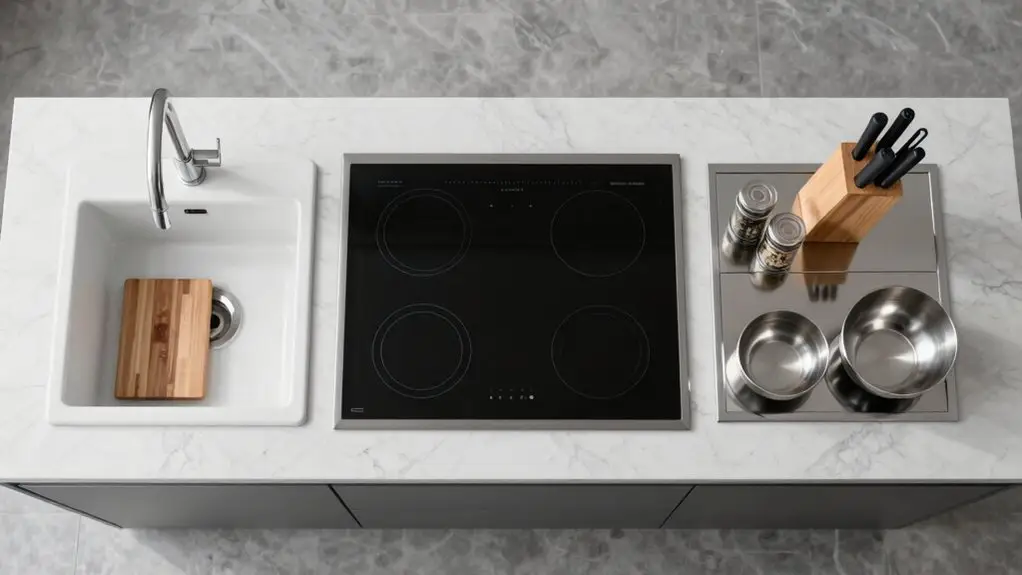
If you’re placing an island heat source, make sure it doesn’t block that natural sink-to-range connection or fridge line. Otherwise, you’ll be playing dodgeball with your own cookware. Keep at least 3.5 feet of clearance around any island to prevent forced detours that break up your natural cooking flow.
Refrigerator to Sink Flow
Before you map out your working triangle, do a quick tape walk-through to see where your feet actually travel between fridge, sink, and range.
You’ll spot where you cross paths and where collisions happen in real prep-to-cook movement. This isn’t just about a diagram; it’s about your kitchen’s actual flow, much like a Back of House crew mapping stations.
Place your sink and dishwasher close to the fridge so rinsing and cleanup happen right after you grab items, cutting backtracking.
Keep the path from fridge to sink to rangetop unobstructed, supporting a “grab, prep, fire” rhythm without weaving around carts.
Use the sink to define your clean-up zone, keeping raw rinsing on the fridge/sink side, not in your cooking zone near the range.
Prioritize open countertop space within the triangle, stashing prep tools near the sink/rangetop boundary to avoid detours.
Let your layout guide natural movement, so your feet flow easily from storage to sink to stove.
Target minimum walkway clearances of 35 to 36 inches within the triangle so movement between each station stays comfortable and never collapses into a bottleneck during busy cooking sessions.
Sink to Range Path Optimization
When you actually map where your feet go during a busy cook, you’ll find the sink-to-range path matters more than any diagram: those few feet can make or break your flow. You don’t want to dodge a trash can or clean dishes while hot pan in hand.
Instead, keep the sink close to the range within zone layouts, so rinsing and firing transfers happen without awkward backtracking.
To optimize your kitchen workflow, position quick-rinse tools, soap, and prepped containers right between them. This turns that sink to range path into a clean-contact-to-cook-contact relay, not a storage detour.
Even if your blueprint shows short distances, protect that route from raw-prep traffic or drying racks.
Finally, tie the path into clean-up: aim for one-way flow from soil to sink to dishwasher, so nothing forces you back toward the range mid-rush. Placing your dishwasher near the sink prevents you from hauling dirty dishes across the kitchen and keeps the overall cleanup zone consolidated in one efficient area.
Island Heat Source Placement Logic
The sink-to-range path you just optimized is only half the story. Now you need to figure out where to drop that island rangetop so it doesn’t wreck your flow. Your island’s heat source must sit inside your real movement between fridge, sink, and cookware storage, keeping those trips short. You’re creating an assembly line: grab from cold, prep, then fire. Don’t let a poorly placed rangetop force you to backtrack for a pot or oil.
Place the rangetop so your prep zone naturally feeds into it, with oils and salt right next to the burners. Keep the sink and dishwasher close to define a tight cleanup zone, so you rinse pans without crossing your burner return path.
Plan island layouts so you can move fridge → prep → heat in a straight, repeatable loop. Adjust the island’s heat location if another station’s path crosses that loop. When the island houses the rangetop, keep its edge from cutting into your work triangle path by more than twelve inches, or you’ll force detours that defeat the whole layout.
Do a tape walkthrough, simulating cooking steps to confirm the island reduces turns, not creates bottlenecks.
Prep Station: Set Up Near the Cooking Zone to Reduce Cross-Kitchen Trips
You’ll want to park your prep station right next to the cooking zone, so your chopped veggies and garnishes take a quick “prep → fire” trip with zero backtracking.
Keep your knives, cutting board, and measuring tools within arm’s reach, so you’re not sprinting across the kitchen every time you switch from chopping to stirring.
This setup lets you grab ingredients and tools fast without crossing through the busy cookware or plating paths.
Saving you steps and sanity during a hectic dinner rush. A solid target is maintaining 36–48 inches of uninterrupted prep space between your cooking zone and work surface to handle even complex dishes without crowding your workflow.
Proximity to Cooking Zone
Because your prep station acts as the engine room for cooking, placing it right next to the range cuts down on unnecessary steps and keeps your rhythm flowing effortlessly. You’ll thank yourself when you’re not trekking across the kitchen with a handful of chopped onions.
Locking into a close proximity to cooking zone is your secret weapon for a smooth service.
Your prep station becomes a true extension of the stove, so ingredients travel just a foot or two, well, chef-like pivot away. You keep core tools within arm’s reach; your cutting board, knives, and measuring cups stay right where you season and sear.
An unobstructed path from chop to pan means you never weave-free transfers. No dodging the sink or trash zone mid-bustle.
Store go-to fats, salt, and pepper near the range, ready for lightning-fast grabs.
A non-slip mat under your board and a quick-wipe station nearby cuts detours during your busiest moments. Applying the work triangle logic keeps your sink, stove, and fridge each spaced roughly 4–9 feet apart, so the entire cooking workflow stays connected without forcing long crossings between stations.
Tool & Ingredient Accessibility
Slotting your prep station next to the cooking zone is just step one. Now you need to make sure every tool and ingredient is within easy reach. For true tool and ingredient accessibility, stage your cutting board right on your prep station.
Place knives, measuring cups, and prep bowls within arm’s length. You don’t want to cross the sink or stove mid-chopping.
Keep a designated rinse spot nearby, maybe right at the sink edge, so you can wash produce quickly without a detour.
Use a towel under the cutting board to stop slipping, and give each tool a home.
That way, you won’t hunt for a can opener while your garlic burns.
Finally, always bring ingredients from the fridge directly to your prep station first.
Chop there, then move everything to the cook zone.
No wasted steps. Keeping tools stationed within arm’s reach is a core principle of mise en place, which eliminates the frantic mid-recipe scrambling that extends your total cooking time.
Arrange Your Cooking Zone for Faster Access to Pots, Pans, and Seasonings
Once you’ve got your range in place, the real magic happens when you organize what goes around it. Your kitchen layout and work stations live or die by how fast you can grab what you need.
Proper cooking equipment placement saves you steps and stress.
Stash your most-used pots and pans in the cabinet closest to your range, keeping “fire, grab, return” motions short and smart.
Keep tongs, spatulas, and wooden spoons within arm’s reach so you don’t hike across the station during a rush.
Store salt, pepper, and oils in a dedicated spot off the cooking line, but out of grease splash to avoid delays.
Arrange a tight grab pattern around each burner: pan, lid, and tool should be reachable from one stance, cutting step counts.
Place temporary cookware like sheet pans at the cooking zone edge nearest the pass.
This way, you can move directly from sauté to handoff without backtracking.
Position your sink within the cooking triangle boundaries so you can rinse, drain, and deglaze without abandoning your burner at a critical moment.
Place Your Clean-Up Between the Prep and Cooking Areas
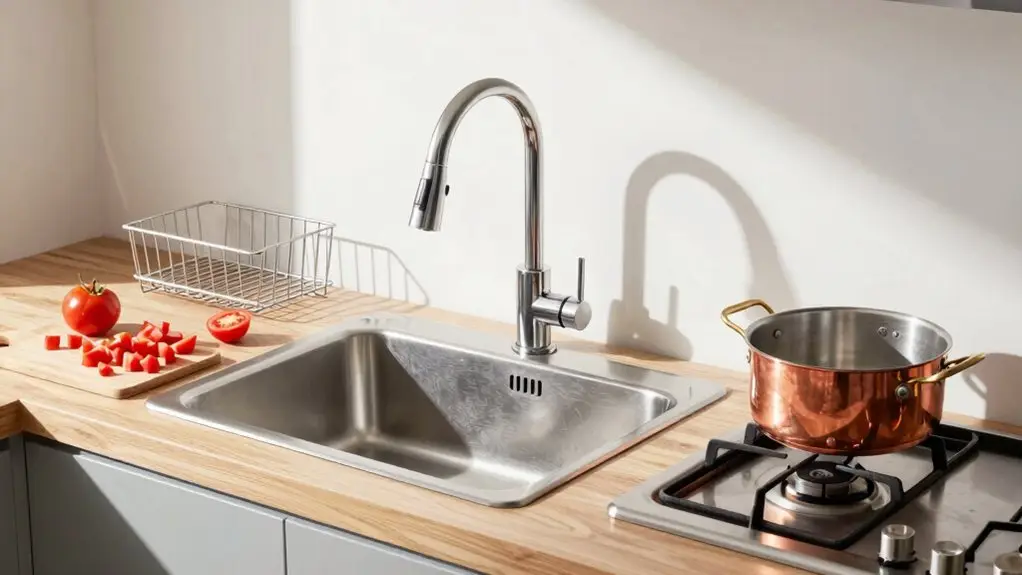
Now, let’s talk about where your clean-up zone belongs.
You’ll want it smack between your prep and cooking areas, turning that space into a smart traffic handler for both dirty dishes and work-in-progress.
By doing this, you create a steady one-way flow—from scraping and rinsing to scrubbing and drying.
This ensures you’re never zigzagging dirty plates through your hot zone.
In this zone, keep essentials like dish soap, sponges, and a dish rack within arm’s reach so everything you need for cleaning zone storage is immediately accessible.
Clean-Up Zone Placement
- Place the sink close to prep for immediate rinsing of tools before they clutter counters.
- Position the dishwasher nearby so your scrape-scrub-wash cycle stays tightens up.
- Design a clear one-way flow: soil drop-off → rinse → wash → machine → dry → restock, no backtracking.
- Add a small “to-wash” landing next to the clean-up zone, not on your prep counters.
- Keep the working triangle clear, no crossing between storage, prep, and cooking zones.
This simple layout cuts cleanup zigzags, keeping your station calm and your workflow steady.
Workflow Sequence Logic
Because cleanup is the messiest part of the kitchen, it makes perfect sense to wedge your sink and dishwasher right between your prep area and the cooking zone. This isn’t just about convenience: it’s about smart workflow sequence logic.
You’re creating a one-way logic where dirty pots and knives move from prep to wash to machine, never crossing paths with clean plates heading to the pass. That keeps staff movement seamless and prevents raw mess from sneaking into your cooking zone.
You’ll wash items right after use instead of lugging them through the heat corridor.
This setup supports a faster ticket rhythm and fewer collisions.
Plus, the natural barrier between raw prep and hot cooking supports HACCP-style separation.
Build a Putting-Away Station Next to the Fridge
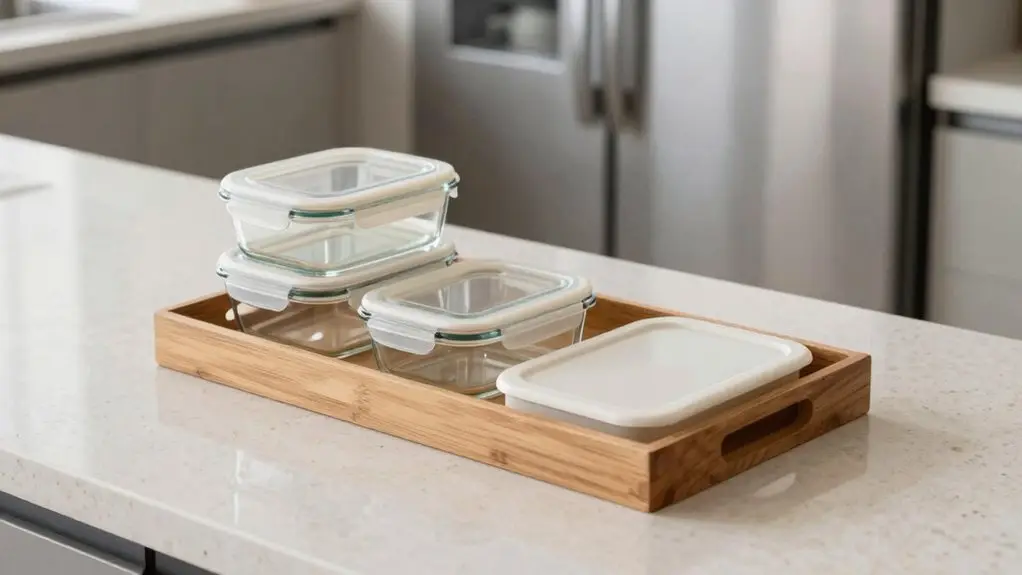
Once you’ve finished eating and cleaned your hands, the last thing you want is to trek back through the prep zone with a stack of leftovers. That’s why you’ll build a dedicated putting-away station right next to the fridge. This keeps your putting-away zone within arm’s reach, so you never cross the busy room line again.
Stock Tupperware, foil, plastic wrap, masking tape, and Sharpies here—no trips back for supplies. Set shelf heights at your natural standing reach, using your tallest oil bottle as a guide.
Mount a simple inventory labeling system, like a magnetic whiteboard, for dating and rotating containers.
Prioritize pull-out shelving or easy-grab drawers in tight spaces to speed returns and avoid traffic jams.
Keep all tools at the same height you use while standing at the fridge. Your back will thank you later.
This setup slashes cleanup time and keeps your flow seamless.
Choose Storage Formats Before Measuring: Cabinet or Pull-Out Shelves?
Before you grab a tape measure, stop and decide: are you going with standard cabinets or pull-out shelves? This choice shapes your entire cooking zone. Pull-out shelves excel in your prep or cooking zone, especially for frequently used oils and spices. Measure your tallest oil bottle, set that pull-out dimension, and you’ll never dig again.
Standard cabinets work for less-used items, but pull-outs save you bending and wasted countertop space. Keep heat-adjacent consumables off your island near the rangetop; that’s a mess waiting to happen.
Validate your choice with a contents-driven plan, like a spreadsheet inventory. Match each shelf or pull-out bay to the actual items it must hold.
You’ll get a “grab-and-go” system that feels effortless, without sacrificing valuable countertop space. Make the right call now, and your cooking routine thanks you later.
Measure Your Tallest Pantry Items to Set Cabinet Heights
Grab your tape measure, because the true test of a pull-out shelf’s usefulness starts with your tallest bottle of oil. Don’t guess the height; measure it from the counter to the shelf underneath. That number sets your cabinet’s pull-out dimension, so your daily-use items fit without a struggle.
- Measure your tallest pantry bottle with a tape measure, like that oil you always reach for, to match the shelf height in your floor plan.
- Use that height as the key input for the pull-out shelf’s dimension, making sure it fits reality, not paper.
- Add a small clearance margin above the tallest item, so lids don’t bind and you slide items in and out seamlessly.
- Decide if you need “grip-in/grab-out” access by checking the shelf supports for easy reach while standing at your cooking area.
- Plan shelf heights around your actual pantry contents, not generic standards, so frequently used items stay accessible without cluttering your stainless steel island.
This approach keeps your kitchen design practical and your workflow effortless.
No One Transfers Their Kitchen Inventory to a Spreadsheet: You Should
If you want a kitchen that actually works for your cooking habits, skipping the inventory spreadsheet is a mistake.
You wouldn’t design a restaurant kitchen layout without a plan, so don’t build your dream kitchen without one.
Start by transferring every pot, pan, and squeeze bottle into a spreadsheet, mapping each item to its future drawer or cabinet.
This turns your Kitchen Display System into a real tool, not a guessing game.
It makes decisions about pull-out shelves versus cabinets objective.
Your daily oils stay within arm’s reach in the prep area, while rarely used gadgets go to higher dry storage.
Measure your tallest oil bottle so shelf heights avoid wasted space near the rangetop.
Use item dimensions to plan drawer partitions that actually fit your tools, not generic inserts.
Reconciling this sheet with your designer makes move-in a breeze, preventing “temporary” storage chaos.
Trust the spreadsheet, not your memory.
Lock In Your Layout Before Cabinets Ship
With your inventory spreadsheet in hand, it’s time to nail down the station layout before you lock in cabinet orders. Don’t risk a costly redo after the cabinets ship: this step is non-negotiable.
You’ll walk through your kitchen on masking tape, catching collision tests of the work triangle and identifying collision points before any line blocks and orders ship.
- Do a “tape walk-through” on the empty floor. Simulate cooking, turning, and walking to the pass. Catch collision points, then freeze the station footprint before cabinets ship.
- Verify your working triangle. The fridge, from fridge to sink to range, must have unobstructed paths and open countertop clearance. Layout changes after ordering are costly.
- Lock the placement and clearances of fixed anchors: sink, dishwasher, range, and fridge. These dictate where prep and tool staging can safely live.
- Use each zone’s operational requirements—prep near cooking and clean-up near the sink—as your acceptance criteria. This ensures cabinet orders don’t force workflow backtracking.
- Decide storage sizes, like pull-out shelf heights, before cabinet fabrication. This way, reach ergonomics don’t break once cabinets arrive.
Final Thoughts
You’ve got the blueprint, so don’t second-guess yourself now. Trust your measurements, your movement patterns, and those pantry shelves you actually planned for. A well-designed kitchen isn’t magic—it’s just smart decisions made before the sawdust flies.
Sure, you might still grab the wrong pot now and then, but you’ll save yourself from the chaos of stacking spice jars behind the fridge. Your future self will thank you with every seamless meal you cook.