The Best Fluffy Pancakes recipe you will fall in love with. Full of tips and tricks to help you make the best pancakes.


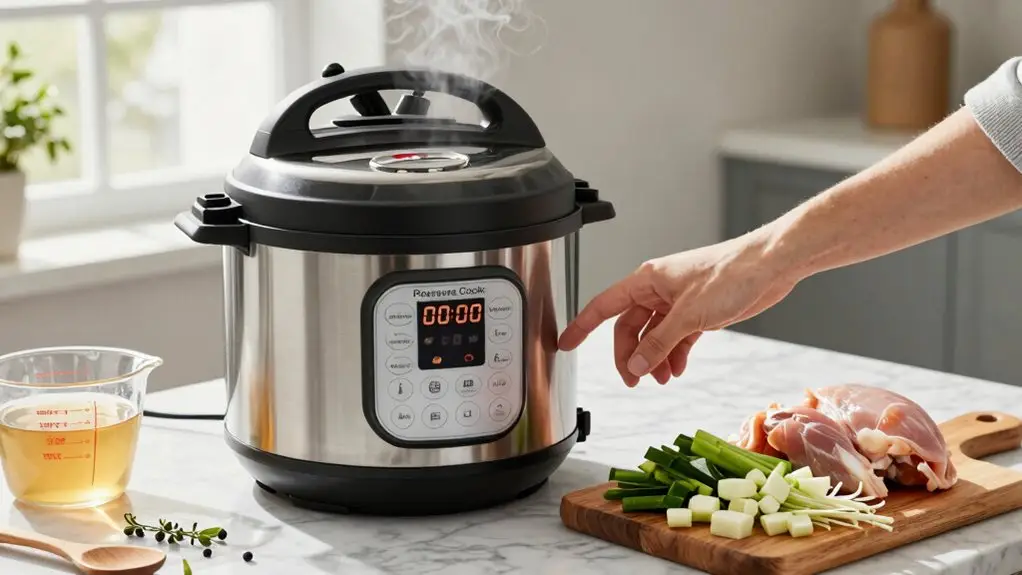
You’ll start by washing the inner pot, lid, and sealing ring, then install that silicone ring snugly so steam can’t escape. Add at least one cup of thin liquid like water or broth, layer your food with longer-cooking items on bottom, and twist the lid until it chimes. Hit Pressure Cook or Manual, set your time, and wait 5–15 minutes while it builds pressure, don’t panic when it says “On” and does nothing at first.
When cooking ends, choose Natural Release for tender meats or Quick Release when you’re hungry now. Master these basics and you’ll soon wonder why you ever stressed about this magical countertop robot.
Unbox and Set Up Your Instant Pot the Right Way
When you first crack open that Instant Pot box, you’ll probably feel a mix of excitement and “what did I get myself into”, totally normal, by the way.
Cracking open that Instant Pot box brings excitement and “what did I get myself into”—totally normal, by the way.
Start by removing all packaging materials and extract those internal parts hiding inside. Don’t forget the small paper insert underneath and the orange warning card, they’ve gotta go. Almost all models include a stainless steel steamer rack that you’ll want to locate among the accessories.
For safety checks, pull that pressure release valve straight up, then pop it back in.
Wash the inner pot, lid, and silicone sealing ring with warm soapy water, and rinse all accessories. Dry everything completely.
Slide that condensation collector cup onto the back, make sure it’s secure.
Align the lid arrows with the open lock symbol, twist clockwise until you hear the chime, and peel that protective film from the button panel.
You’re ready for first use.

Compatible with 6Qt Duo Plus 60, Duo 60, Duo Viva 60, Duo Nova 60, DUO CRISP AF. An Instant Pot verified accessory

✅ 【Perfect Fit for Instant Pot 6QT】 6QT Inner Pot Replacement perfect fit for Instant Pot DUO, LUX, Ultra, Smart, and most 6-quart models (not for Pro Plus/Bella/Cuisinart EPC-1200)

100% food-grade 304 stainless steel cooking pot for clean eating and optimal durability
Master the Essential Instant Pot Buttons Every Beginner Needs
That big shiny panel staring back at you isn’t as complicated as it looks, promise. You’ll use Pressure Cook/Manual most often, it defaults to high pressure, and you can master time adjustment tricks with the +/– buttons.
Don’t forget pressure setting basics: only the Rice button uses low pressure automatically.
Hit Sauté to brown ingredients without the lid; always press Keep Warm/Cancel when switching functions.
Button safety tips matter, never seal the vent during sautéing, a common beginner error.
Program buttons like Soup or Bean/Chili handle defaults for you, but you can override them.
The Adjust button tweaks heat intensity across all modes.
The pre-programmed buttons reduce guesswork when you’re new to pressure cooking and serve as convenient shortcuts for common recipes.
Prep Ingredients for Instant Pot Cooking Without Rookie Mistakes
Before you toss everything in and hope for the best, you’ll need to nail down three basics: getting your liquid amounts right, stacking ingredients in the proper order, and cutting everything to the same size.
Your Instant Pot won’t build pressure without enough thin liquid, think water or broth, not tomato sauce, and you’ll want denser foods like meat sitting at the bottom with quicker-cooking veggies up top. For a 6-quart model, plan on at least 1 cup of thin liquid to ensure proper pressurization.
When you chop those carrots and potatoes into matching pieces, you’re setting yourself up for dinner that doesn’t turn into a mushy disaster or a crunchy disappointment.

[Perfect Fit for Instant Pot] Designed for Instant Pot 5 & 6 quart, Compatible with model: IP DUO50, IP DUO60, IP LUX50, IP LUX50, IP CSG50, IP CSG60, IP LUX60V3, Smart 60, ULTRA 6, LUX 5, DUO60-2. Fit for 6Qt Pioneer Women Lux & VIVA & ULTRA & Smart WIFI & MAX & LUX & DOU SV & DUO PLUS & DUO NOVA & DUO EVO PLUS & DUO

Product Included: You will get 4 pieces of baby bottle warmer replacement gaskets. These sufficient number of seal rings can meet your daily use and replacement needs.

ABOUT THIS - These Replacement Silicone Gasket Seal for Instapot 5/6qt sealing rings fit pressure cooker's Models - IP-DUO60, IP-LUX60, IP-DUO50, IP-LUX50, Smart-60, IP-CSG60, IP-CSG50 and 6qt ultra, gasket rings Fit 5 & 6 QT IP Duo-60, Pro 6Qt, Duo Crisp 6Qt, RIO 6Qt, Nova, Duo Plus, Plus, Max, Lux, Gem, Viva, Smart Wifi 60,for 5/6 quart instant pot
Liquid Requirements
Because the Instant Pot relies on superheated steam rather than bubbling water to cook your food, you don’t need to drown your ingredients like you’d on the stovetop, though plenty of home cooks still do, thanks to outdated advice floating around. Let’s fix that, shall we!
Mastering liquid requirements for steam cooking means understanding your pot size math: 1 cup for 3-quart, 1½ cups for 6-quart, 2 cups for 8-quart, and 2½ cups for 10-quart models. That old “2 cups minimum for everything” rule? Toss it.
Your thin liquid minimum covers water, broth, or juice, but never oil alone. Here’s the kicker: vegetable water release from tomatoes, spinach, or mushrooms counts toward your total. Thick sauces? Thin them out first.
- Use 1 cup minimum for 3-quart pots, scaling up by half-cup increments
- Count naturally watery veggies toward your liquid total
- Thin out thick sauces with water or broth before pressurizing
- Never substitute oil for your required water-based liquid
The Instant Pot changed its official recommendation from 2 cups to 1 cup years ago, yet older manuals still circulate with the outdated guidance, leading many first-time users to produce soggy, diluted results their grandmothers wouldn’t recognize.
Layering Order
Now that you’ve got your liquids sorted, let’s talk about where everything actually goes inside the pot. Mastering your stack sequence makes or breaks a meal, so pay attention to ingredient timing.
Start by pouring 1 to 1.5 cups water into the inner pot base, this creates the steam you’ll need.
Place your longer-cooking foods, like chicken or brown rice, directly on the bottom. They’ll cook through while shorter-cooking items ride above.
Grab your trivet and set it over that base layer. This elevation keeps your stackable containers slightly above the water, preventing scorching/burn error. Elevating containers on the trivet keeps them from completely touching the bottom of the steel insert, which reduces the chance of overcooking and helps boost tenderness and flavor while conserving juices.
Nestle your quicker-cooking sides, maybe vegetables or seafood, into those 6×3 or 6×4 inch pots. You’ll want containers under 4 inches tall to avoid overflow disasters.
Keep your total fill under two-thirds capacity, and you’re golden.
Match cooking times wisely, and you’ll nail one-pot meals without the mushy broccoli regret.
Size Uniformity
While you’ll eventually eyeball portions like a pro, sticking to consistent sizes keeps everything cooking evenly and prevents that awkward moment when your carrots are mush and your potatoes are still crunchy.
Uniform sizing isn’t just about aesthetics, it’s your secret weapon against the dreaded “some done, some raw” dinner disaster. When ingredients share similar dimensions, they surrender to pressure at the same rate, transforming your Pot Fill Lines from mysterious markings into your best friends. Ingredients that expand or foam up, like oats, pasta, rice, and grains, require even more attention to sizing since they can quickly rise and potentially block valves if cut too large or packed too densely.
Watch for Ingredient Measurement traps: dense foods need space to expand, while quick-cookers want snug quarters. Your 6-quart workhorse handles most家庭 meals, but scaling up to 8-quarts means adjusting liquid ratios or risking the dreaded “BURN” notice.
Master these size secrets, and you’ll dodge the rookie blues:
- Chop dense vegetables (potatoes, beets) into 1-inch cubes so they soften alongside quicker-cooking partners
- Slice meats to uniform thickness, uneven chicken breasts mean dry edges and scary-pink centers
- Match pasta shapes to your pot’s capacity; long spaghetti wants halving, while small shapes swim free
- Keep beans, grains, and rice level with the Ingredient Measurement sweet spot, never exceeding two-thirds capacity
Trust the process, adopt the chop, and let consistency be your kitchen compass.
Lock, Seal, and Start Your First Instant Pot Pressure Cook
Getting your Instant Pot ready to pressure cook isn’t rocket science, though it might feel like it the first time you’re staring down all those knobs and rings. You’ll want to run through your safety checks first. Look at those black markings on your lid, they’ll guide you through the alignment process. Match that inverted triangle to your pot’s released triangle, then give it a clockwise twist until it clicks into place.
Installing the sealing ring properly is essential for those first time settings. Work your fingers around the entire rack until that silicone ring sits snug, no gaps, no wiggle room.
If you’re hitting troubleshooting hitches, a little white-out on those arrows helps tremendously.
Twist your venting knob clockwise to sealing, don’t panic when it wobbles, that’s completely normal. When you move the knob to the ceiling position, the slight tilt will drop down and become fairly level, which is exactly what should happen.
Test your floating valve from underneath to confirm it’ll pop up when things heat up.
Double-check that anti-block shield too. These aren’t just cleaning maintenance steps, they’re your insurance policy against kitchen disasters.
Once everything’s verified, you’re golden to select your pressure cook function and finally start that first cook.
What Happens While Your Instant Pot Pressurizes (And How Long to Wait)
Once you’ve hit that start button, there’s a brief pause where not much seems to happen, and that’s totally normal. Your Instant Pot enters the steam buildup timing, which takes 5-15 minutes depending on how much food you’ve loaded inside. During this display “On” phase, you’ll catch the hissing sounds during pressurization as steam releases, then quiets as pressure seals.
Watch for float valve behavior, it’s your visual cue that magic’s happening. The valve lifts and locks into place when fully pressurized, releasing a satisfying single beep. Remember that cooking time differs from total time due to this pressure-up phase plus release time after cooking.
The display “On” then switches to your countdown timer, and cooking officially begins. Don’t panic if you smell plastic initially; that’s just your pot breaking itself in.
- Listen for hissing, then silence, that’s pressure building
- Watch the float valve pop up when sealed tight
- Expect 5 minutes for water tests, longer for full meals
- Wait for the beep before your countdown appears
Choose Natural or Quick Release for Instant Pot Recipes
Once your Instant Pot finishes cooking, you’ve got a big decision to make: let the pressure drop on its own, or speed things up with a manual release.
You’ll want to understand how natural release keeps your food cooking gently while you wait, and why quick release demands some safety smarts to avoid a face full of hot steam. Quick pressure release stops pressure cooking quickly and is recommended for vegetables that should avoid overcooking.
Picking the right method isn’t just about patience, it’s about protecting your dinner (and your eyebrows) while getting the best texture from your meal.
When Pressure Naturally Releases
When the cooking cycle finishes and that cheerful little beep sounds, you’ve got a choice to make, let your Instant Pot do its thing naturally, or jump in and release the pressure yourself.
With natural release, you simply leave the pressure release switch sealed and wait.
Your food keeps cooking while pressure slowly drops, pretty handy for tough meats that need extra time to get tender.
Natural release timing typically runs 10 to 25 minutes, though it can stretch longer depending on what’s inside. For a full natural release, expect 30 to 40 minutes of waiting before the pressure drops completely.
You’ll know it’s done when the float valve indicators drop down, letting you unlatch the lid safely.
- Keep the pressure release switch in Sealed position, no touching needed
- Wait for the float valve to drop before opening the lid
- Let tougher cuts finish cooking gently without drying out
- Use Keep Warm to track your wait time effortlessly
Quick Release Safety Steps
Natural release works great for some dishes, but other times you’re hungry now and can’t wait 20 minutes for dinner. That’s when you’ll hit cancel and go for the quick release, but let’s talk safety first.
Valve positioning matters more than you’d think. You’ll flip that knob to venting, but keep your face, hands, and basically everything you love away from the lid. That steam distance isn’t optional, it’s your burn prevention strategy. We’re talking seriously hot vapor shooting out fast. Never cover the sealing knob or ceiling pin with a cloth or towel during this process, as this can block venting and create a serious safety hazard.
Here’s a pro move for safe timing: try short bursts instead of one long whoosh. Toggle between venting and sealing a few times. It prevents your soup from redecorating your ceiling.
Wait for that pin to drop completely before even thinking about opening the lid. Patience now beats a kitchen disaster later.
Choosing Best Release Method
Because every recipe demands its own exit strategy, you’ll need to pick between natural and quick release like you’re choosing between a slow Sunday morning or a Tuesday night sprint.
Natural release lets pressure drift away over 5-30 minutes, giving you tenderness results that’ll make your brisket fall apart beautifully. The timer benefits here include hands-free waiting while flavors deepen. Your Instant Pot will beep again when pressure is fully gone and it is safe to open the lid.
You’ll want this for foamy foods, hello, foam control with oatmeal and stews.
Quick release demands you flip that valve yourself, blasting out steam in under two minutes.
It’s your go-to for veggies and seafood you don’t want mushy.
- Master foam control with natural release for grains and beans
- Unseal timer benefits by using Keep Warm to track your wait
- Practice safe steam management, hands away from the valve
- Achieve perfect tenderness results on meats every time
Fix 5 Common Instant Pot Problems Beginners Face
Even though your Instant Pot is supposed to make dinner easier, sometimes it feels like the thing’s got a mind of its own. Troubleshooting burnt food starts with adding enough liquid, at least 1-1.5 cups of thin broth, since scorching happens fast with thick sauces. Most recipes take between 10 and 25 minutes to build up pressure, so don’t panic if your pot seems idle at first.
Layer tomato products on top instead, and always deglaze after sautéing.
Preventing sealing failures means checking that valve’s twisted to sealing, not venting. Clean that float valve if it’s sticky, and inspect your sealing ring for cracks or proper seating.
Won’t pressurize? You need that minimum cup of liquid, and don’t overfill past the max line.
Leaking steam? Re-seat the gasket, dry your lid, and yes, make sure you actually put the inner pot back.
For perfect grains, use extra liquid and stay below fill lines.
Dry meats? Switch to fattier cuts, shorten cook times, and always add moisture.
Final Thoughts
You’ve got this! Your Instant Pot isn’t some scary kitchen robot, it’s your new best friend for fast, flavorful meals. Sure, you’ll probably overcook something once (we all did), but that’s how you learn.
Start simple, trust the process, and don’t overthink it. Before you know it, you’ll be pressure cooking like a pro and wondering why you ever waited so long to jump in. Now go make dinner!

PACKAGE CONTENT - 2 x Jigger Valve, 2 x Stainless Steel Anti-Blocking Cover, 2 x Anti-Blocking Bracket, 1 x Exhaust Rod. The pressure Cooker Relief Jigger Valve has a size of 28x38mm/1.1"x1.5" and an inner hole diameter of 10mm/0.4".

Note: All our Pressure Cookers are "UL" approved and follow the Worldwide standards and approvals. According to "UL" standards or any other standards used around the world the capacity of the Pressure Cookers is the Total Volume Capacity of the Cooker with the close lid

Three-in-One Design: With a 6.3QT/6L capacity, the stovetop pressure cooker brings together a soup pot, steaming rack, and pressure mode. Choose manual release, 60kPa, or 100kPa to match your dish, allowing fast, even cooking that helps retain natural taste and key nutrients under high pressure