The Best Fluffy Pancakes recipe you will fall in love with. Full of tips and tricks to help you make the best pancakes.


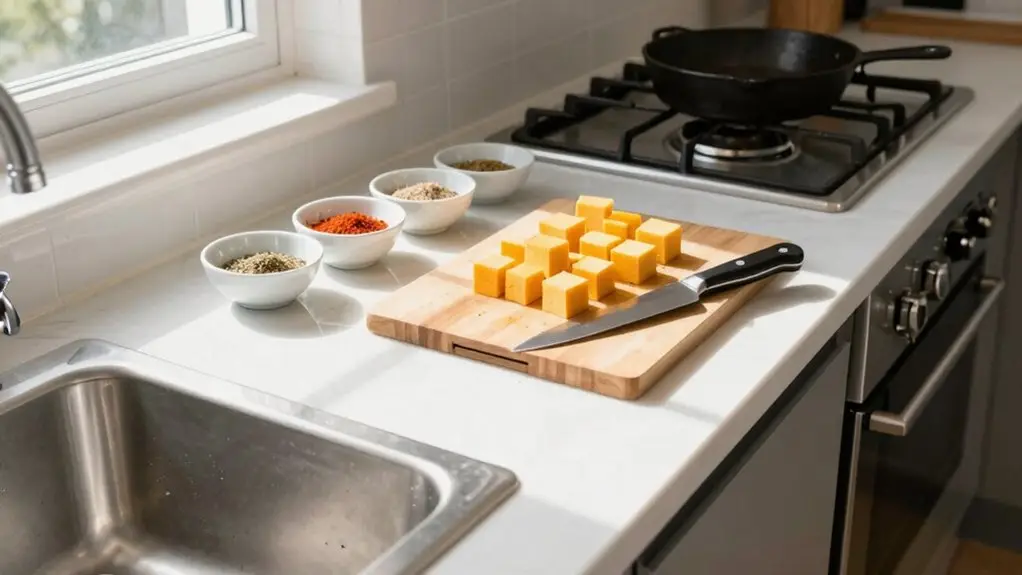
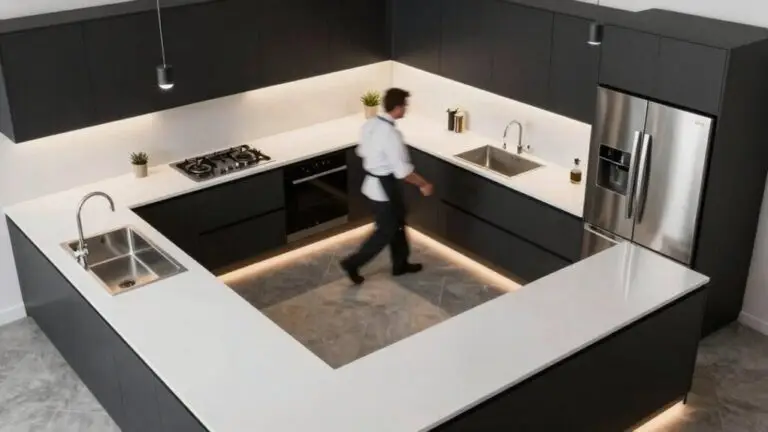
You’ll save hours by locking in your sink and dishwasher first, this anchors your whole workflow. Then map your work triangle between sink, stove, and fridge, keeping each leg between 4 and 9 feet.
Create distinct prep, cooking, clean-up, and putting-away zones so you’re not zigzagging with hot pans. Measure storage heights by your tallest olive oil bottle and use pull-out shelves for daily grab-and-go.
Ready for the rest of the steps to make your kitchen practically every meal feel effortless?
Pick Appliances and Sink First for a Smooth Kitchen Workflow
Because your sink and dishwasher form the busiest pair in the kitchen, start by picking them first, then let everything else fall into place around that core workflow. Once you lock in that duo, you’ve anchored your entire kitchen workflow.
Start with your sink and dishwasher—once that pair’s locked in, your whole kitchen workflow is anchored.
Now you can carve out a dedicated prep zone right nearby, so chopping veggies and rinsing dishes flow seamlessly together.
Don’t forget to carve out ample storage space for pots, pans, and seasonings close to where you’ll cook. No one wants to hunt for a lid mid-stir.
Placing your cooktop on an island? Make sure a heat source is built in, and stash your pots in the nearest lower cabinet. This way, you’re not crossing the room with a hot pan.
Prioritize this pair, and the rest clicks into place. To keep your triangle efficient, each leg connecting your sink, stove, and refrigerator should measure between 4 to 9 feet to avoid wasted steps or cramped movement.
Map Your Working Triangle Around Sink, Stove, and Fridge
Once you’ve locked in your sink and dishwasher, it’s time to map out the rest of your working triangle around the sink, stove, and fridge. This trio forms the heart of your kitchen workflow, keeping daily tasks fluid and efficient.
You’ll wash, cook, and grab ingredients without zigzagging like a pinball.
To nail that efficient kitchen layout, consider these three rules:
- Keep points close. Arrange your sink, stove, and fridge in a compact triangle, so food flows from fridge to prep to cook, then back for cleanup.
- Carve out counter space. Leave at least 18 inches of usable counter on key sides of the sink and stove for landing hot pans and rinsed items mid-transition.
- Prioritize circulation. Ensure your triangle leaves a clear main pathway; opening fridge or oven doors shouldn’t block movement between stations.
Each leg of your triangle should measure between 4 and 9 feet, with the total triangle perimeter ideally falling between 13 and 26 feet to avoid both cramped appliance placement and excessive walking.
Create Four Functional Workflow Zones in Your Layout
Now, you’ll define four distinct workflow zones: prepping, cooking, clean-up, and putting away to turn scattered steps into a seamless loop.
Keep them close together. Your prepping zone should sit right next to the cooking area, so you’re not running back and forth with a knife in hand. Assign storage for each zone’s tools and ingredients. You’ll stop hunting for pots or sponges mid-task. For rarely used items, reserve the hardest-to-reach spots like high shelves and the backs of deep cabinets, keeping prime areas free for the tools you reach for every day.
Prepping Zone Planning Zone Definitions
Before you chop a single onion, you’ll measure each ingredient. Think about where you’ll need to stand. That’s prepping, the first step in your four-zone workflow. Getting the right layout for your kitchen means making this zone a seamless part of your cooking process.
Here’s what you need to take into account:
- Gather everything within arm’s reach—knives, peelers, cutting boards, measuring cups, and prep bowls. No running around mid-recipe.
- Set it close to your cooking zone, usually right next to the rangetop, so you can slide chopped veggies straight into the pan contents without extra steps.
- Keep staging items like sheet pans and towels nearby. They’re your unsung heroes when things heat up.
With the right layout, you’ll feel like a pro from the start. No wasted moves, just easy slicing and dicing. Skipping this setup invites the kind of stop-and-go rhythm where multiple pantry trips can cost you 5–15 minutes per dish before dinner even lands on the table.
Zone Proximity Alignment
You’ve got your prepping zone set, so now it’s time to arrange your entire kitchen around four distinct zones: prepping, cooking, clean-up, and putting away. Align them in a logical flow.
Keep prepping right next to cooking so your cutting board and knife are near the rangetop. No more juggling ingredients across the kitchen.
Place clean-up around the sink and dishwasher, ideally between prepping and cooking. This arrangement lets you rinse and load dishes fast without crossing your work path. That saves you steps and keeps your space tidy.
Set putting-away near the fridge, using the same route your groceries travel.
For the smoothest movement between all four zones, keep your total kitchen triangle perimeter between 13 and 26 feet so the space stays tight enough for convenience without feeling cramped.
Just remember to clear countertops within these zones. Don’t let your well-planned layout create door-swing conflicts or blocked walkways. Your kitchen’s layout should work for you, not against you.
Zone Storage Assignments
- Keep knives, peelers, and cutting boards together by the sink or counter.
- Stash measuring cups and mixing bowls right next to your prep area.
- Hang towels and a trash bowl nearby so cleanup begins instantly.
This simple arrangement makes prep a breeze.
For cooking, group pots, pans, oils, and seasonings around the rangetop.
Don’t forget your most-used spices right by the stove.
The clean-up zone demands scrubbers, sponges, and waste bins under the sink.
The put-away zone near the fridge holds Tupperware, wraps, and markers.
You’ll never walk across the room for a lid again.
Positioning your fridge, sink, and range so that each pair stays 4 to 9 feet apart helps ensure these four zones connect into one seamless workflow.
That’s a truly efficient layout in action.
Design a Prep Zone With Tools Within Arm’s Reach
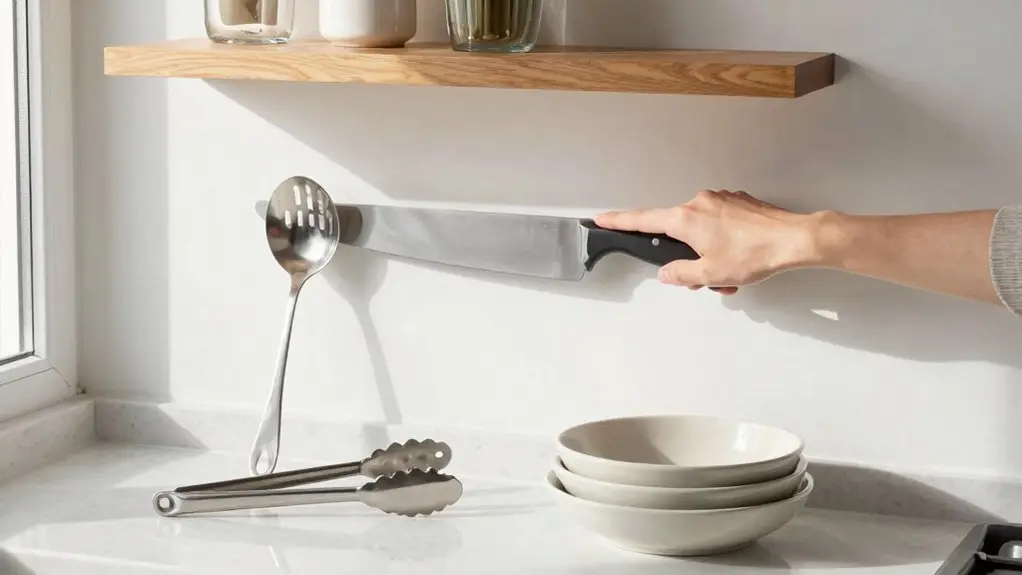
Since you’ll spend most of your cooking time chopping, measuring, and grabbing tools, it’s worth setting up a dedicated prep zone that puts everything you need right at your fingertips. Place it adjacent to the rangetop so you’re not trekking across the kitchen.
A kitchen remodel is your chance to nail this. Anchor your prep area with a large cutting board and a non-slip kitchen towel underneath to keep it from sliding.
Within arm’s reach, stage your highest-frequency items: knives, peeler, can opener, measuring cups, and a towel.
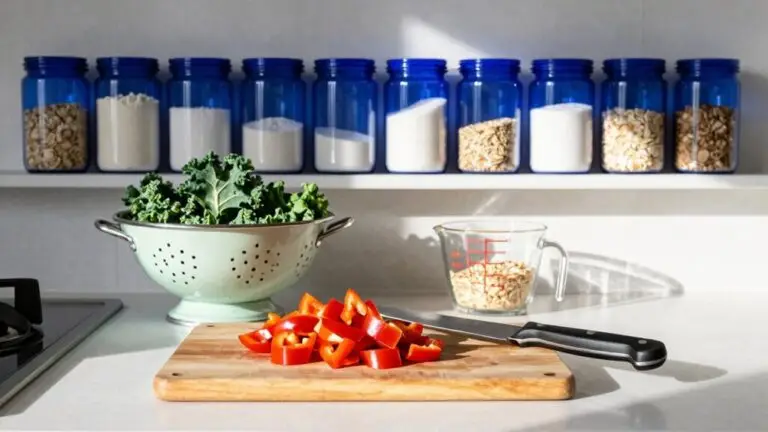
Keep prep support like bowls, a colander, and sheet pans next to the work surface so you flow directly from mise en place to oven or serving.
Mounting magnetic rails for knives and small tools near your prep area frees up counter space without disrupting your workflow.
This setup turns creating an efficient workflow into second nature.
Place Your Cooking Zone Next to Pots, Pans, and Seasonings
Here.
- Cookware within arm’s reach – Pot and pan pull-outs beside the rangetop reduce bending and reaching.
- Seasoning stash – Essential spices and oils, salt, and pepper live at stove level for instant seasoning.
- Utensil canisters – Tongs, spoons, and spatulas stay in the cooking zone, not the prep zone.
This setup lets you focus on what matters. You barely move, so hot pans don’t cross the kitchen, and your flow stays fluid. Keeping tasting spoons and small bowls of lemon juice within arm’s reach also supports the final flavor adjustment window right before pulling the pot off the burner.
Set Up Clean-Up and Putting Away Zones Near Sink and Fridge
Once you’ve got your cooking zone humming, it’s time to tackle the aftermath management.
Position your sink and dishwasher close together, so you can rinse and load in just a few steps, no dragging dirty dishes across your prep area.
Then, set your putting-away zone right next to the fridge.
That’s where you’ll stash leftovers and pantry items, cutting down on counter clutter.
Keep dish soap and scrubbers at the sink, and tuck foil, wrap, and a Sharpie near the fridge.
Use vertical space for towels and bags, freeing up counters for actual kitchen activity.
Now, make sure you’ve got a clear pathway.
When the dishwasher’s open or the fridge door’s swinging, you can still zip back to the stove.
This setup keeps your workflow efficient and your sanity intact.
Mount a paper towel holder under cabinets near the sink to keep your counters clear and your cleanup supplies within easy reach without sacrificing precious workspace.
Measure Storage Heights by Your Tallest Kitchen Item
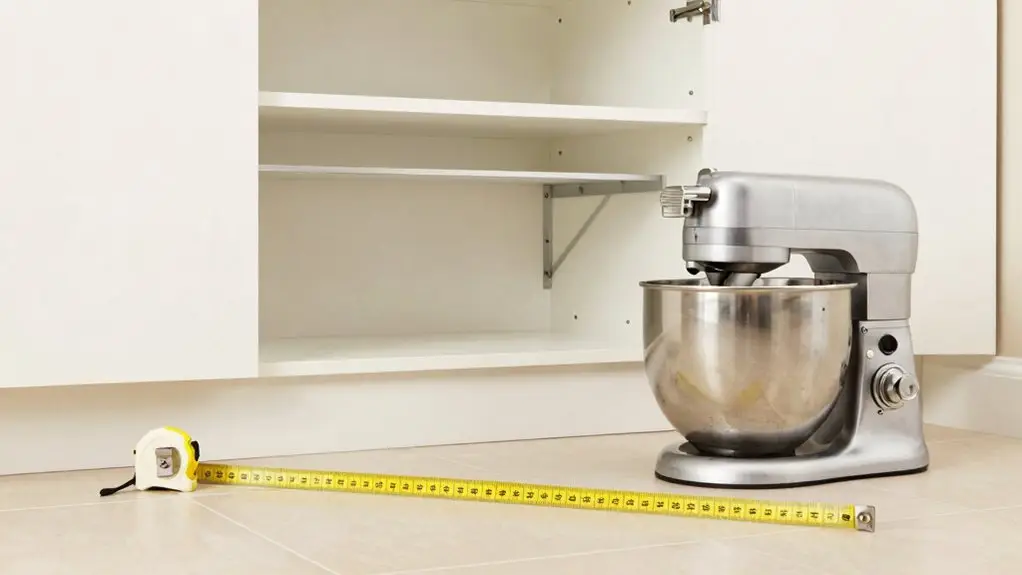
You’ll start by hunting down your tallest kitchen item, say, that oversized bottle of olive oil perched near the back of your pantry.
Before you decide on a pull-out shelf height, measure from the base to the very tip of the cap to make sure it fits snugly without blocking the door or drawer travel.
Then, set your “arm’s shelf inches” so you can grab that oil or seasoning with zero bending, keep everything in prime reach, and avoid a useless gap in your cabinet design.
Store heavier items on lower shelves and reserve the upper space for lighter jars so your vertical storage layout supports both safety and quick access throughout the kitchen.
Finding the Tallest Bottle
Why start with cabinet measurements when the real boss of your storage is that tall olive oil bottle? That premium bottle with its pump top sets the ceiling for your cabinet height—measure its full height, cap included, so you don’t jam it later.
- Measure the full height of your tallest cooking oil bottle (like olive or avocado) from base to pump tip. Real-world use matters for the correct storage.
- Add a small clearance to the opening so you can grab it without the cap scraping the shelf above. Easy access keeps your food prep flowing.
- Check the widest tall item (like a cruet) to confirm depth and side clearance prevent wobbling against cabinet walls. No spills during kitchen design.
Use this bottle’s height only for the cabinet arm’s reach from your prep zone. If it’s way taller than everyday items, plan adjustable shelving or a dedicated pull-out for oils.
Measuring Precise Shelf Height
Now, set that shelf bottom so the tallest item sits at easy arm height, no bending or stretching near the hot rangetop. Verify it with a quick dry fit: place the bottle in, close the door, and confirm you can grab it comfortably next to your cooking zone.
Next-tallest items like oil or condiments tuck in front, well behind or in adjustable sections, preventing countertop clutter. This precise spacing makes your kitchen workflow seamless and efficient.
Arm’shelf Inches for Kitchen Storage
Since you’re measuring storage heights by your tallest kitchen item, that bottle of olive oil becomes your new best friend for determining the perfect arm’shelf height. You don’t want to work hard just to grab a key ingredient. This measurement saves you from unnecessary movement every time you cook.
Here’s how to nail it:
- Tall item first – Set the pull-out shelf height so that the tallest bottle sits right at or below shoulder level, making it a no-reach grab.
- Check clearance – Leave enough room above for lids and spouts. Dry-fit the tallest plus two “almost tallest” items to confirm easy removal.
- Avoid island heat – Store that oil beside the rangetop, not on the island, so your arm’shelf inches stay safe and accessible.
With this approach, your daily workflow becomes effortless.
Choose Pull-Out Shelves for Pantry Items You Access Daily
Before you start ordering pull-out shelves, measure the tallest daily-use bottle you keep in your pantry, like that big oil or vinegar container, so you mention it’s so you can set the shelf height comfortably within arm’s reach. You’ll want that shelf right next to your prep zone.
Before ordering pull-out shelves, measure your tallest daily-use bottle to set shelf height within arm’s reach.
That way, grabbing breakfast or cooking essentials becomes a single, short reach, keeping your countertops pristine and your sanity intact.
Choose pull-outs over fixed shelves for items you dig for daily. They don’t just slide out; they show you everything in back, so no more playing pantry Jenga.
Make certain you receive full-extension slides for that functionality. You’re investing in functionality here.
Use your inventory to spot what you grab most: that jar of peanut butter you eat with a spoon—that’s a daily-use friend.
Reserve the pull-out surface for these high-frequency heroes. Plan clearances for your jars and bagged goods too loose, not so tight your lid gets stuck.
You’re building a shortcut, not a puzzle.
Match Storage Types to Your Actual Gear (Not a Spreadsheet)
Once you’ve sized up your daily-use bottles and gear, you’re ready to match storage types to what you actually own—not some generic list you found online.
Pull out that 9×13 baking dish and that tall oil bottle, then decide.
For real flow, make sure your storage fits your gear, not the other way around.
- Drawer organizers belong near prep zones for small tools you grab every shift. No more digging.
- Pull-out shelves work magic for tall bottles and pantry staples you access daily. They reduce reaching and backtracking fast.
- Cabinets are best for bulky cookware you use less often, like roasting pans. Store these low by the rangetop.
This approach balances functionality and aesthetic, making your kitchen spaces feel custom—not copied from a spreadsheet.
You’ll grab what you need without a second trip.
Reduce Traffic by Keeping Walkways Clear and Clutter Hidden
From the sink to the stove to the fridge, that main path through your kitchen needs to stay open, even with every door and drawer flung wide. You don’t want to step around a swinging oven door while holding a hot pot.
Aim for a 48-inch aisle width so two people can pass without bumping.
Avoid placing your kitchen island directly opposite the fridge or stove, which creates bottlenecks.
Designate a drop zone near the entrance for coats and mail, so counters stay clear.
During parties, steer guests toward the island or living area, not the work triangle.
Contact us if you need help rethinking your layout. Use your kitchen smarter, not harder.
Final Thoughts
So, you’ve got the blueprint for a kitchen that actually works with you, not against you. But don’t stress about making every step perfect right away. It’s your space, not a showroom. Start with one zone, tweak it until it feels right, and let the rest grow from there.
Before you know it, you’ll be breezing from sink to stove like a pro. And less hunting for that garlic press means more time to actually enjoy your cooking.