The Best Fluffy Pancakes recipe you will fall in love with. Full of tips and tricks to help you make the best pancakes.


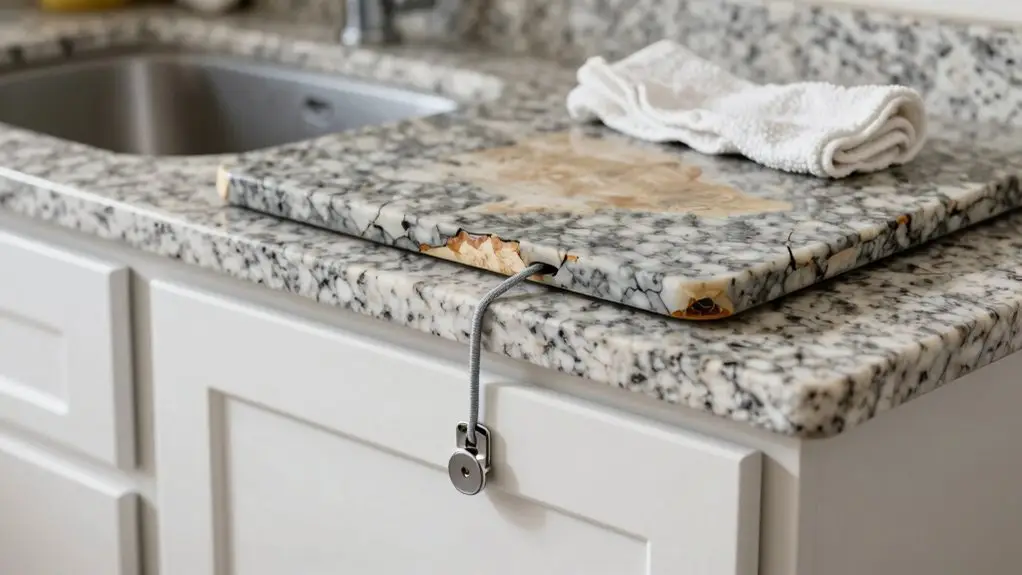
You don’t need a full renovation to fix a frustrating kitchen. Start with the three biggest annoyances that slow you down every day. Upgrade dim under-cabinet lights with high-CRI LED strips and lubricate sticky drawers for instant relief.
Then organize your counters into prep, cook, and clean zones, keeping only daily-use items within reach. Repair sagging cabinet interiors before painting doors, then swap worn handles for a fresh look. Tackle one small project this weekend, and you’ll see real progress that makes you want to keep going.
Fix the Three Most Annoying Kitchen Problems in Under an Hour
Before you even think about tools or trips to the store, start with a quick audit. Just grab a notepad and jot down your kitchen’s top three daily friction points. That’s your real blueprint for a kitchen make.
Start with a quick kitchen audit. Your biggest daily friction points are your real blueprint.
Maybe it’s cluttered counters or dim lighting killing your vibe. Don’t tackle everything at once. Focus on the biggest pain in the neck first: your workflow.
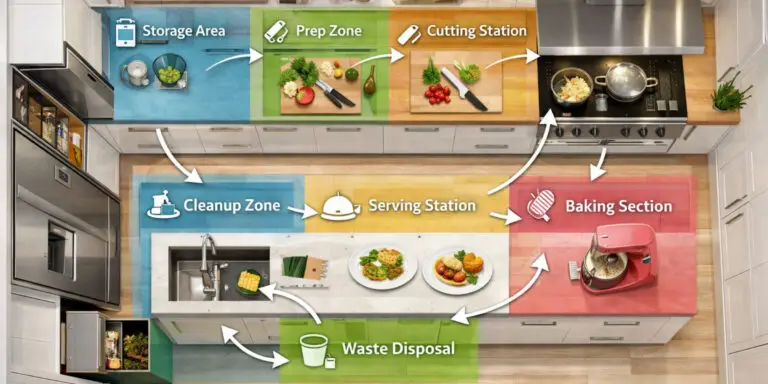
Keep your knives, cutting boards, and mixing bowls right in the prep zone— that’s between the sink and stove. Oils and spices belong by the stove.
For storage woes, edit your counter space ruthlessly. Only daily-use items stay out.
Then, add cheap cabinet organization like drawer dividers or pull-outs. They’re under $500 total and reclaim lost space. Mounting magnetic rails for knives along the sides of your prep station keeps small tools off the counter without blocking your left-to-right workflow.
Finally, fix that dark corner with under-cabinet task lighting. It’s safer and makes your kitchen feel cleaner instantly.
Upgrade Under-Cabinet Lighting and Fix Sticky Drawers First
You’ll instantly boost your kitchen’s usability by swapping those dim under-cabinet lights for an LED strip conversion. It brightens your prep area without breaking the bank.
Don’t overlook fixing sticky drawers first, since a simple drawer glide replacement eliminates that daily frustration and keeps your workflow effortless. Tackle these two upgrades together, and you’ll make your counters more functional at night while cutting down on clutter that builds up near your chopping zones. When selecting LED strips, look for options with a CRI rating of 90 or above to ensure accurate color rendering on your countertops and food prep surfaces.
LED Strip Conversion
Since sticky drawers can make even the best lighting feel pointless, you’ll want to tackle that friction first. Clean out any debris, adjust misaligned slides, and lubricate them so they glide like new.
Now, let’s talk about your kitchen lighting. Poor lighting can turn your prep space into a dim, shadowy hazard, but an under-cabinet LED conversion offers better lighting without tearing out cabinets.
You’ll pick a neutral color temperature, like 2700K to 4000K, to see your ingredients clearly.
Positioning strips directly under the cabinets guarantees light hits your counters, not the floor.
Outlets positioned near blending, mixing, and boiling surfaces keep cords from blocking your task lighting coverage and creating unnecessary hazards along your countertop.
This inexpensive upgrade—typically $200 to $800 installed—helps you improve your kitchen without a full renovation.
You’ll chop, mix, and wipe with confidence, all while saving your budget for other fixes.
Drawer Glide Replacement
Start by yanking out the worst offender: that drawer that sticks halfway and makes you want to slam it shut. Don’t just force it; do some quick prep work. Check for loose screws, swollen tracks, or debris on the glide rails.
It’s often a simple fix, but if the slides are worn, a drawer glide replacement changes everything.
With full-extension ball-bearing slides, your pots and pans slide completely out, making your kitchen feel instantly more functional.
You’ll improve access to everything, and it’s a cheap way to build a better kitchen that’s easier to use.
Pair this with upgraded under-cabinet lighting so you actually see what’s inside each kitchen cabinet drawer.
It’s a small swap that delivers big satisfaction: no more battles with your cookware.
Once your drawers move freely, add adjustable drawer dividers inside each one to keep utensils and tools in designated spots so the improved access doesn’t become an invitation for new clutter.
Organize Your Kitchen Into Prep, Cook, and Clean Zones
Before you tackle anything else, think about how you actually move through your kitchen when you’re cooking. Set up three clear zones: Prep, Cook, and Clean. Your main prep space lives between the sink and stove—keep it clear so you feel more efficient.
Add a simple drop zone near the fridge for groceries and keys, stopping clutter from invading your work areas.
In your cabinets without open shelves, organize by zone inside your Cabinet Interiors. Store heavy cookware low, and group baking supplies separately. Use drawer dividers for utensils.
Near the stove, stash oils, salt, pepper, and potholders. By the sink, keep soap, dishwasher tabs, and cleaning cloths.
A lazy Susan for corner cabinets helps you access hard-to-reach items without digging through everything stored behind them.
You’ll move less and cook faster: no full renovation needed.
Clear the Counters Without Losing Storage
To clear your counters without losing storage, start by ruthlessly editing what’s out in the open. Keep only daily-use items, like that coffee maker; stash the toaster in a cabinet.
Designate a simple “drop-in” zone near the stove for oils and spices. It’ll shrink clutter fast. A small, controlled landing spot for mail or keys prevents junk zones from growing.
Without cabinet organization, you reduce wasted steps. So invest in bins or drawer dividers for a better storage setup. These small changes make a kitchen feel efficient without losing function—you’ll actually find what you need.
A kitchen update doesn’t require gutting everything; just clear counters and improve what’s inside to maintain that breathing room. For cooking tools specifically, store them in the drawer nearest to the stove so they’re immediately accessible when you need them most.
Repair Cabinet Interiors Before Painting the Doors
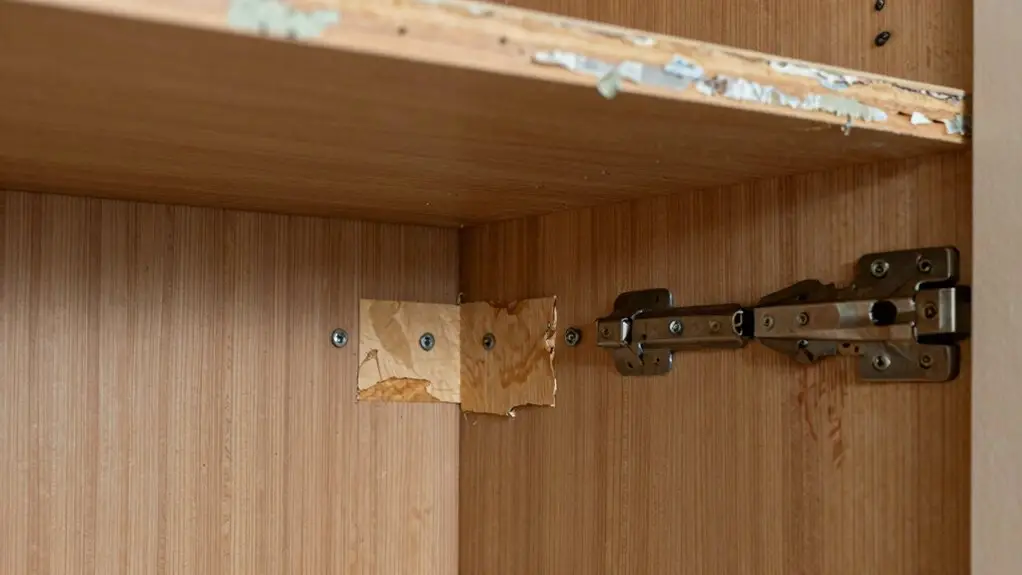
While it’s tempting to dive straight into painting those cabinet doors, hold off.
The real magic happens inside first. Take time to repair cabinet interiors so everything functions seamlessly.
Without cabinet organization, it doesn’t just reduce wasted steps every time you grab a pot or pan.
Without cabinet organization, you’re wasting steps every time you grab a pot or pan.
Fix wobbling shelves, sticky drawers, and sagging bottoms before they ruin your flow.
Then add smart storage upgrades like pull-out bins or lid organizers.
Adding shelf risers or extra shelves can split unused vertical gaps and effectively double your usable storage layers without touching a single cabinet door.
This approach feels better than a fresh paint job over broken parts.
You’ll make cooking simpler, not merely prettier.
Prioritize interiors now, and you’ll end up with a kitchen that works hard for you, all without replacing a single cabinet.
Replace Worn Handles and Hinges for a Fresh Look
After you’ve poured time into fixing what’s inside your cabinets, it’s now time for the fun part: the outside. Without a full kitchen remodeling, simply replace worn handles and hinges to instantly modernize your space.
It’s one of the fastest, budget-friendly updates—often under a few hundred bucks.
Match hardware finishes like brushed nickel or matte black to your faucet and lighting for a cohesive look. If your older cabinets have sagging doors, swapping hinges isn’t just cosmetic; it improves everyday functionality.
Don’t forget to coordinate with Appliance Repair for a seamless handle-to-appliance vibe.
It’s a better move than replacing everything, giving tired cabinets a fresh, intentional upgrade without the mess of a full remodel. Pairing updated hardware with light cabinet colors like warm white or soft greige can further reduce visual clutter and make your kitchen feel noticeably more open and cohesive.
Add Open Shelving, Pull-Outs, and Racks for More Storage
You’ll instantly cut counter clutter by swapping upper cabinet doors for open shelving, keeping your most-used mugs and dishes right at your fingertips.
Then, slide in pull-out organizers for your pots and spices, so you’re not digging through dark cabinets every time you cook.
These simple tweaks make your kitchen feel bigger and more efficient, without the hassle of a full renovation.
For knives specifically, a magnetic wall-mounted bar replaces a bulky countertop block and frees up valuable drawer and counter space at the same time.
Open Shelving Benefits
Because open shelving keeps your go-to items right where you see them, it cuts down on those annoying extra trips digging through cabinets. This organization reduces wasted steps, so you grab that olive oil or spice in seconds. You’ll love how frequently used necessities stay front and center, while your less-loved everyday items tuck away behind doors.
A single unit still fits your existing layout, meaning you achieve this upgrade without a full remodel. Just go step by step: Start by clearing one shelf area and only expose items you actually use daily. Pair it with a small mug or utensil rack to maximize vertical space and keep your counters clutter-free.
Your workflow zones, like oils near the stove or coffee fixings nearby, become effortless to access, saving you time and frustration. You can also add shallow shelves for jars and spices along open wall space, using your ingredients as functional décor while keeping them within arm’s reach of your cooking zone.
Pull-Out Organizers Setup
Pull-out organizers setup is your ticket to opening hidden storage in a small kitchen. They transform awkward corners into accessible spots for snacks or tall pantry items, no more digging. Without a full remodel, you can install pull-outs in existing cabinets instead of letting that space go to waste.
Add open shelving for daily stuff like mugs and spices, keeping it near your prep zone. Then, tackle friction points: a pull-out trash bin near the sink makes cooking feel easier, not like a game of fetch.
Don’t forget vertical racks for lids and baking sheets, they stop the dreaded stacking avalanche. Map your kitchen needs by zone first, then add organizers where you lose time. You’ll gain usable space without the hassle, and your kitchen will actually work for you.
Refresh Cabinets With Paint Instead of a Full Remodel
If your cabinets are still sturdy and functional—hinges work, frames are level, no water damage—you can skip the costly remodel and just give them a fresh coat of paint instead. You’ll make the whole kitchen feel better without a full demolition, and it’ll cost far less, typically $800–$1,200 versus thousands for refacing.
Start by identifying your goal: repaint or refinish, based on your cabinets’ material. A phased approach works well; paint first, then swap out hardware for modern handles to create a noticeably newer style.
Don’t stop at looks, though. Add simple organizers like shelf risers or pull-out bins to improve workflow. Painted cabinets alone won’t fix clutter, but combining fresh color with smart storage gives you a functional, refreshed kitchen without the full remodel expense.
Do One Small Project This Weekend: See Real Progress
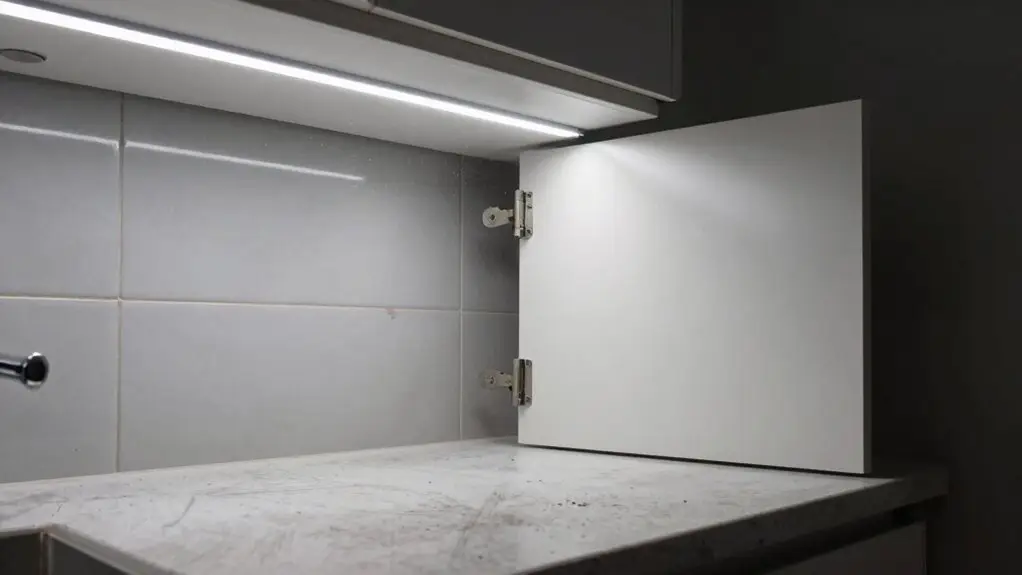
Instead of overhauling your entire kitchen, you can tackle one small project this weekend and feel real progress by Monday. That’s the beauty of a focused change: it transforms how your kitchen feels without a huge commitment.
- Fix that daily “friction” spot like dim lighting near the stove, so your kitchen that feels annoying becomes your kitchen that feels effortless.
- Do a 1-zone reset for your Prep or Cooking Zone: move oils, spices, and cutting boards within arm’s reach so you cook without feeling frustrated.
- Add a low-cost storage hack like shelf risers or drawer dividers, which give you room to breathe and help you save money on bigger fixes later.
- Remove duplicates and unused items so your nightly reset takes minutes, not hours. That’s your first step toward a calmer space.
Final Thoughts
So you’ve fixed the sticky drawers, brightened your countertops, and organized your zones—all without gutting the whole kitchen. Feels good, right? Those small upgrades add up fast. Give yourself a pat on the back.
Now your space actually works for you. Remember, you don’t need a full renovation to make a big difference. Tackle one more project next weekend, and you’ll keep that momentum rolling.
Your kitchen’s already happier, and you should be too.