The Best Fluffy Pancakes recipe you will fall in love with. Full of tips and tricks to help you make the best pancakes.


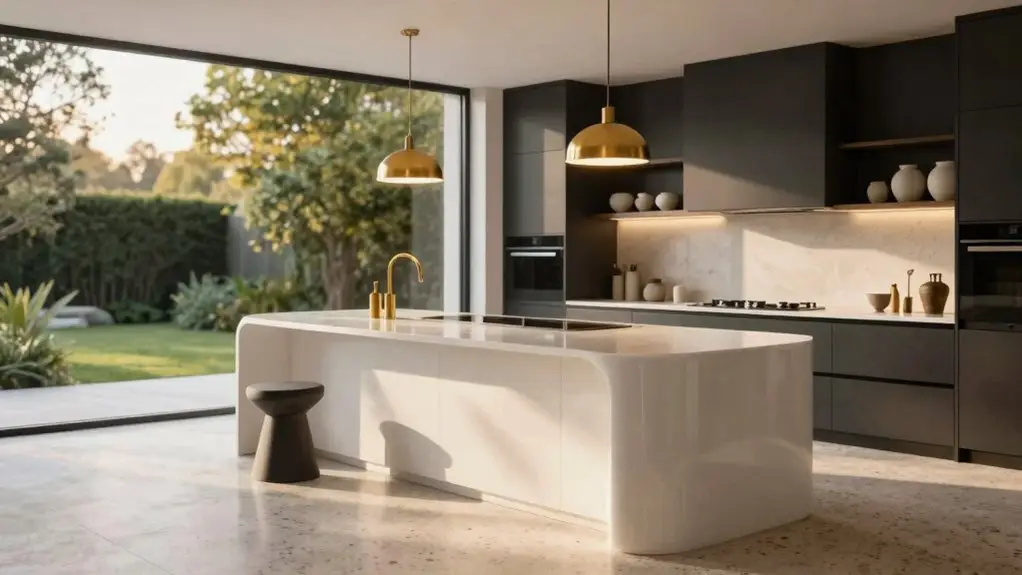
A U-shaped kitchen wraps three walls of cabinets and countertops around you like a horseshoe, creating what designers call a “cooking bubble” where everything sits within arm’s reach. You’ve got continuous workspace and a tight work triangle connecting your stove, sink, and fridge, which cuts down your steps and keeps traffic out of your way.
It’s trending because it squeezes maximum efficiency into almost any footprint, whether you’re working with a cozy nook or a spacious room. The layout’s flexibility also means you can go closed, open, or semi-open, and even add an island if you’ve got the clearance.
Stick around, and you’ll pick up practical tips on aisle widths, appliance placement, and storage tricks that make this classic layout work even harder for you.
What Exactly Is a U Kitchen?
Picture three walls hugging you like a cozy kitchen nook, that’s your U kitchen right there. You’ve got cabinets and countertops wrapping around you on three sides, with one open end letting you step right in. It’s like a horseshoe of functionality, and you’re standing in the sweet spot.
Your cabinet organization shines here because you’ve got three walls to play with. You’re zoning your appliances smartly—fridge on one leg, stove on another, sink anchoring the base. That countertop continuity means you can slide your chopping board from prep zone to cook space without breaking stride. This layout creates an ideal work triangle connecting your refrigerator, sink, and range for maximum efficiency.
You’re planning prep zones that actually make sense, with everything within arm’s reach. No more marathon laps around an island. It’s compact, it’s clever, and you’re cooking without the chaos.
Is a U Kitchen Right for Your Space?
Before you commit to a U kitchen, you’ll need to check if your space can handle the layout’s demands: think aisle widths, door placements, and whether you’re working with a cozy nook or a sprawling room.
You’re also weighing how easily you’ll move between the sink, stove, and fridge, because nobody wants to play kitchen Twister while cooking dinner.
This layout supports a functional work triangle that keeps your key appliances within easy reach, so you can cook efficiently without unnecessary steps.
Luckily, you’ve got flexibility on your side.
From adding an island for extra seating to opening up walls for that airy, open-concept vibe, there are plenty of options to enhance your kitchen design.
Kitchen Size Requirements
If you’ve been dreaming about a U-shaped kitchen, you’re probably wondering whether your space can actually handle all that glorious counter space and storage.
You’ll need at least 100 square feet for a classic layout, with 42 to 48 inches between facing walls for smaller versions. That island clearance you’re picturing? You’ll want room width of at least 14 feet to pull it off comfortably.
Measure your space twice. Nothing kills the vibe like cramped appliance access.
Aim for 7.5 feet total width so you’re not bumping elbows constantly.
Even if your kitchen is more modest, a U-shaped layout can work well if you involve a design team to confirm suitability for your specific dimensions. Keep ergonomic spacing in mind; 54 to 60 inches lets multiple cooks coexist peacefully. Prioritize prep reachability by placing everything within easy arm’s reach. Don’t force an island where it won’t fit. Your shins will thank you later.
Workflow Efficiency Considerations
You’ve nailed down the square footage and cleared enough space for that island dream—nice work. Now let’s talk about how you’ll actually move through this kitchen without feeling like you’re running a marathon in your own home. Your ergonomic movement planning matters here, big time.
The U-shape naturally creates that classic work triangle, connecting your fridge, stove, and sink within easy reach—usually about four to nine feet apart. Smart appliance placement strategy puts your sink on the middle wall, with stove and fridge on opposite sides, cutting unnecessary steps by up to 30%. This configuration ensures your refrigerator placement near the kitchen’s entry point simplifies grocery unloading when you’re hauling in bags.
You’ll glide between washing, prepping, and cooking without dodging family members or doubling back. Three walls of continuous countertop mean everything’s right where you need it, keeping you productive and maybe even enjoying the process.
Layout Flexibility Options
Whether you’re squeezing into a cozy apartment or sprawling across a suburban great room, the U kitchen bends to fit your life.
You’ll find cabinet customization and drawer pullouts transform awkward corners into goldmines. Lazy Susan solutions bring the back of corner cabinets to you, eliminating wasted storage space.
Tight on space? You still get that seamless work triangle.
Got breathing room? Island placement or peninsula extensions give you gathering spots without killing flow.
Corner solutions save your sanity, and smart appliance alignment keeps everything within arm’s reach.
Use open shelf zoning to break up heavy cabinetry visually.
Add lighting placement that actually helps you chop onions without crying.
Slide in peninsula extensions for instant breakfast bars.
Tuck drawer pullouts into every awkward nook you’ve got.
Pick island placement that doesn’t block your fridge door swing.
How U Kitchens Beat Other Layouts on Efficiency
You’ll notice how a U kitchen wraps around you like a hug, keeping your sink, stove, and fridge within arm’s reach so you’re not running laps during dinner rush.
This compact footprint squeezes every inch of efficiency from your space, turning even modest kitchens into powerhouse workstations.
Once you experience that streamlined, circular flow between tasks, you’ll wonder why anyone puts up with the back-and-forth chaos of other layouts. The perfect kitchen law ensures this triangle positioning delivers minimum movement and maximum efficiency during cooking.
The Golden Triangle
In a U-shaped kitchen, you’re perfectly positioned. The layout places each point on separate walls, creating an ideal loop that linear kitchens just can’t match. Here’s what makes it click:
- Each leg spans 4-9 feet, keeping you close but never cramped.
- Your total perimeter lands between 12-26 feet for balanced reach.
- Counter Clearance Planning lets you pivot seamlessly between stations.
- Work Triangle Rules eliminate backtracking during meal prep.
- Even solo cooking flows with direct, energy-saving paths.
You’ll save steps, time, and your sanity. This design principle, first developed in the 1940s, remains the golden rule for kitchen efficiency today.
Compact Footprint Design
A kitchen’s footprint can make or break your daily routine, and U-shaped designs know exactly how to squeeze every last inch out of tight spaces. You’ll find three walls packed with continuous countertops and cabinets, giving you more storage than you’d expect from such a compact area.
Here’s where U kitchens really shine: corner space solutions. Those awkward dead zones become gold mines with Lazy Susans and pull-out shelves. You won’t waste a single inch.
Vertical storage hacks take things higher, literally. Floor-to-ceiling cabinets and stacked wall units draw the eye upward while stashing your stuff out of the way. Even narrow galley-style adaptations work with deeper base cabinets on one side. Maintaining 4–7 feet between each workstation ensures the space never feels cramped while preserving that efficient wraparound flow.
You’re essentially wrapping efficiency around yourself. Keeping traffic out and functionality in is like wearing a well-tailored suit—everything fits exactly where it should.
Streamlined Task Flow
Because your kitchen should work as hard as you do, U-shaped designs deliver a workflow that feels almost telepathic. You’re cutting cooking time by up to 30% when your sink, stove, and fridge sit within four to nine feet of each other. No more marathon walks between stations. The middle wall sink placement pairs with stove and fridge on opposite sides to create smooth workflow paths that reduce crossing paths during busy meal prep times.
Ergonomic height planning keeps your countertops at comfortable levels so you’re not hunching over dough or reaching for spices. Appliance staging tips help you position your heaviest items where you’ll use them most, saving your back and your sanity.
You’ll create distinct cooking, cleaning, and prep zones without anyone bumping elbows. Multiple people can work the space simultaneously when you keep that center aisle six to eight feet wide. Abundant counter space on three sides means you’re never hunting for room to chop.
You get efficiency without the chaos.
How Wide Should Your U Kitchen Aisle Be?

Figuring out how much breathing room you’ll need between your U-shaped kitchen’s cabinets and countertops can make or break your daily cooking experience. You’ll want to nail your aisle space from the start because squeezing past open dishwasher doors gets old fast.
For solo cooking, you need 42 inches minimum. Bring a partner into the mix? Bump that to 48 inches or more for multiple cooks. When you can’t maintain that minimum spacing, rollaway islands offer workspace without sacrificing your walkway clearance.
Don’t forget door clearance—you’ll hate life when your fridge and oven doors collide mid-dinner rush.
In compact U-shapes, 42-48 inches between facing aisles keeps you efficient without feeling cramped. Scale up to 54-60 inches in medium layouts.
Dreaming bigger? Six feet opens room for an island.
You deserve to swivel without hip-checking cabinetry, right?
Where to Put Your Sink, Stove, and Fridge
Your U kitchen’s three walls give you a natural head start for nailing the classic work triangle, so you’ll want to park each heavy hitter on its own side for maximum efficiency. Stick the sink on one wall, the stove on another, and let the fridge hold down the third. This keeps your legs between four and nine feet apart, which means less running around and more actual cooking.
Don’t forget to leave yourself some breathing room on that center wall. Cramming appliances too close together turns your kitchen dance into an awkward shuffle, and nobody wants to play bumper cars with a hot pan.
Most designers recommend keeping your stove, sink, and refrigerator 4 to 8 feet apart for optimal workflow.
The Work Triangle
When you step into your kitchen, you’re probably not thinking about invisible geometry, but you should be.
The work triangle connects your refrigerator, sink, and stove with imaginary lines that will save your sanity.
You’re looking for sides between 4-9 feet each, totaling 13-26 feet around.
That’s your sweet spot for efficiency.
Here’s what makes this triangle work for you:
- Smart storage keeps necessities within arm’s reach of each point.
- Vertical drawers maximize tight spaces between appliances.
- Traffic control means nobody crashes into you mid-sauté.
- Appliance zones group your tools where you’ll actually use them.
You’ll prep, cook, and clean without running a marathon.
Position your refrigerator near the entrance for easy grocery unloading.
Drop your sink between the fridge and stove.
You’re creating a hub that actually flows.
In a U-shaped kitchen, you’ll typically place your refrigerator and sink on one side of the U with the stove on the opposite side, creating a natural workflow that keeps everything within easy reach.
Center Wall Placement
Where do you actually put the big three so your kitchen doesn’t feel like an obstacle course? You’ve got to nail your work triangle first. In a U-shaped kitchen, you’re giving each major appliance its own wall—sink on one side, fridge on the other, and stove dead center on that back wall. This setup keeps you moving easily without bumping into yourself.
Smart appliance spacing saves your sanity. You’ll want your dishwasher right next to that sink, and don’t stick your stove next to the fridge, as heat and cold don’t mix well. Give yourself landing space beside everything, too. If one of your U-shaped walls extends past its parallel wall, you can place the refrigerator at the end of that longer wall to maintain close proximity between your sink and stove.
When you center your range hood properly over the cooktop instead of obsessing over perfect symmetry, you’re cooking with gas. Literally.
Ergonomic Spacing Rules
Getting those appliances on their right walls is only half the battle; you’ve still got to figure out how far apart they actually need to be. You’re aiming for that sweet spot where ergonomic clearance meets real-life cooking, not a gym workout between your fridge and stove.
Keep your triangle perimeter between 13–26 feet for peak movement efficiency. Allow 4–9 feet between each appliance—no cramming, no marathon walking. Give yourself 24 inches of sink side access for dirty dishes and prep work. Position your stove away from doorways for traffic safety while you cook. Plan ventilation near external walls to keep fumes flowing out. Remember that no obstacles should block your path between the three main points, including full-height cupboards or tables that disrupt your natural workflow.
Workstation spacing isn’t rocket science, but it does make or break your counter workflow. Get your appliance distance right, and you’ll glide through dinner prep like a pro.
Can You Add an Island Without Losing the Flow?
Adding an island to your U-shaped kitchen sounds like a dream: extra prep space, a spot for friends to hang out, maybe even a wine fridge. However, you’ve probably wondered if it’ll turn your seamlessly running kitchen into an obstacle course.
You’re right to pause and think it through. Island placement rules matter here. Position your island parallel to the longest sides for symmetry, or tuck it outside the U on the open side so seating doesn’t wreck your work triangle.
Walkways planning keeps you sane—maintain 42-48 inches between aisles so you’re not doing the sideways shuffle. The 3–4 feet of clearance between island and countertops ensures effortless movement and proper appliance access.
In tighter spaces, compact island options save the day. Try mobile cart strategies with casters for flexibility, or butcher block carts you roll away when company’s over.
Stool clearance tips help too—pick stools that tuck completely under. Storage expansion ideas like pull-out drawers maximize every inch without cramping your style.
Smart Storage Ideas for Small U Kitchens

You’ve figured out how to squeeze an island into your U-shaped kitchen without bumping your elbows every time you flip a pancake. But now you’re staring at your cabinets wondering where on earth the stand mixer is supposed to live.
It’s time to get clever with every inch you’ve got. You’ll want to maximize corner storage since those awkward angles swallow pots whole. Install lazy Susans or pull-out sliding racks so nothing gets lost in the abyss.
Run upper cabinets straight to the ceiling—you’re wasting precious real estate otherwise. Stick magnetic spice racks on empty wall spaces and hang mugs under cabinets. Don’t forget clear container labeling; you’ll spot your ingredients instantly instead of playing pantry detective at 6 AM. For those tall ceiling gaps, store your holiday serveware and special occasion gadgets you barely touch.
- Run cabinets to the ceiling for bonus storage
- Add lazy Susans to corner cabinets
- Mount hooks under cabinets for mugs
- Use see-through bins with labels for everything
- Stick magnetic racks on any metal surface
Open, Closed, or Semi-Open: Which Layout Works Best?
Now that you’ve squeezed every inch out of your cabinets, it’s time to step back and look at the bigger picture: literally. Lighting and sightlines matter just as much as storage when you’re choosing between open, closed, or semi-open layouts.
Closed U-shapes wrap three walls around you, packing in maximum workspace and creating that classic cooking bubble. You’ll find yourself bouncing between stove, sink, and fridge like a pro. The three-sided arrangement naturally supports the classic kitchen work triangle, keeping everything within easy reach.
But hey, sometimes you want to chat with guests while chopping onions, right?
Open layouts ditch one wall entirely, improving traffic flow planning and making your kitchen feel bigger than it actually is. Multiple cooks can dodge each other without the usual elbow-nudging dance.
Semi-open designs split the difference. You keep most of your storage while gaining a peninsula for casual mornings. Traffic flows seamlessly, and you won’t feel boxed in.
Common U Kitchen Remodeling Mistakes to Avoid
Even if you’ve measured every cabinet twice and picked out the perfect backsplash tile, one wrong move can turn your dream kitchen into a money pit you’ll regret for years.
- Skipping the Appliance Clearances Check leaves you with fridges that stick out awkwardly or ovens you can’t open fully.
- Neglecting Cabinet Depth Planning creates narrow walkways, cramped corners, and doors that collide when you’re cooking.
- Ignoring your work triangle means you’ll exhaust yourself just reaching the sink from the stove.
- Guessing your budget without a detailed breakdown guarantees nasty surprises when hidden costs pop up. A 10–20% contingency should be added to cover unexpected problems like hidden water damage or electrical upgrades.
- Choosing pretty white marble countertops that stain instantly means you’ll spend more scrubbing than enjoying weekend brunch.
You don’t need perfection, just smart planning. Your future self, cooking Sunday pancakes without bumping into everything, will definitely thank you.
Quick Upgrades That Transform Your U Kitchen
With a few smart swaps and a free weekend, you can wake up a tired U-shaped kitchen without tearing out a single cabinet.
Start your Budget Hardware Refresh by unscrewing dated knobs and installing matte black or brushed gold handles. You’ll love how Timeless Finish Options like antique brass instantly enhance the space. For a more open, curated look, consider removing upper cabinet doors to convert them to open shelving and display your favorite dishes or glassware.
Next, tackle a Peel And Stick Backsplash—grab a utility knife, measure twice, and press those tiles into place for major wow factor.
DON’T FORGET CABINET LIGHTING LAYERS. Stick battery-powered strips under cabinets for that Under Cabinet LED Glow.
Then, add dimmable pendants overhead. Feeling bold? Try a Countertop Paint Makeover on your island for contrast.
These quick wins deliver serious transformation without the renovation headaches.
Final Thoughts
You’ve explored the ins and outs of U kitchens, from tight corners to smart storage tricks. Now you’re ready to decide if this layout fits your life.
Whether you’re remodeling or just dreaming, remember: good design isn’t about perfection; it’s about creating a space where you’ll actually want to cook. So grab that measuring tape, trust your gut, and go build the kitchen you’ve been scrolling through.
Your future self will thank you.