
The Best Fluffy Pancakes recipe you will fall in love with. Full of tips and tricks to help you make the best pancakes.


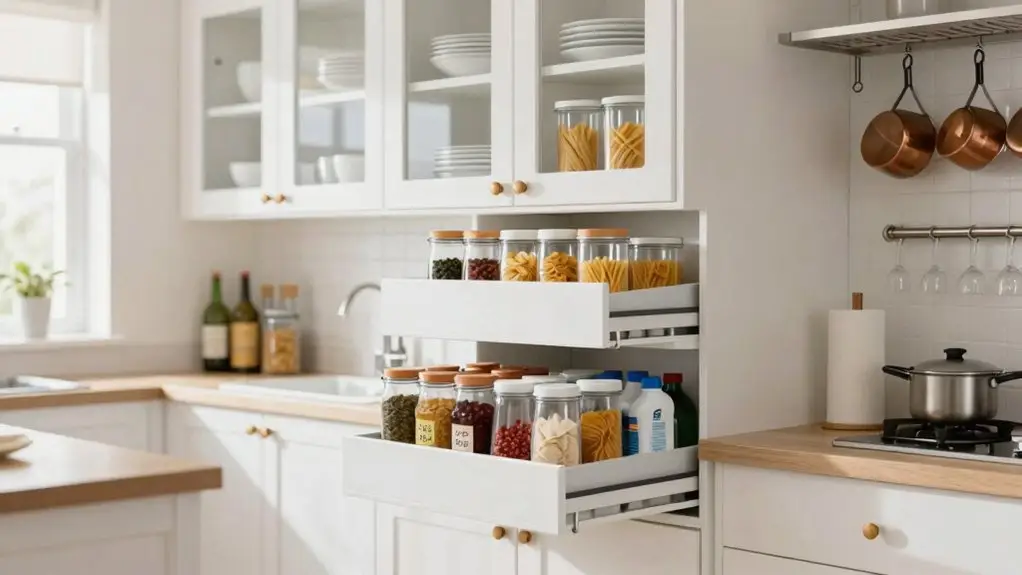
Start by pulling everything out and sorting it into keep, donate, or toss piles—be ruthless because that avocado slicer from 2019 isn’t coming back into style. Group what’s left by how often you actually use it. Then move your daily must-haves to eye-level shelves and easy-reach drawers where you can grab them in seconds.
Stand baking sheets upright with cheap dividers. Add pull-out trays to deep corners and swap opaque bins for clear ones so you stop playing cabinet Jenga every time you need a pasta box. Tuck seasonal platters and fancy gadgets above the fridge or on high shelves, and you’ll free up prime real estate for the stuff you reach for every morning.
There’s a lot more where that came from.
Empty Every Cabinet to See What You Actually Have
Before you can even think about organizing, you need to pull everything out, and I mean everything. You’re going through every cabinet, drawer, and shelf until your kitchen looks like a yard sale exploded.
It’s messy work, but you can’t improve your storage space when you don’t know what you’re actually dealing with.
Now sort what you’ve got into three piles: keep, donate, or toss. Be ruthless.
Be ruthless in your sorting: keep, donate, or toss. Nostalgia has no place in an organized kitchen.
That bread maker you haven’t touched since 2022? It’s not coming back into your life. Neither are those lidless containers you’ve been saving “just in case.”
Kitchen organization starts with honesty, not nostalgia.
Drawer organization gets so much easier when you’ve already edited your stuff.
You’ll find you actually have room for the tools you love, instead of cramming them between gadgets you’ll never use.
Once you know what’s staying, a kitchen storage cabinet organizer can help you assign every item a dedicated spot so clutter doesn’t creep back in.
Group Everything by How Often You Use It
You deserve a kitchen that works with you, not against you. So start by giving your everyday items the prime real estate they’ve earned—eye level, easy reach, no stretching required.
When you rotate seasonal storage, you’re not merely shuffling stuff around. You’re making sure your soup pot isn’t hogging space in July while your blender hides in the dark.
Build those high-rotate zones with intention, and you’ll stop playing cabinet Tetris every time you just want to make coffee. Stackable shelf organizers let you add or remove levels in 1 to 6 inch increments to accommodate taller or bulkier items as your storage needs shift throughout the year.
Prime Real Estate Priority
Because you’re probably tired of playing cabinet Jenga every time you need a dinner plate, it’s time to rethink where everything actually lives in your kitchen.
Your kitchen cabinets hold secret “prime real estate”: those eye-level shelves and easy-reach drawer space. You’re wasting them if holiday platters live there while everyday plates hide up high.
Start reserving drawer space and middle shelves strictly for frequently used items: daily dishes, morning coffee mugs, and your go-to spatula. Move that fondue set and turkey roaster up top where you’ll grab them twice a year.
Create clear zones too: baking supplies together, breakfast gear in one spot. This way, you’re not circling the kitchen like you’re on a scavenger hunt.
After you declutter, reassess; consolidating plates might finally free up room for your actual priorities. For a fully connected kitchen, consider upgrading to smart home electrical panels that let you monitor and control your appliances more efficiently.
Rotate Seasonal Storage
If your ice cream maker‘s hogging prime cabinet space in July and you haven’t touched it since last Christmas, you’re not really organizing: you’re just storing. You need to rotate seasonal items by how often you actually use them.
Keep daily-use dishes and tools at eye level, where you’ll grab them without thinking. Stash those holiday platters and specialty gadgets higher up or in a “bunker” closet with steel shelving. You’ll free up serious room.
For food storage, move pantry items you only cook with in winter, hello, chestnut flour, out of your main cabinets when the season’s wrong. A lazy susan helps you spot what’s hiding in back corners before it expires. For corner cabinets specifically, a kidney-shaped two-tier lazy susan can hold up to 50 pounds per shelf and is designed to maximize those awkward angled spaces.
Check in every few months, swap what you’re actually using, and ditch the expired stuff. Your cabinets will breathe again.
High-Rotate Zones
While you might think organizing cabinets means grouping similar items together, what really matters is how often you actually grab them. You’ll want to put your high-rotate items right where you can see them—eye level, front of shelves—so you’re not playing hide-and-seek with your morning coffee mug.
Move that fancy fondue set you use once a year up top, and swap it down if you find yourself stretching too much.
Use a drawer organizer to keep your daily utensils from becoming a tangled mess, and keep your cabinet storage food-only so you’re not digging past water bottles to find the pasta.
It’s a small tradeoff to open another cabinet for glasses, but hey, your routine just got faster, and everything actually stays where it belongs. Adding an under sink cabinet organizer to your setup can also reclaim that awkward dead space below the sink, turning it into a surprisingly functional storage zone.
Move Daily Essentials to Quick-Grab Zones
Your morning coffee routine shouldn’t feel like a treasure hunt through a maze of cabinets. With better organization, you’ll transform frustrating searches into flawless starts to your day.
Create quick-grab zones by moving your most-used items, mugs, filters, tea supplies, to eye level in cabinets closest to where you’ll use them. You deserve easy access that actually makes sense for how you live.
Use drawers for your daily necessities so you’re pulling items forward, not diving into dark cabinet corners. Consolidate dishes into one nearby spot, even if glasses need their own space.
Add drawer dividers and shelf inserts to keep baking tools and utensils instantly visible. Look for dividers with adjustable expansion ranges spanning roughly 11 to 22 inches so they press snugly against both drawer sides without tools or screws. Tack recipes or photos inside cabinet doors—you’ll stop hunting around cluttered counters when you need them.
Smart placement means less digging, faster mornings, and cabinets that actually work for you.
Maximize Vertical Space With Clear Bins and Risers
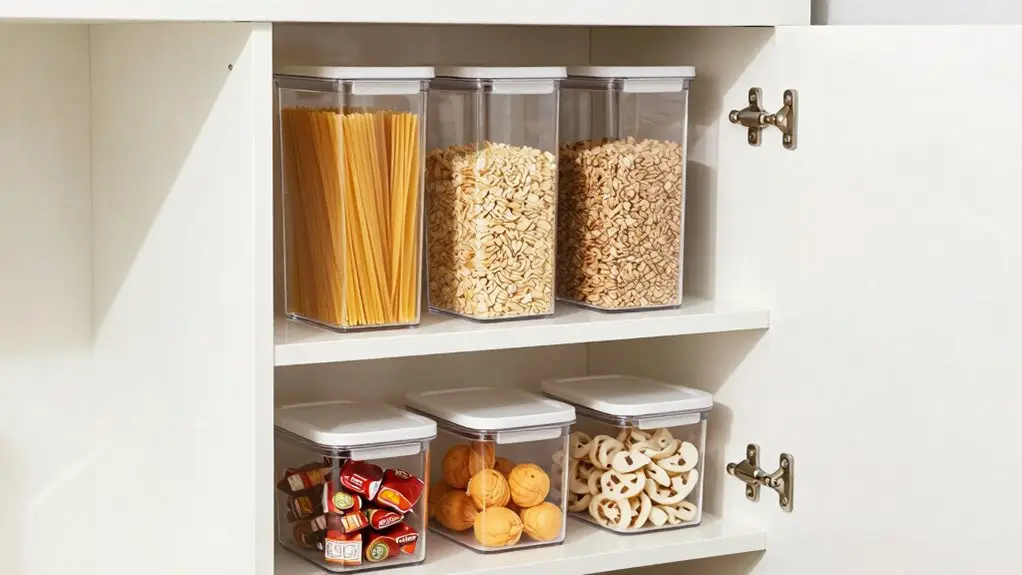
You’re probably tired of playing Jenga with your cereal boxes every morning, and that’s exactly where a smart mix of clear bins and risers can save your sanity.
When you can actually see what’s hiding in the back, no more mystery bags of forgotten pretzels, you’ll stop buying duplicates and start cooking with what you’ve got.
Let’s walk through how to pick bins that show off your stuff and place risers where they help, not hinder, your daily routine. For deeper storage zones, consider pull-out spice rack organizers that use ball-bearing glides to bring everything in the back fully into view with a single smooth slide.
Clear Bin Selection
Because you’ve probably played the “pull everything out just to find one thing” game one too many times, it’s time to toss those opaque bins in favor of see-through ones. Those gray or black containers force you into constant “pull-out-to-check” cycles that waste your precious time and patience.
When you’re rethinking your kitchen storage, clear bins deliver game-changing storage solutions. You’ll spot exactly what you need at a glance, no digging required.
Start by consolidating similar items into single cabinets. Then stack those transparent containers strategically.
You’ll transform chaotic shelves into streamlined zones where every snack, spice, and supply stays visible.
Pick sturdy, stackable clear bins that maximize every vertical inch. Your future self will thank you when grabbing pasta takes three seconds flat, not three minutes of cabinet archaeology. If you’re also refreshing your cabinet interiors with a coat of paint, using a medium-adhesion painter’s tape along the edges ensures clean lines without damaging the surfaces inside.
Riser Placement Tips
Stacking plates and mugs sky-high feels like a win until you’re playing Jenga just to grab a coffee cup from the back. Smart riser placement tips help you boost storage capacity without creating chaos.
You’ll want to reserve risers for multiples, like matching mugs, where you don’t need constant back-of-shelf access.
If you can’t see what’s hiding behind that second tier, reevaluate. Sometimes lowering a shelf beats adding height you can’t actually use.
When anchors feel stuck, don’t force them alone; grab a buddy so you don’t break hardware or pinch a finger.
Swap opaque bins for clear ones first, then add risers only where back items stay visible. That way, you pull out less, spot more, and keep your morning routine seamless.
For a quick cabinet refresh while you’re reorganizing, peel-and-stick backsplash tiles can be trimmed with a utility knife and applied grout-free to the interior walls without removing your shelving.
Stand Your Baking Sheets Up: No Remodel Needed
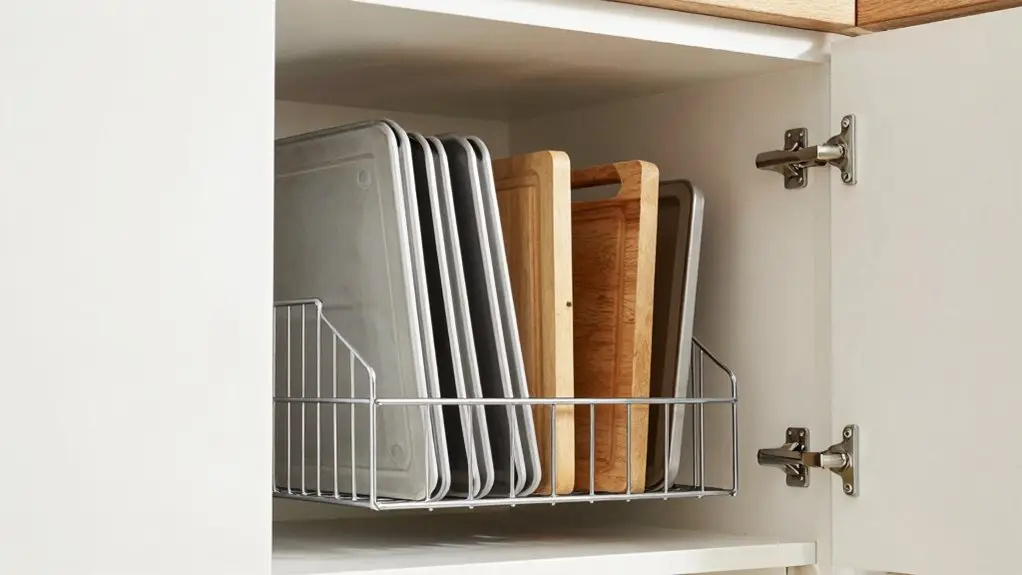
Since you probably know the frustration of unstacking three cookie sheets just to grab the one you actually need, standing your baking sheets upright is a total game-changer you can pull off today—no contractor required.
You’ll reclaim hidden storage space and stop playing Jenga with your cookware.
Grab cheap cabinet dividers sized for sheet pans and slide them into your most accessible drawer or cabinet—wherever you reach for baking tools most often.
If you’re tight on room, add inserts or rails so everything stands side-by-side without tipping.
Before you lock things in, check that the top of your upright sheets clears the next shelf by about half an inch.
It’s a small tweak that saves big headaches, and you didn’t even touch that awkward corner cabinet. For tile work nearby, like a kitchen backsplash, using color-coded thickness spacers helps you achieve clean, consistent grout lines without guesswork.
Fix Your Corner Cabinet Without Replacing It
Tame that awkward corner cabinet before it swallows another casserole dish whole. You don’t need a full remodel to fix this black hole. Here’s how to reclaim that tricky space:
- Consider skipping it for daily use — Store seasonal items here instead, since blind corners love to hide things you’ll forget.
- Install a blind-corner pull-out — Heavier pots and Dutch ovens slide right out, no more yoga poses to reach the back.
- Go two-tier when needed — Separate your bulky cookware from baking dishes so you’re not digging through stacks.
- Choose quality hardware — Rev-a-Shelf-style pullouts beat static shelves hands down, giving you full visibility without tearing out cabinets.
You’ll wonder why you waited so long to rescue that lost real estate.
Add Pull-Out Trays to Maximize Deep Cabinet Space
Once you’ve wrestled that corner cabinet into shape, it’s time to face the rest of your base cabinets, the ones where your bakeware goes to die in the back. Add pull-out trays to your deep base cabinet, and you’ll never again play archaeologist just to find a muffin tin. These sliding wonders bring everything into view with a simple tug, turning forgotten depths into usable space.
You’ll love how pull-out trays work even in shorter drawer areas, boosting your storage organization without major renovations. Group your items thoughtfully—canned goods here, baking tools there—so you spot what you need instantly.
For extra credit, pair them with door-basket combos that glide out automatically. Your back and your patience will thank you.
Hide Your Trash Can in a Pull-Out Cabinet
You can reclaim that awkward floor spot where your trash can usually sits by tucking it into a pull-out cabinet instead, which instantly makes your kitchen feel bigger and less cluttered.
When you’re cooking and need to toss scraps, you’ll just slide out the drawer without missing a beat. No more tripping over the bin or nudging it around with your foot.
It’s one of those small upgrades that makes daily life easier.
Honestly, you’ll wonder why you ever settled for staring at a garbage can while you ate breakfast.
Floor Space Saver
Here’s why pull-out trash systems work so well:
- They’re retrofittable—you’ll install them in existing cabinets without tearing everything apart.
- They clear your aisles—no more dodging a bulky can while you’re cooking.
- They hide the mess—your garbage stays tucked behind a sleek cabinet front.
- They optimize flow—you’ll keep countertops open and movement easy.
This simple floor space saver transforms awkward zones into functional areas.
You’ll wonder why you didn’t make the switch sooner.
Convenient Waste Access
Slide open a drawer and toss your scraps—no dodging a bulky can mid-chop, no crinkling wrappers into an eyesore on display. Convert a base cabinet into a pull-out trash drawer, where your garbage hides inside the cabinetry yet rolls out easily when you need it.
You’ve reclaimed precious floor space and cleared your countertops, too. No more tripping over a freestanding bin or letting it dominate your kitchen’s look.
During your upgrade, position this pull-out trash drawer for front-access convenience, just like your other storage solutions.
You’ll find integrated options around $316, or grab a Rev-a-Shelf double bin for $165 if you’re budget-minded.
Either way, you’re treating yourself to a non-negotiable upgrade: fast disposal, tidy surroundings, and one less thing to stub your toe on.
Lower or Swap Shelves to Fit Your Tallest Items
The tallest items in your kitchen cabinets don’t have to live in a perpetual game of Tetris. You can create breathing room by rethinking your shelf setup.
Your tallest kitchen items deserve better than a daily game of Tetris—rethink your shelves and give everything room to breathe.
- Swap shelves first: Skip risers when possible—they clutter sightlines for pantry goods, though mugs play nicer with them.
- Lower shelf strategically: Drop a shelf to fit around your tallest glasses, leaving about half an inch clearance above. Your custom cabinet deserves that precision.
- Check your anchors: Some shelf brackets fight back. Grab help before forcing anything. Plan adjustments early if you’re renovating.
- Match height to habit: Raise shelves for stacked coffee cups you’ll grab daily. Lower them for tall oils and cereals, keeping everything visible so nothing hides in back.
Move Fancy Platters and Rarely Used Gear Elsewhere
Sometimes you open your cabinet and that turkey platter from three Thanksgivings ago just stares back at you, hogging prime real estate. You don’t need it daily, so why let it steal space from your everyday plates?
To maximize your space, move those fancy platters and rarely used gear to a “bunker” closet or the upper cabinets above your fridge. This organization strategy frees your prime cabinets for items you actually grab regularly.
If your top shelf sees lots of action, swap things around—keep daily dishes reachable while pushing holiday stuff higher.
Use clear, labeled bins in secondary storage so you protect pieces from dust without forgetting what you own.
Yes, you’ll walk a little farther for that platter when Aunt Carol visits, but you’ll smile every time you easily grab your morning cereal bowl.
Final Thoughts
You’ve got this! Start small, pick one cabinet, and see how good it feels to actually find your stuff.
These tweaks aren’t about perfection; they’re about making your kitchen work for you, not against you. So grab a bin, stand up those cookie sheets, and enjoy the extra space you didn’t know you had.
Happy organizing!





