The Best Fluffy Pancakes recipe you will fall in love with. Full of tips and tricks to help you make the best pancakes.


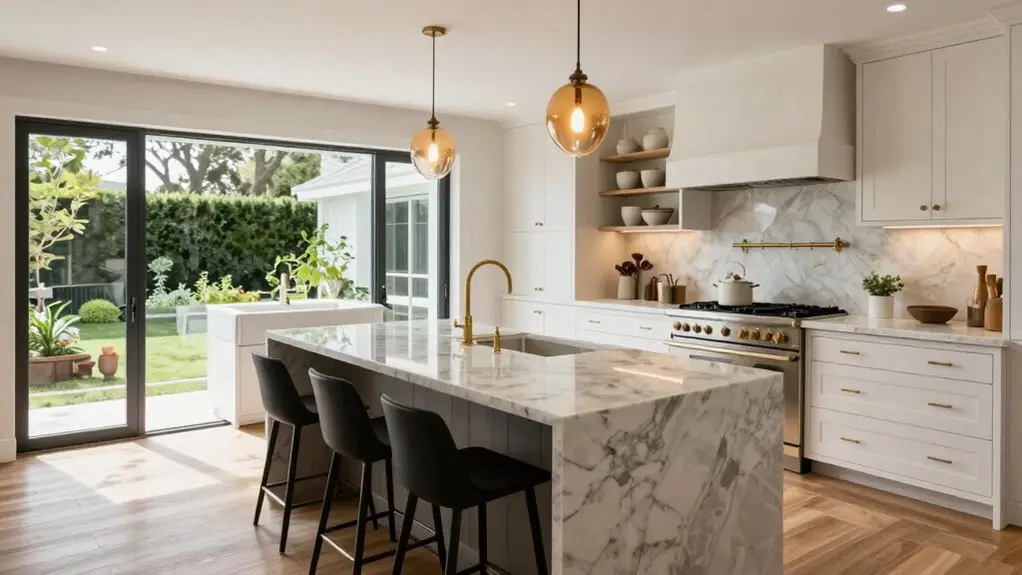
The best kitchen layout depends on your space, cooking habits, and how many people crowd in during breakfast. Start by measuring your walls and door swings, then map your work triangle: fridge, sink, stove, so you’re not hiking across the room mid-recipe.
Galley and one-wall layouts suit tight spots, while L-, U-, and G-shapes open up for bigger families or serious hosts. Add islands only when you’ve got breathing room, and tuck your dishwasher right by the sink to dodge floor puddles.
Get these basics locked in, and you’re already halfway to a kitchen that actually works with you instead of against you. Stick around, and you’ll pick up the finer points that turn a decent plan into one you’ll genuinely enjoy using every day.
Map Your Space First: Width, Clearance, and Door Placement
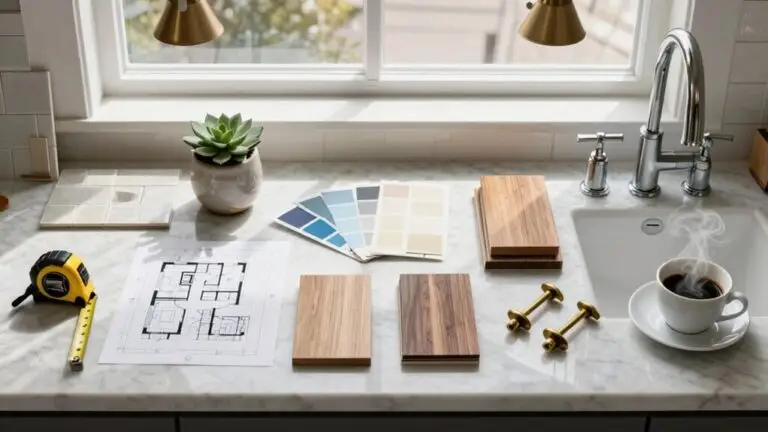
Before you pick out that gorgeous backsplash, you’ll need to grab a tape measure and get real about your actual space. You’re checking the full kitchen width, especially if you’ve got a galley or one-wall kitchen layout where traffic flow gets tight and elbows bump fast.
Picture yourself cooking dinner while someone’s grabbing a drink—will you squeeze past each other? You’ll want at least 36 inches for main walkways, more if your family’s the “everyone helps” type.
Imagine cooking while someone grabs a drink—will you squeeze past? Aim for 36 inches of walkway, more if your kitchen’s always busy.
Now, here’s where door placement trips people up. That standard door swing? It’s a space hog. You’ll kick yourself later if your fridge door whacks the wall or blocks your storage space when open.
Map those no-go zones early, so you’re not dancing around awkward corners every single day. If you’re planning a tile backsplash as part of your kitchen refresh, using tile leveling spacers during installation helps prevent lippage and keeps grout lines uniform across the surface.
Match Your Kitchen Layout to Your Cooking Realities
You’ve mapped your space, now it’s time to get real about how you actually cook and who you’re cooking with.
If you’re batch-cooking on Sundays or hosting friends who won’t leave the kitchen, your layout needs to work harder than a one-person galley ever could.
Let’s look at how batch cooking needs and social kitchen dynamics should steer your final decision.
Nobody wants to bump elbows with their sous chef or exile their guests to the living room.
A dedicated professional workbench with storage can give serious home cooks the extra prep surface and organization they need to keep a busy kitchen running smoothly.
Batch Cooking Needs
Because your weekends often turn into meal prep marathons, you need a kitchen that actually works with your cooking habits, not against them.
For your batch cooking needs, you’ll want an efficient work triangle that keeps your fridge, sink, and range close together. You’re doing less walking, which means more energy for actual cooking.
A U-shaped kitchen gives you three walls of counter space and storage, perfect when you’re cooking for a crowd. The sink sits centrally, creating a dedicated clean-up zone for those mountains of dishes.
Working with a smaller space? A Galley kitchen’s two parallel walls keep everything within arm’s reach. You’ll rinse, chop, and cook without breaking stride.
CONSIDER A G-SHAPED LAYOUT IF YOU’RE STORING MOUNTAINS OF CONTAINERS AND SHEET PANS BETWEEN COOKING AND COOLING PHASES.
Whatever layout you choose, make sure your kitchen flooring is installed over a properly prepared substrate, since uneven subfloor surfaces can cause tiles or planks to crack, rock, and fail prematurely under the heavy foot traffic of frequent batch cooking sessions.
Social Kitchen Dynamics
Your kitchen isn’t just where you cook, it’s where life happens. When you think about kitchen work as a team sport, your layout makes all the difference.
A friend chopping vegetables while you stir the pot, laughter echoing as wine glasses clink near the oven. Kids doing homework across an island while you prep dinner.
If you cook with others regularly, a U-shaped layout keeps your efficient workflow tight—refrigerator and range at opposite ends, with your sink and dishwasher in the middle.
An L-shape opens things up for conversation without losing function.
When entertaining rules your life, an island or peninsula becomes your stage.
Even a galley layout works in narrow spaces, keeping everything within arm’s reach so you never miss the fun. To keep the air fresh during busy cooking sessions, pairing your kitchen with a whole house air purifier helps eliminate smoke, odors, and airborne particles throughout your entire home.
The 6 Core Kitchen Layout Types Explained
The right kitchen layout can make or break how you actually use your space, no pressure, right? Let’s explore the best kitchen layout options for your home.
You’ll find one-wall kitchens perfect for tight spots like studios or wet bars, needing only 8–10 feet of width. Galley kitchens squeeze two parallel walls into narrow spaces, keeping your workflow tight and efficient.
An L-shaped kitchen layout opens things up across two perpendicular walls, often with clever corner storage like lazy Susans.
The U-shaped design wraps three walls around you, maximizing counters and storage for medium to large spaces.
Finally, G-shaped kitchens add a fourth peninsula arm to that U-shape, giving larger kitchens even more room to spread out. When tiling any of these layouts, starting from a center reference line helps ensure symmetrical and balanced tile placement throughout the space.
Place Your Fridge, Sink, and Stove for Fewer Steps
Once you’ve picked your layout, it’s time to position the three workhorses of your kitchen—your fridge, sink, and stove—so you’re not running laps during dinner prep. The classic work triangle still works wonders today.
You’ll want these three stations close enough to save your feet, but not so tight you’re bumping elbows.
Picture yourself grabbing veggies from the fridge, turning to rinse them at the sink, then pivoting to the cooktop without breaking stride.
Imagine sliding a hot pan from stove to counter, then turning to the sink just steps away for quick cleanup.
Visualize your dishwasher humming right beside the sink, so you’re not dripping across the floor.
Keep your fridge, sink, and stove/cooktop in this golden triangle, and you’ll cook smarter, not harder. For the walls surrounding these stations, peel-and-stick backsplash tiles offer a waterproof, heat-resistant, and grout-free way to protect and refresh your kitchen surfaces without a major renovation.
Add an Island or Peninsula Without Blocking Flow

You’re standing at your kitchen counter, coffee in hand, and thinking about that gorgeous island you saw on Pinterest. But before you commit, you’ll need to figure out whether you’ve got the space to actually walk around it without doing an awkward sideways shuffle.
Islands and peninsulas can totally transform how your kitchen works, but they can also turn your morning routine into an obstacle course if you don’t plan for traffic flow. If you’re updating the space around your island, the backsplash behind the stove can serve as a natural focal point that defines the cooking zone without overwhelming the rest of the kitchen. Let’s break down how to choose between these two options and where to put them.
Island Versus Peninsula Comparison
Whether you’ve got a sprawling kitchen or a cozy galley, you’re probably daydreaming about extra counter space, and maybe a spot where your friends can perch with a glass of wine while you chop vegetables.
You’ll want an island for large kitchens. It anchors the room beautifully, giving you loads of storage and counter space plus dramatic seating. Just remember, you’ve got to leave breathing room on all four sides.
Smaller kitchens play hard-to-get with islands, so that’s where a peninsula shines. It hugs your wall like a trusty sidekick, delivering that same prep zone and casual seating without eating your floor plan alive.
Picture your best friend laughing on a stool, wine in hand, while you toss a salad without bumping elbows. Imagine sliding a hot pan across uninterrupted counter space, no zigzagging around a traffic jam.
Envision your kids doing homework nearby, close enough to chat but out of your sizzling zone.
Peninsulas forgive cramped quarters more graciously since they don’t need clearance on every side. Both options boost your cooking triangle if you place them smartly—keep your fridge, sink, and stove humming along without bottlenecks.
To further maximize your storage beyond the kitchen, a garage ceiling storage system can help reclaim valuable overhead space throughout your home.
Flow Preservation Tips
The island versus peninsula debate settles around one thing: nobody wants to feel like they’re traversing an obstacle course just to grab a snack. In your kitchen layout, you’ll want to keep that flow seamless and effortless, like a well-choreographed dance.
If you’ve got the space—think larger L- or U-shaped setups—go ahead and add that island.
But in average or smaller footprints, you’ll want to skip it.
Clearing walking paths matters more than extra counter space.
You should use the work-triangle approach, keeping your fridge, sink, and range tight together.
This way, adding an island or peninsula won’t force you into extra steps between work areas.
Planning heat or prep access?
Keep those pots, pans, and cooking tools reachable from your triangle.
NOBODY WANTS TO ZIGZAG ACROSS THE KITCHEN MID-STIR-FRY.
For island seating or a peninsula, place it on the “open side” of your layout.
You’ll support social interaction without blocking that primary traffic lane.
When you’re unsure, stick with cabinet-only perimeter storage including corner pull-outs like a lazy Susan.
KEEP THAT CENTRAL ROUTE CLEAR SINCE CORNER CLUTTER AND NARROW AISLES ARE NOTORIOUS FLOW KILLERS.
If you’re also updating your kitchen floor, doing a dry run tile layout from the center outward helps you catch awkward cuts near islands or cabinets before committing to adhesive.
Spatial Planning Priorities
Because your kitchen’s footprint dictates everything, you’ll want to map out your moves before committing to that dreamy island or convenient peninsula. You’re balancing storage cabinets against breathing room, after all.
In an island kitchen, you’ll extend countertop space dramatically, but you’ve got to protect that working triangle or you’ll be dancing around obstacles during dinner rush.
If you’re tight on square footage, you’ll love how a peninsula hugs the wall—one side anchored, traffic flowing free on the other. Your kitchen layout stays open, your paths stay clear.
Picture yourself gliding between fridge, sink, and stove without bumping elbows on a too-big centerpiece. Imagine chopping veggies bathed in warm pendant light, guests perched nearby but never blocking your hustle.
Feel the relief when your narrow galley keeps two lanes open, cart ready for overflow action. Underneath your upper cabinets, tunable white strip lights let you dial in color temperature from warm 2700K to crisp 6500K daylight, so your task zones stay clearly lit no matter the time of day.
Fix Awkward Corners and Storage Gaps for Your Layout
Your kitchen’s corners don’t have to be the black holes where Tupperware lids and forgotten gadgets go to die. You can fix awkward corners and storage gaps with smart cabinet design choices that actually work for your daily routine.
In L-shaped or U-shaped layouts, install lazy Susans or pull-out organizers to reclaim that dead space. You’ll stop losing storage containers and small tools in the abyss.
Reclaim dead corner space with lazy Susans—stop losing containers and tools to the abyss.
For U-shaped kitchens, match your upper and lower cabinetry. Treat those corner bases as storage problems first—add revolving shelves or corner drawers so pots reach easily.
Keep your working triangle clear. Don’t stash cookware in distant awkward corners; place it near the fridge, sink, and cooktop.
In narrow galley layouts, use vertical tall cabinets and tight pull-out shelves. Reserve corner zones for low-frequency items, not large appliances you need daily.
Design for Two Cooks and Busy Household Traffic
When you’re juggling multiple pots and trying not to elbow your partner, it’s clear your kitchen layout matters more than you’d think. A U-shaped kitchen gives you three walls of possibility, letting you and your cooking buddy spread out without stepping on toes.
Picture yourself chopping veggies at the prep zone while your partner pulls sizzling pans from the range, never once bumping hips.
Imagine kids darting through for snacks, but the traffic flow stays effortless because you’ve tucked storage cabinets and appliances thoughtfully along the perimeter.
Envision both of you laughing as you complete the work triangle together: fridge to sink to stove, without the chaos of crossed paths.
Keep your zones tight, skip the island if space feels snug, and you’ll cook in harmony instead of traffic jams.
Price Check: What Each Layout Costs to Build

Before you fall in love with a sprawling island kitchen, you’ll want to know where your money’s actually going, because material costs swing wildly between a simple one-wall setup and a tricked-out G-shaped masterpiece.
Your layout choice directly drives labor costs too, with every extra wall, corner, and custom island adding hours of plumbing, electrical, and installation work.
Let’s break down what each configuration demands from your wallet, so you can match your dream kitchen to a realistic budget without ugly surprises.
Material Costs by Layout
Because you’re staring down a kitchen renovation, you’re probably wondering which kitchen layout won’t drain your savings faster than a leaky faucet. Your material costs depend heavily on how many walls you’re working with.
One-wall setups keep things simple, with cabinets and counters hugging a single stretch. Galley kitchens squeeze efficiency from parallel walls, keeping your kitchen remodel budget trim.
L-shaped designs add a corner turn, bumping up your material costs slightly for those tricky storage solutions. U-shaped kitchens demand cabinetry on three sides, which piles on expenses fast.
And those sprawling G-shaped kitchens? They’ll hit your wallet hardest with that fourth arm or island centerpiece. More surfaces mean more everything—cabinets, countertops, and hardware. Pick wisely, and you’ll cook without financial heartburn.
Labor and Installation Factors
Material costs only tell half the story, because what you pay the crew can swing your budget just as wildly.
If you’re squeezing into tight quarters, a one-wall kitchen layout saves you big on labor since plumbers and electricians don’t run all over the house. They stick to one spot, and you’re done in 8–10 feet of space.
Galley kitchens keep things simple too, with two parallel walls and one straight walkway.
However, you’ll hit some headaches when cabinets won’t quite fit that narrow aisle.
Your L-shaped kitchen bumps up the bill because those corner cabinets need fancy hardware like lazy Susans.
Finishing two perpendicular runs takes extra time as well.
U-shaped kitchens? You’ve got three walls of appliances and custom corner work that will make your contractor sigh.
Add an island or peninsula, and suddenly you’re reinforcing floors and hiding utilities—fancy but pricey.
Don’t Make These Layout Mistakes (Seen in Real Renovations)
Even if you’ve pinned a hundred gorgeous kitchen photos, you can still trip up on layout blunders that turn your dream space into a daily headache. You break the working triangle when you scatter your fridge, sink, and range too far apart, and suddenly you’re logging miles just to make pasta.
In small spaces, you might squeeze in a U-shape that leaves you wedged between cabinets. Alternatively, you ignore the galley option that actually keeps everything within arm’s reach.
Picture yourself spinning a lazy Susan in a dark corner, finally grabbing that lost spice jar. Imagine sliding out a shelf that fits your tallest olive oil bottle, no more countertop clutter. See yourself gliding between two parallel counters, ingredients and tools always right there.
Don’t forget storage access. Pull-out organizers save your sanity, and designing zones for prep, cook, clean, and put-away keeps you sane.
Draft Your Kitchen Layout: A 5-Point Final Checklist
You’ve dodged the layout traps, and now you’re ready to lock in a plan that actually works. Start your kitchen renovation by mapping a tight working triangle: sink, dishwasher, and range close together, so you’re not marathon-walking between tasks.
Draft clear zones: prep near cooking, cleanup around the sink, and putting-away by the fridge. Match appliances to your shape.
Zone with purpose: prep where you cook, clean where you rinse, and stow near the fridge.
A U-shaped floor plan offers fridge and range on opposite ends with the sink centered, while L-shapes put the sink between the other two.
Skip the island if your space feels cozy—you need breathing room more than you need trendy extras. Aim for plenty of cabinet space and additional counter space by measuring early.
Use that tallest oil bottle as your shelf-height guide.
Nobody enjoys a step stool workout just to grab olive oil.
Final Thoughts
You’ve got the tools now, so trust your gut and draft that layout. Map your space, match your cooking style, and don’t let Pinterest bully you into a triangle that doesn’t fit your life.
You’ll trip over bad flow every single day, so get the work triangle right and give yourself breathing room. Your dream kitchen isn’t about perfection; it’s about fewer headaches and more moments where you’re actually enjoying the pizza you just made.