
The Best Fluffy Pancakes recipe you will fall in love with. Full of tips and tricks to help you make the best pancakes.


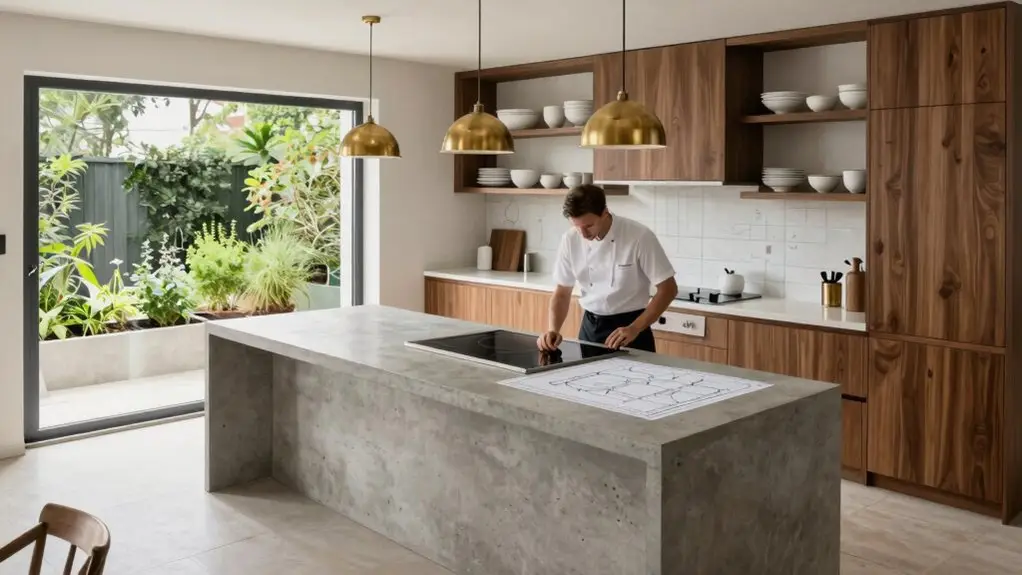
Start by measuring your space and marking minimum clearances: aim for 35 to 36 inches so you’re not doing the sideways shuffle.
Pick a layout shape that actually fits your floor plan, whether that’s galley, L-shape, or U-shape. Choose between the classic work triangle or task-based zones depending on how you cook.
Map traffic paths to dodge those “behind you!” moments during dinner rush. Land counter space right next to your stove, sink, and fridge.
Store items by how often you grab them, not by some mystery system. Light and outlet placement matters more than you’d think: nobody wants to dice onions in shadow.
Stick around, and you’ll pick up the finer points that turn a decent kitchen into your favorite room.
Measure Your Kitchen Space and Mark Minimum Clearances First
Grab your tape measure and let’s get started, because guessing your kitchen dimensions is a recipe for headaches later. When you measure your kitchen space, capture every inch: length, width, and ceiling height. Sketch it to scale, then mark fixed elements like windows, doors, radiators, and plumbing.
Precision beats guesswork: measure every inch, map every fixed element, and build your kitchen plan on facts, not assumptions.
You’ll want to note every appliance and opening, too. Think about your fridge’s cabinet door swing, your dishwasher’s drop-down clearance, and drawer depths that could block walkways. These details matter more than you’d think.
Now, let’s talk minimum clearances. Aim for at least 35 inches for comfortable movement, and 36 inches for main walkways. This keeps your work triangle—the path between sink, stove, and fridge—smooth and obstacle-free.
Whether kitchen layouts include galley kitchens or open plans, flagging bottlenecks early saves you from costly surprises down the road. A professional laser level kit can help you achieve precise, level measurements across walls and floors, ensuring your layout markings are accurate from the start.
Choose a Kitchen Layout That Fits Your Floor Plan
Once you’ve got your measurements down, look at your walls and ask what shape they want to be. You’ll match galley, L, U, or island layouts to your actual room dimensions, not the other way around.
Keep at least three feet of walkway so nobody’s doing the sideways shuffle while you’re carrying hot soup. Map your stove, sink, and fridge so they’re close friends, not awkward strangers. For custom cabinetry cuts and built-in shelving, a professional jigsaw variable speed tool gives you the precision needed to fit pieces perfectly into your unique kitchen dimensions. You’ve got the bones of a kitchen that actually works for you.
Assess Your Space
Before you start picking out pretty backsplashes or dreaming about that fancy range, you’ll need to get real about what you’re actually working with, because even the most stunning kitchen design falls apart if it doesn’t fit your space.
Grab your tape measure and measure your kitchen dimensions to scale, marking doors, windows, radiators, vents, and plumbing. Sketch the room so you can test kitchen layout shapes against reality.
You’ll want clear walkways—about 35–36 inches keeps traffic flowing, especially when you’re juggling dinner and guests. Position your sink, stove, and fridge in a tight workflow triangle, but stay flexible since your floor plan calls the shots.
During your kitchen remodel, remember appliance footprints and door swings matter. That dishwasher needs to live near water, and you’ll want counter space beside the cooktop.
Also take a close look at your existing subfloor, since uneven spots can cause serious problems down the line, including cracking, cupping, and premature wear that make even a well-designed kitchen feel like a failure within months.
Work with your kitchen space, not against it.
Match Layout Options
You’ve likely spent enough time in awkward kitchens to know that layout matters more than looks alone. Now you’ll match your floor plan to a shape that actually works.
Start by measuring everything—doors, windows, vents, even those pesky radiators. Then sketch it to scale. This reality check keeps your kitchen design ideas grounded.
Consider these layout choices:
- Parallel Kitchen – Perfect for tight spaces, with two facing runs that keep everything within arm’s reach.
- L-shaped or U-shaped – Great for corner spaces, giving you room to spread out while keeping the stove, fridge, and areas like the sink in a tight triangle.
- Island layout – Ideal when you’ve got breathing room, adding prep space and clever storage solutions.
Once your layout is set, securing shelves properly becomes a priority, and professional floating shelf hardware gives your storage the structural support it needs to hold up under daily kitchen demands.
Prioritize Traffic Flow
Because you’ve already picked a layout shape, you’re ready to tackle the part that trips up even seasoned renovators: making sure people can actually move through the space without playing bumper cars. You need to prioritize traffic flow by keeping walkways at least 35–36 inches wide, so no one’s squeezing past with hot dishes or fighting for elbow room during dinner prep.
Position your work triangle—stove, sink, fridge—so you don’t weave through obstacles just to boil water. Even in a single wall setup, you’ll want clear paths between entry points and appliances.
When adding an island, keep in mind it shouldn’t block your main route or cramp your kitchen work. Test real movement patterns to protect storage space access and prevent congestion when your kitchen gets busy. For precise trim cuts on cabinetry and molding during your renovation, a professional miter saw can help you achieve clean, accurate results that keep the finished space looking sharp.
Decide Between the Work Triangle or Task-Based Work Zones
When you’re figuring out how your kitchen should flow, you’ve got two main roads to travel: the trusty work triangle or the newer task-based zones. Both paths lead to designing a functional kitchen, but they suit different lifestyles.
Here’s how to pick your winner:
- Go classic with the work triangle if you love simple, cook-focused flow. This option is perfect when a kitchen designer helps you nail tight distances between sink, stove, and fridge in a small kitchen.
- Choose kitchen zones when your crew multitasks. Prep, coffee, and cleanup can happen simultaneously without collision.
- Check your clearances either way. Keep 35–36 inches open so your brilliant plan doesn’t crumble into a traffic jam.
For flooring that ties the space together, consider using coordinated tile collections that offer complementary dimensions in matching colors, textures, and finishes for a seamless look across the kitchen.
Work smarter, not harder, and your kitchen will hum.
Map Traffic Paths to Prevent Bottlenecks During Busy Hours
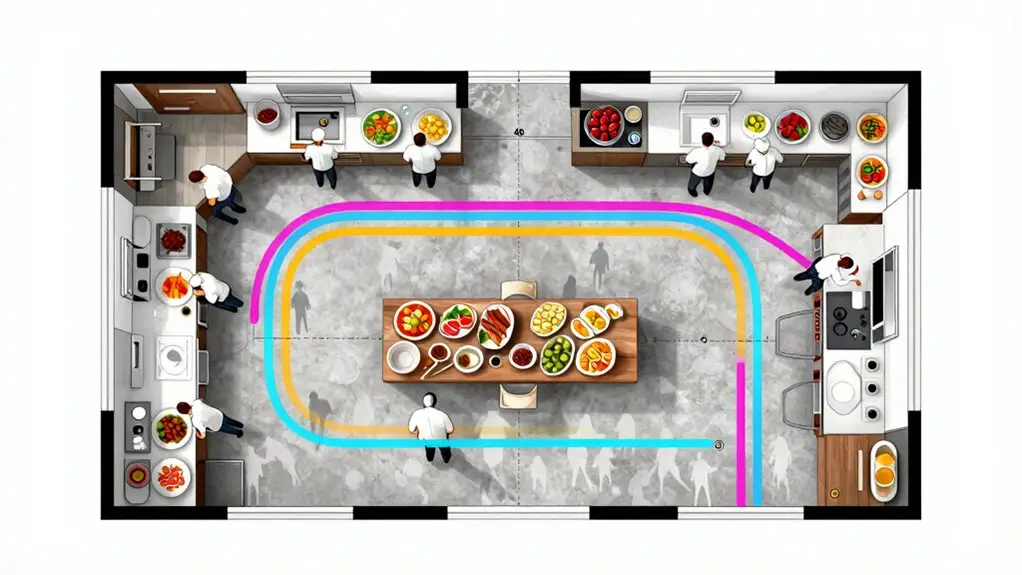
You’ll want to sketch out clear pathway mapping on your floor plan first, marking door swings and appliance clearances so no one’s doing an awkward dance around the fridge when you’re trying to cook.
Keep your busiest routes, like the dash from entry to coffee station, completely obstacle-free, because nothing ruins a morning faster than bumping elbows with your teenager who’s just grabbing milk.
Strategic zone separation matters too. Tuck that trash pull-out near the sink instead of sticking it where it creates a traffic jam every time someone scraps their plate.
A dedicated charging station organizer near the kitchen entry keeps devices, cords, and clutter consolidated in one spot, freeing up counter space along those high-traffic routes you’ve worked so hard to clear.
Clear Pathway Mapping
Even if your kitchen looks great on paper, it won’t feel that way when you’re dodging your partner at the fridge while a hot pan’s sizzling on the stove. When designing a functional kitchen, clear walkways are your first step to sanity.
In kitchens everywhere, route mapping saves marriages and dinners. Here’s how to nail it:
- Map real busy-hour paths—door swings, fridge arcs, and dishwasher access—so you’re not playing chicken during rush hour.
- Keep primary clear walkways 35–36 inches wide, especially around cabinets and countertops where bumping elbows ruins the mood.
- Test your layout by “walking” morning coffee runs and dinner prep. If drawers block traffic, you’ve got homework to do.
Nobody wants a kitchen that feels like an obstacle course. If you’re also planning to tile your kitchen floor, performing a dry layout from center outward lets you visualize how tile placement interacts with high-traffic zones before anything is permanently set.
Strategic Zone Separation
Because kitchens aren’t meant to be mosh pits, you’ve got to carve out zones that keep everyone from crashing into each other when dinner’s on the line.
Start by designing your functional kitchen with strategic zone separation—think cooking, prep, washing, and coffee stations, each with their own turf.
Now, map those traffic paths.
You’re aiming for two parallel routes so one person can grab milk from the fridge while another stirs at the stove, no collision required.
Keep that work triangle open and obstacle-free, with your fridge, sink, and stove spaced so nobody’s doing the awkward backward shuffle.
Skip the bottleneck by placing prep zones away from dishwashing chaos.
Give yourself at least 36 inches of walkway.
Before finalizing your floor plan, do a dry run of traffic patterns to spot awkward movement issues while they’re still easy to fix.
Your future self, juggling Tuesday night’s chaos, will thank you.
Plan Kitchen Counter Space Near Your Stove, Sink, and Fridge
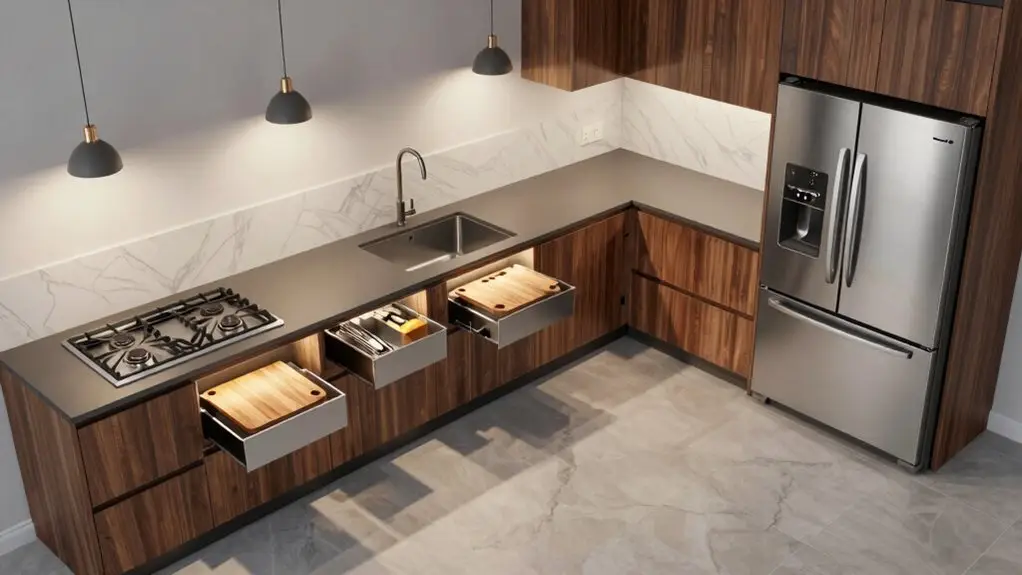
If you’ve ever found yourself juggling a hot pan across the kitchen while hunting for a place to set it down, you already know why counter space placement matters. When you’re designing a kitchen, you’re really crafting where life happens, because the kitchen is the heart of your home.
Here’s how to nail your countertop space:
- Land zones beside your stove, sink, and fridge so you’re not hiking across the room with hot food or dripping produce.
- Keep that classic work triangle open. Clear paths between these three points mean L-shaped kitchens and other layouts actually work for meal preparation instead of against you.
- Design kitchen cabinets and surfaces for your real routines. Place dish storage near the dishwasher so counters don’t become dumping grounds.
Just as thoughtful placement transforms a kitchen, a well-positioned luxury bathroom vanity mirror can anchor your bathroom’s layout and maximize both light and function.
Smart placement turns chaos into flow.
Design Kitchen Storage by Frequency of Use and Task Proximity
Storage placement can make or break how seamlessly your kitchen runs, and you’ve probably felt the frustration of hunting down a lid while your pasta boils over. When you’re designing your new kitchen, smart kitchen storage helps you work smarter, not harder.
Smart kitchen storage placement helps you work smarter, not harder—no more hunting for lids while dinner boils over.
Group your cabinets by how often you use things. Keep daily necessary items—plates, glasses, cooking tools—within arm’s reach of where you actually use them. Stash seasonal stuff up high, where you won’t waste precious real estate.
In smaller kitchens, this proximity trick becomes even more critical; every step saved counts. Your kitchen island can house overflow storage for items you grab less frequently, freeing up prime cabinet territory near your main work zones.
Pull-out drawers and lazy Susans eliminate those annoying corner dead zones, too.
Place Lighting and Outlets to Eliminate Workspace Shadows
- Install under-cabinet LEDs directly above your prep zones to wipe out shadow bands that hide your knife work.
- Position outlets right where you’ll blend, mix, and boil—near surfaces, not edges—so cords don’t block your task light or create trip hazards.
- Layer your lighting by starting with natural light, then adding task light where windows leave you working in your own shadow.
Ask your electrician for extra outlets during rough-in. Trust us, you’ll thank yourself later when you’re not playing adapter Tetris at 6 a.m.
Final Thoughts
You’ve mapped, measured, and maybe even stressed a little. Now your dream kitchen’s within reach. These seven steps aren’t just rules; they’re your recipe for a space that actually works when you’re flipping pancakes at 7 AM or hosting friends for dinner.
Sure, you’ll tweak things as you go, but starting with a solid plan saves you from that “why didn’t I think of that” regret later. So grab your tape measure, trust your gut, and build a kitchen that fits your life.







