The Best Fluffy Pancakes recipe you will fall in love with. Full of tips and tricks to help you make the best pancakes.


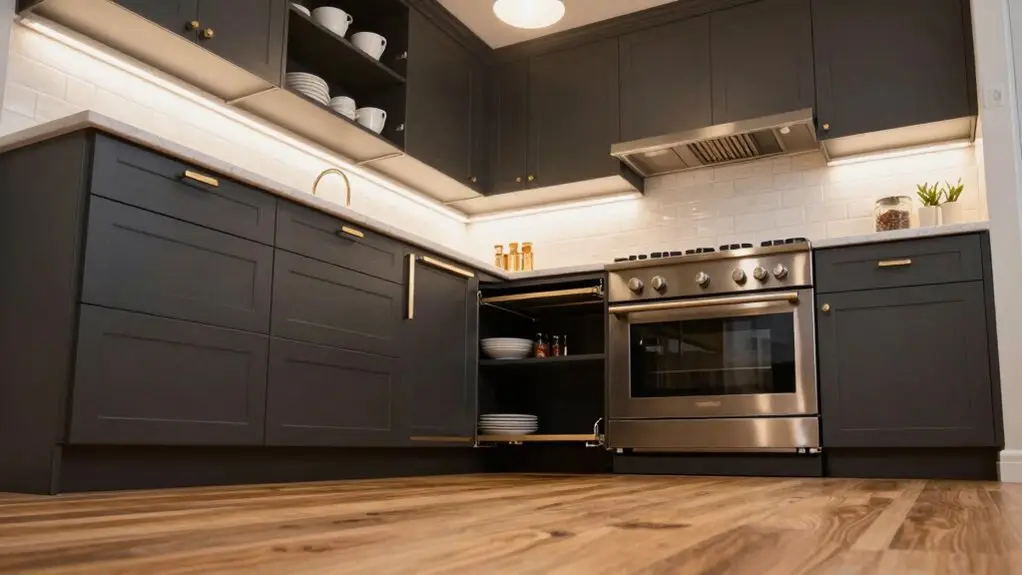
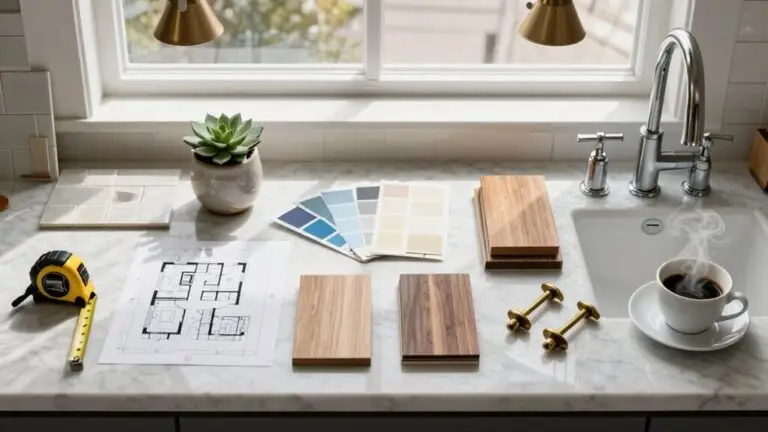
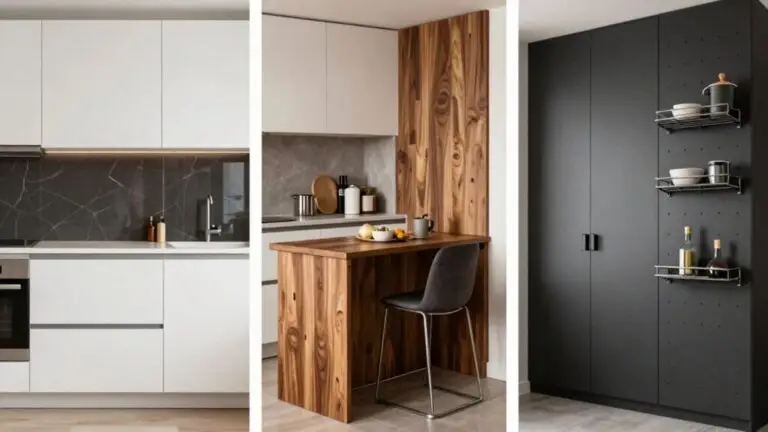
You’ll love how these seven cabinet tricks transform your cramped kitchen into a space that actually works. Run your uppers straight to the ceiling: no more dust-collecting gaps, just clean lines that draw the eye upward. Stick with light colors like warm white or soft greige to bounce light around, and swap some solid doors for glass fronts to keep things feeling airy.
Trade those frustrating fixed shelves for deep pull-out drawers that bring your pots right to you. Don’t let corner cabinets become black holes; lazy susans and glide-out systems save the day. Arrange everything around how you actually cook, so your daily tools live where you need them.
Add under-cabinet lighting and suddenly you’ve got a kitchen that feels twice as big, with secrets still waiting to reveal.
Extend Small Kitchen Cabinets to the Ceiling
When you’re working with a compact kitchen, every square inch counts—and that includes the vertical space you’re probably ignoring right now. Running your kitchen cabinets all the way up transforms that dead zone into serious storage real estate.
By extending upper cabinets to the ceiling, you’ll capture every available inch while creating a cleaner, more finished look. No more awkward gaps collecting dust bunnies or random clutter you pretend not to see. These smart design strategies make your small kitchen feel taller and more open, since the eye travels upward without hitting a visual wall.
Stash your holiday dishes and bulk Costco finds up top, where you won’t need them daily. It’s an easy way to maximize storage without knocking down walls or expanding your footprint. To complete the look, finishing touches like hardware in matte black or brushed nickel tie the extended cabinetry together with a cohesive, polished appearance.
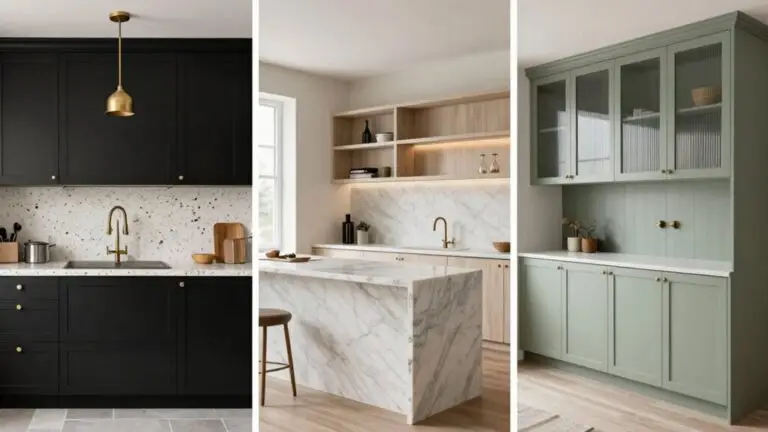
Choose Light Cabinet Colors That Visually Expand the Room
Because you’re stuck with a cramped kitchen doesn’t mean you have to feel boxed in.
Light cabinet colors work magic in tight spaces, bouncing brightness around and tricking your eye into seeing more room than you’ve actually got.
Warm white, soft greige, or light putty beats harsh bright white every time; they’re cozy, not clinical.
Pick Shaker-style doors with clean lines so your cabinets don’t weigh the room down.
Match your hardware and faucet finishes to cut visual clutter.
Stick to one neutral tone for your cabinet storage, then layer in light countertops and backsplashes.
Swap some uppers for glass-front cabinets with pale interiors to let light flow through.
Small kitchens feel instantly airier when cabinets reflect light instead of absorbing it.
For hardware, matte black and brushed nickel finishes are especially practical choices since both resist fingerprints and wear, keeping light-colored cabinets looking cleaner for longer.
You’ll breathe easier, promise.
Replace Fixed Shelves With Deep Drawers and Pull-Out Shelves
You’ve probably fought with dark, fixed shelves that hide your stuff in the back, forcing you to crawl halfway into the cabinet just to grab a single pot. That’s exactly why you’re smart to swap those shelves for deep, full-extension drawers that slide all the way out, bringing every pan into plain sight without any awkward reaching.
Add pull-out organizers for narrow spaces like spice cabinets, and you’ll finally use every inch instead of losing it to the black hole behind fixed plywood. For even better organization, look for pull-out units with track-guided sliding drawers that reduce swaying and keep your items stable as you extend them fully out of the cabinet.
Deep Drawer Advantage
If you’ve ever played Jenga with your pots and pans just to reach that one lid buried in the back, you already know why fixed shelves can drive you crazy. You’re wasting precious space in your small kitchen, and honestly, it’s exhausting.
An interior designer would tell you that deep drawers change everything. You pull them out, and suddenly everything’s right there. No more digging, no more stacking disasters.
Here’s how you’ll maximize every inch with this compact storage upgrade:
- Swap lower cabinets for deep drawers so pots sit fully accessible at the front.
- Install vertical dividers inside to keep baking sheets upright and organized.
- Add pull-out cabinets with extra-deep boxes for layered cookware storage.
- Transform your corner cabinet with lazy Susans so deep storage becomes usable.
A kitchen storage cabinet organizer can help you take this system even further by adding dedicated compartments for utensils, lids, and pantry items.
It’s simple, smart, and honestly kind of life-changing.
Pull-Out Access
Deep drawers solve a lot of problems, but they’re just the beginning. You can really maximize space when you add pull-out access throughout your kitchen.
Those awkward blind corners? They don’t have to be dead zones anymore. Install rotating pull-outs or lazy Susans, and suddenly you’ve got storage for items you’d forgotten about.
In small spaces, every inch counts. Replace cabinets that reach deep into corners with pull-out shelves, so you’re not crawling on hands and knees to grab rarely used gadgets.
Slide-out spice drawers beside your range keep necessities handy without cluttering counters.
Add vertical dividers in deep drawer space for cutting boards and trays, standing upright instead of stacked. You’re turning compact space into something that actually works for you. An under sink cabinet organizer can also help you reclaim the often-overlooked space beneath your kitchen sink, turning a chaotic cabinet into a well-structured storage zone.
Fixed Shelf Limits
Because fixed shelves in lower cabinets force you to stack and dig, you’re basically playing kitchen Jenga every time you need a heavy pot buried in the back.
Replace them with deep drawers, and you’ll bring everything into view.
This simple swap transforms tiny spaces into functional powerhouses.
For small kitchens, every inch matters.
Try these upgrades to banish wasted space:
- Install pull-out shelves inside cabinets so you can grab items from the back without unloading everything first.
- Add vertical dividers in deep drawers for baking sheets and cutting boards—no more leaning towers of chaos.
- Fix corner cabinets with lazy Susans or blind-corner pull-outs to rescue lost gadgets.
- Use tiered inserts to maximize compact storage for utensils.
You’ll finally stop losing things in the abyss. Corner cabinet lazy Susans like the Rev-A-Shelf two-tier system can hold 50 pounds per shelf while fitting a 24-inch wide footprint in those otherwise wasted angled spaces.
Reclaim Corner Dead Space With Lazy Susans and Pull-Outs

Even if you’ve arranged every drawer and shelf with military precision, that awkward corner cabinet is probably where your favorite pots go to hide from you forever. You can reclaim that dead space with lazy susans and blind-corner pull-outs that transform frustrating corner cabinets into storage space you’ll actually use.
Install rotating carousel shelves to spin items toward you, or swap fixed shelving for pull-out organizers that glide forward, bringing everything into view. You’ll want to match these systems to your cabinet depths so they rotate or slide freely without bumping doors or drawers.
For deeper corners, tiered lazy susans boost visibility by separating small items from bulky cookware. Add vertical dividers to keep everyday necessities at eye level, while lesser-used items stay tucked away.
For spice storage specifically, look for rotating models that use ball bearings or sealed races to ensure smooth 360° rotation and better load handling without binding or wobbling under the weight of jars.
No more playing hide-and-seek with your own kitchen stuff.
Arrange Cabinets by How You Actually Cook
Where’s your frying pan when the oil’s already hot? Smart cabinet layout means you stop scrambling and start cooking. You’ll map every drawer and pull-out to your actual movements, not some magazine fantasy.
Stash daily cookware in pull-outs beside your range—no more hot oil hover-walking. Park mixing bowls in deep drawers flanking your prep countertop for seamless chop-to-cook flow.
Nestle cleaning supplies and under-sink caddies right where the water runs. Employ tall pantry pull-out cabinets for staples, freeing upper cabinet sizes for holiday odds-and-ends.
In galley kitchens, mirror your fridge-to-prep-to-range rhythm. YOU’RE NOT TETRIS-STUFFING; YOU’RE CHOREOGRAPHING DINNER.
When cabinet sizes align with muscle memory, cooking feels like dancing, not fixing a traffic jam. For renovation projects that involve cutting or sanding cabinets, a professional dust collection system keeps your workspace clean and your lungs protected.
Use Glass-Front Cabinet Doors for Visual Openness
You’ll instantly make your tiny kitchen feel bigger when you swap solid cabinet doors for glass fronts, since that see-through surface tricks your eye into seeing more space than you’ve actually got.
Pair those glass panels with light-colored cabinet interiors, and you’ll bounce natural light all over the room like you planned it that way.
Just remember, you’re basically creating a display case. To keep things looking polished at night, consider adding LED ceiling light fixtures overhead to give your glass-front cabinets a clean, well-lit backdrop that highlights what’s inside.
Create Depth Perception
Behind solid cabinet doors, your kitchen walls can feel like they’re closing in, especially when every inch counts. You can break that boxed-in feeling by swapping some cabinet doors for glass-front upper cabinets.
This simple trick adds depth perception and helps make the space feel larger without knocking down walls.
Choose frosted or textured glass to hide visual clutter while keeping things airy. Install glass fronts beside your prep area where walls look heaviest.
Pair them with light shelves and tidy interiors so openness feels clean, not chaotic. Match frame styles and finishes across all doors for seamless flow.
You’ll visually expand the room and create that open room feel you’re after. Just skip dark interiors and heavy muntins; they’ll steal back the light and make the kitchen feel smaller again. For the backsplash area inside or around your glass-front cabinets, consider peel-and-stick backsplash tiles that install without grout or mess, keeping the renovation quick and renter-friendly.
Reflect Natural Light
Since natural light is gold in a tiny kitchen, you’ve got to make it work harder than a barista on Monday morning. You install glass-front upper cabinets to let daylight bounce deeper into the space, making a small kitchen feel twice as roomy.
Solid doors absorb light and create walls. Glass reflects natural light and invites your eye to travel further.
You don’t need everything on full display, though. Choose frosted textured glass to keep things airy while masking the daily mess.
Position these cabinets near your main window to catch and scatter brightness all day long.
Pair them with light-colored interiors—think soft white or greige—to amplify that glow. This combo brings curated storage and genuine visual openness, helping make the room feel open without trying too hard.
Curate Display Contents
Glass-front cabinets do more than bounce light around, they give you a chance to show off your good stuff without looking like a cluttered mess. In a small kitchen, glass-front upper cabinet doors break up solid walls and make compact storage feel breezy instead of boxed-in.
You’ll want to be picky about what lives inside. Here’s how to nail it:
- Stack matching plates and bowls so they look intentional, not accidental.
- Try frosted or lightly textured glass when you need to hide everyday chaos but keep that airy vibe.
- Stick one run in your galley kitchen to add visual depth without exposing everything.
- Pair with light-colored interiors so your curated display contents pop and keep countertop and interiors tidy.
Done right, you’ll look organized, even when you’re not.
Install Under-Cabinet Lighting to Brighten Work Surfaces

With a tiny kitchen, you’ll take all the brightness you can get, and under-cabinet lighting is one of those upgrades that feels like flipping a switch on your whole workflow. Install LED strips around 2700K–3000K close to the cabinet bottom for warm, even light that chases shadows off your work surface.
In a small kitchen, those dark corners make compact storage disappear. But good lighting pulls every inch into view. Use dimmable fixtures so you can crank brightness for chopping veggies, then dial back when you’re just grabbing coffee.
Add a diffuser to keep glare off glossy cabinet faces, and stick the switch right where you walk in. Suddenly your space doesn’t feel cramped, it glows, and that makes the whole kitchen feel more open.
Final Thoughts
You’ve got plenty of tricks now for making your tiny kitchen work harder, and honestly, none of them require a massive renovation or draining your savings.
Pick one or two ideas that speak to your actual cooking habits, and run with those first. Your small space can feel bigger, brighter, and way more functional. You’ll stop bumping your elbows every time you chop an onion.